ReactJS provides a library of reusable components for building JavaScript applications. When combined with Storybook and Applitools Eyes, you can validate the visual appearance of your React components in a controlled testbed. With Applitools Ultrafast Grid, you can run your visual validations across a range of browsers and viewport sizes across multiple screen combinations simultaneously. Together, React, Storybook, and Applitools make you much more productive by developing once in React, testing once in Storybook, and rapidly validating everywhere in Applitools.
React Development and Test Best Practices
When developing a React UI component library, you are likely aware that a well-known best practice splits the components into self-contained js/jsx files. Splitting benefits you, whether you are the developer developing the components or another developer consuming those components in your apps.
Once you develop using standalone components, you need to consider how to test your components inside a browser during the development phase. You have a few options here. One of them is to develop a demo or showcase application. You can use the showcase app to render components and make sure they run correctly inside the browser. However, you end up coding something you likely won’t use again – and that seems like a waste of resources.
The best option is to make use of a third-party playground framework such as Storybook that can kick off a new web server for you and run all the components under development. Also, Storybook gives you the option to generate a static documentation playground website that you can host online to showcase your components live.
As you develop components, you revise components, change their code, and test them to verify nothing broke with the new changes. Some of your changes will be functional, and you can create new functional tests for those components. However, the visual changes are problematic. Manual validation of all of them is cumbersome, time-consuming, and inaccurate. That’s where visual UI testing frameworks come in handy.
So, let’s talk Applitools. Not only does Applitools provide you with the means to do Visual UI testing, but you can also use for Visual UI Regression testing. That is heavenly in terms of Visual UI testing.
In this article, I’ll walk you through a complete, step by step guide to visually test a React app with Storybook and Applitools.
What is Applitools?
If you’re not already familiar, Applitools is an automated visual regression testing framework. It focuses on the visual aspects of your app and plays a significant role in exposing the visual differences between baseline snapshots and both current and future snapshots.
Applitools integrates with dozens of development and testing frameworks, such as Cypress.io, Storybook, and Selenium. It provides SDKs for use in your projects to seamlessly communicate and interact with Applitools, to capture both baseline and test screenshots.
So, let’s get started with some visual UI testing. Your visual testing project will depend on React, Storybook, and Applitools. You will also need node.js tools. So, firstly, make sure you’re familiar with the following and have them installed on your machine:
Before we immerse ourselves in writing code, let’s look at how Applitools and Storybook work together.
How Applitools Works With Storybook
No matter whether you use Vue.js, React, or Angular, Storybook doesn’t offer any extension points for third-party frameworks, such as Applitools, to integrate with. The Applitools team worked around this limitation by providing the Applitools Eyes Storybook SDK.
The behavior of this SDK is that once you run it locally on your machine, it will start by collecting all stories in the application, run them all via the Storybook engine, generate DOM snapshots for each and every story and upload these snapshots to the Applitools Eyes server. Here’s a visual of this flow:
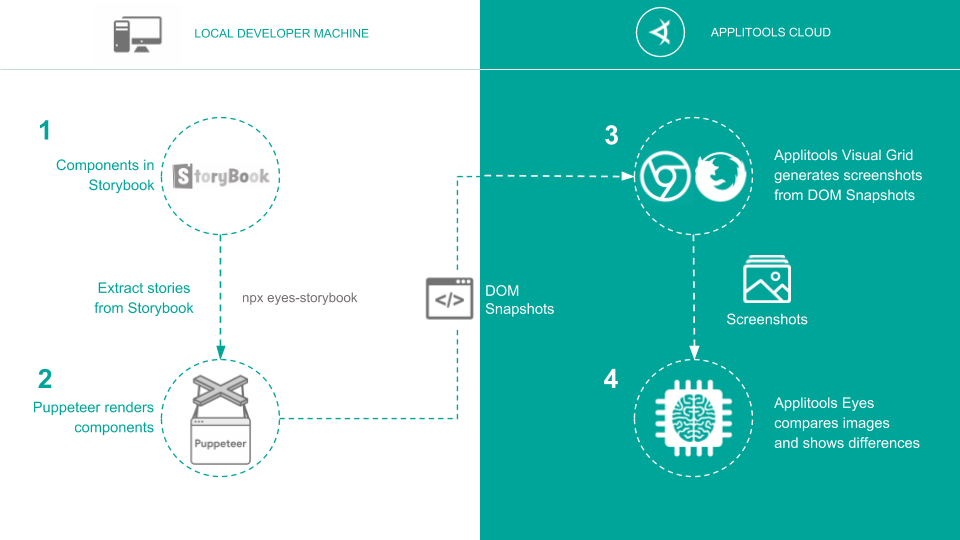
Tests run on the server to generate actual image snapshots. Each snapshot is compared to a baseline snapshot (if one exists), and the results are displayed on the Test Manager Dashboard.
This kind of integration provides a smooth experience in terms of writing Storybook stories. Nothing changes in the way you write your React apps.
Now, let’s get on with it and start coding …
Step By Step Guide
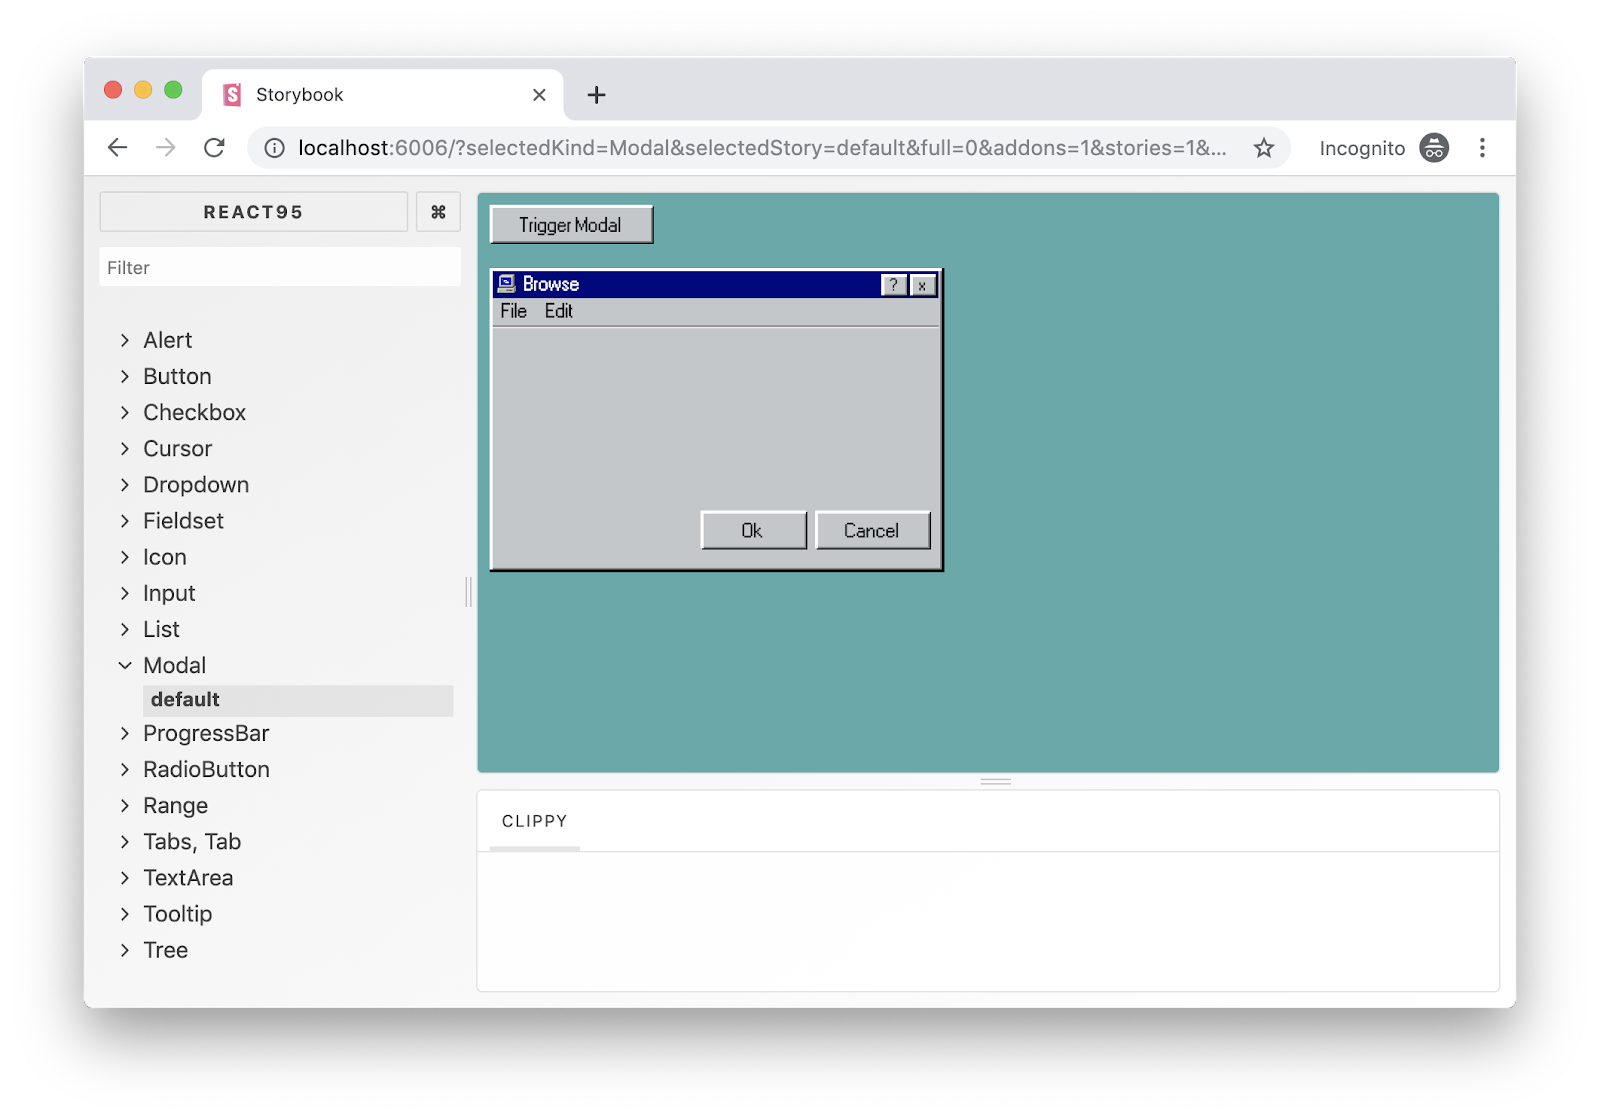
For this demonstration of visual testing a React application with Storybook and Applitools, I’ve chosen the React95 open-source library hosted on GitHub under this repo. This library is both unique and fun at the same time. It creates a rich set of components having the theme of Windows 95. This library already uses Storybook and by adding Applitools to the mix, should be much easier and less time-consuming.
Let’s follow the steps to run the React95 Storybook stories and use Applitools to generate a few visual UI test runs.
Steps 1-3 – Start with a React Library and Install Storybook
Step 1: Clone the React95 GitHub repo locally on your machine by running this command:
git clone git@github.com:React95/React95.git
Step 2: Install all NPM package dependencies by running this command:
npm install
Step 3: As you now know, this library already uses Storybook. Hence, the scripts section of the package.json file already contains the script to run Storybook. Let’s give it a shot and run Storybook stories by issuing this command:
npm run storybook
As a side note, in case you are installing Storybook from scratch, here’s a mini-guide to help you get started adding Storybook to your application.
Run the following command to install Storybook into your application:
npx -p @storybook/cli sb init
The Storybook NPM package {{ link to the NPM package here }} has a smart engine behind it that automatically detects the current development framework and installs the correct version of Storybook.
Then to test the Storybook installation is successful, you may run this command:
npm run storybook
For more information on getting started with Storybook and React, visit this online document at https://www.learnstorybook.com/react/en/get-started.
Step 4 – Install Applitools
Step 4: Now that Storybook is running let’s install Applitools. Applitools offers the Applitools Eyes SDK for Storybook NPM package. Let’s add this package to our application by running this command:
npm i @applitools/eyes-storybook
In order to authenticate via the Applitools server, you need to supply the Eyes-Storybook SDK with the API key you got from Applitools. Read more about how to obtain the API key here.
To do this, set the environment variable APPLITOOLS_API_KEY to the API key before running your tests. For example, on Linux/Mac:
export APPLITOOLS_API_KEY=<your_key>
And on Windows:
set APPLITOOLS_API_KEY=<your_key>
Step 5 – Validate using Applitools
Step 5: Let’s run the first cycle of the visual UI testing by issuing this command:
npx eyes-storybook
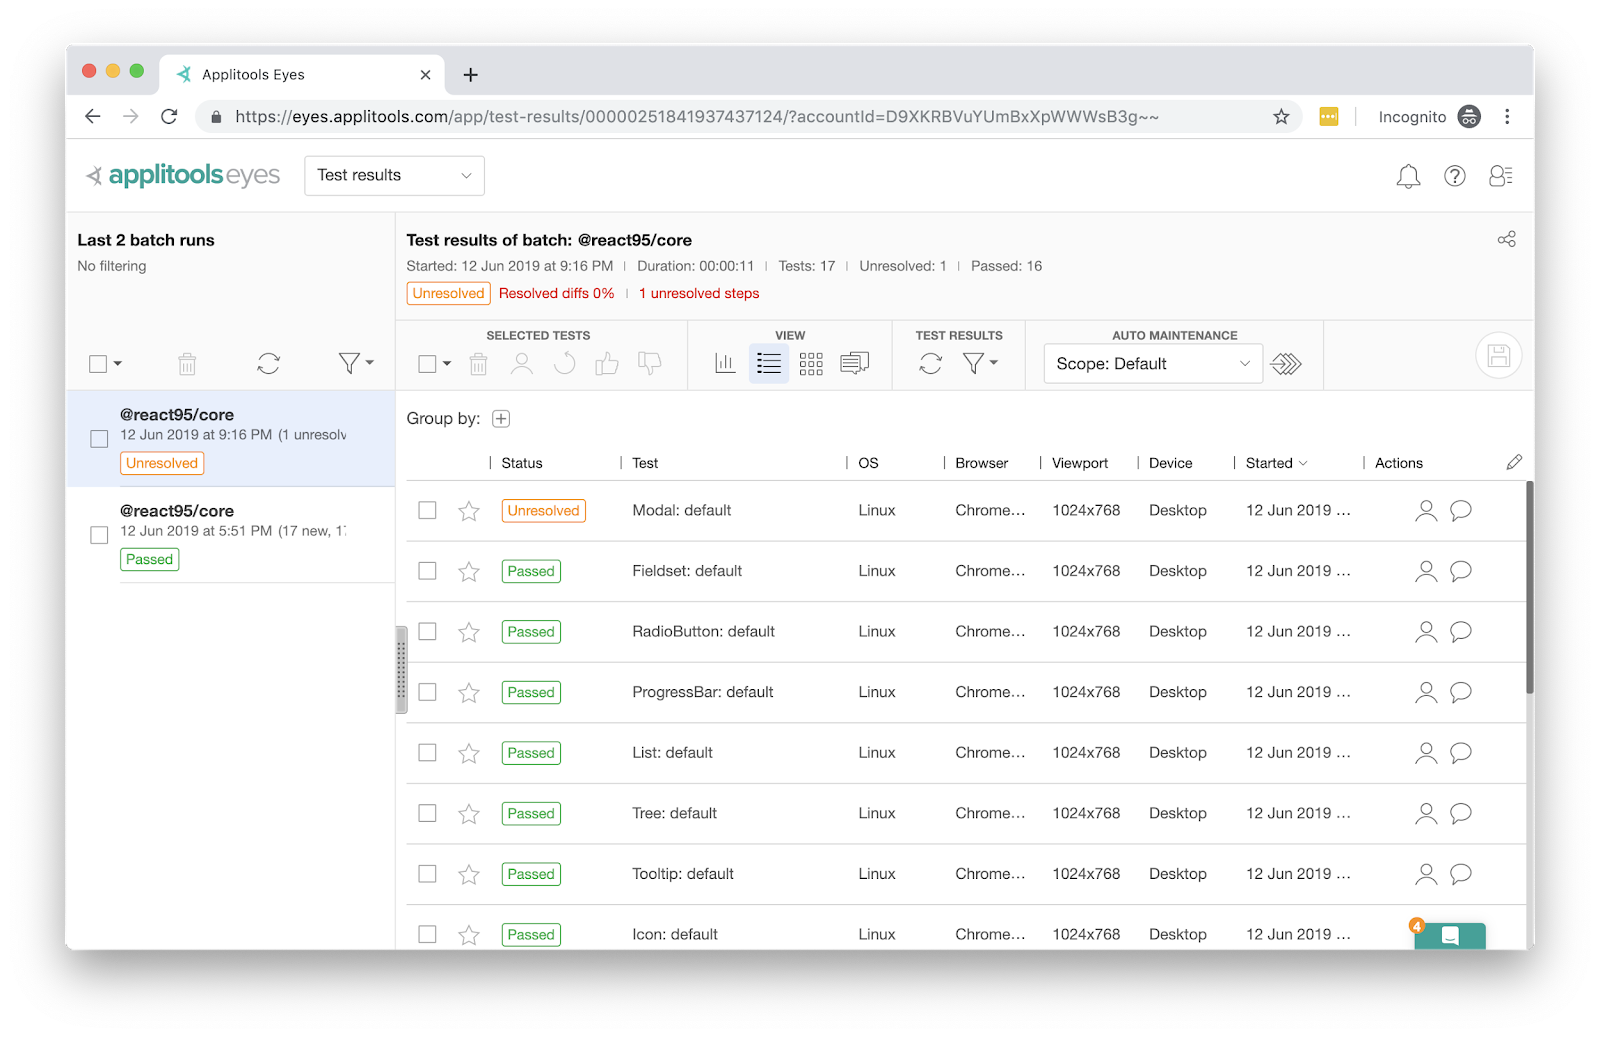
Once the tests are done running, let’s switch back to the Applitools Test Manager Dashboard to check and verify the results.
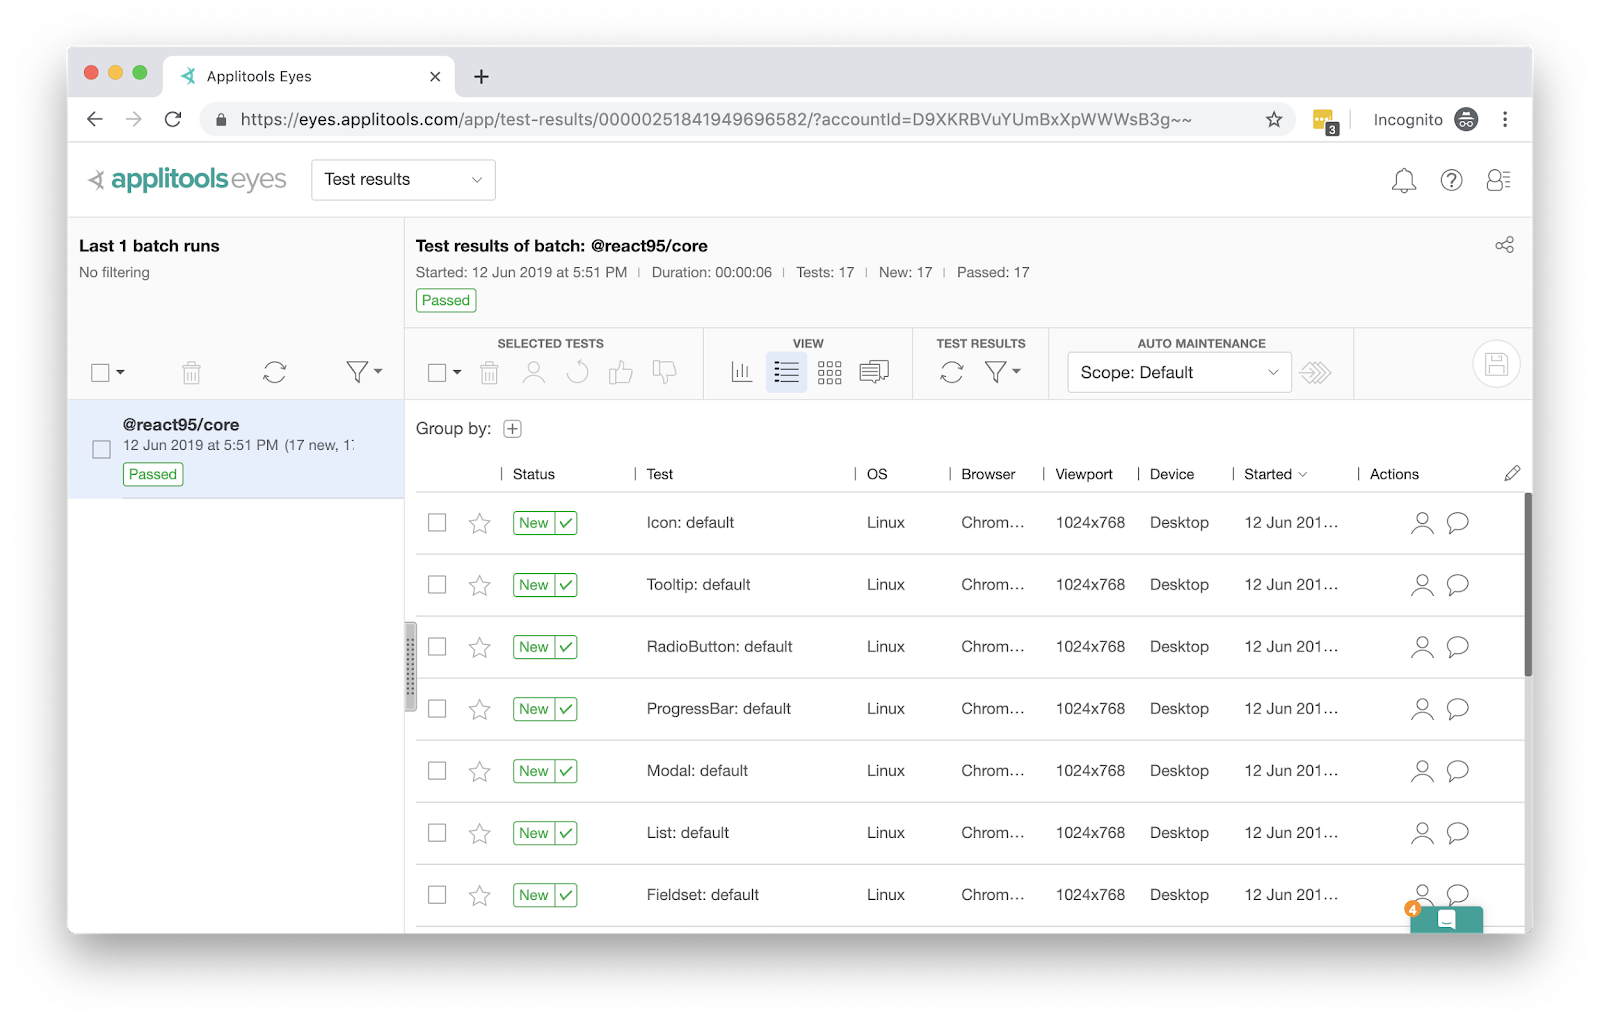 The left side of the Dashboard lists all batch test runs that you have previously performed. In the above screen capture, the single test run shows the status Passed. In handling this first run, the Applitools engine automatically passes this test and all snapshots thereafter as baseline snapshots.
Click on the single batch test to view the snapshots available. For each and every Storybook story, a snapshot is generated by Applitools.
Let’s take, for example, the Modal story test run. Locate the Modal story test run, click on the snapshot and expand the Window to view the snapper on a bigger scale. The expand button is available at the top-right corner of the Window as shown:
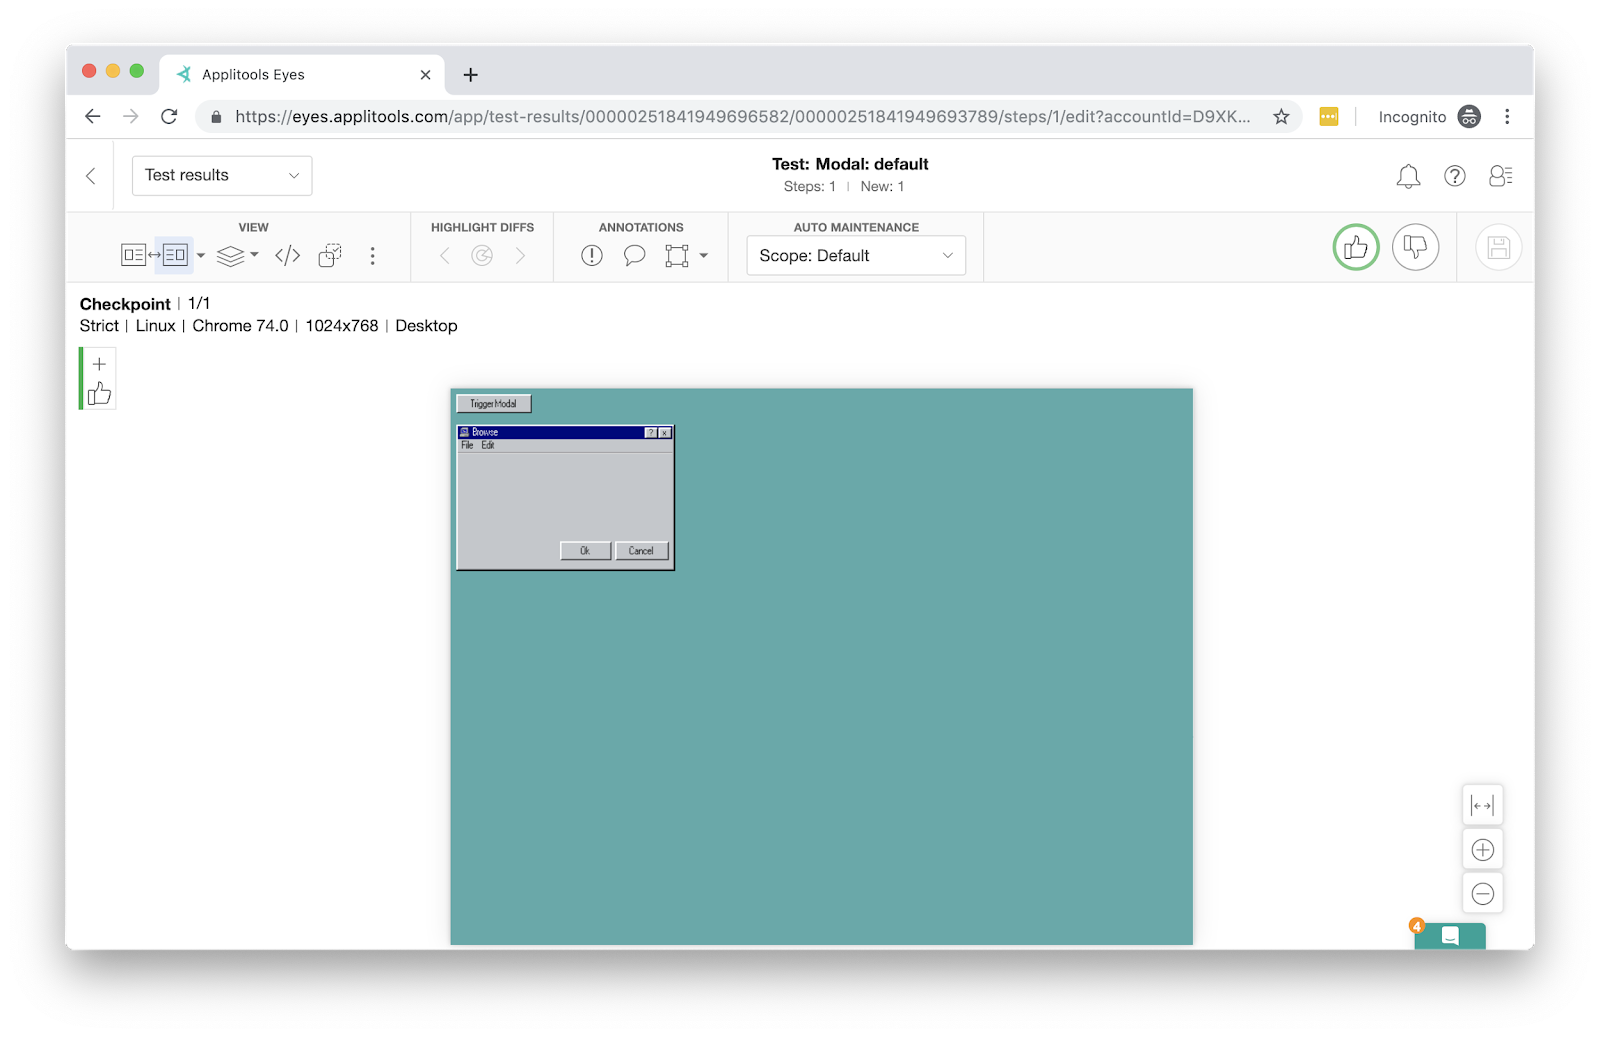
As you can tell, the test run snapshot captures an image snapshot for the story that runs inside the Storybook playground application.
At this moment of time, Applitools stores all the generated snapshots as baseline snapshots. The future test runs would generate a new set of snapshots and Applitools would compare them to the baseline ones and report the results accordingly.
Let’s switch gears and explore a unique gem of Applitools that is the Regression UI testing. Traditional regression testing validates that recent source code changes, deletions, or additions result in behavior that continues to align with expectations.
Applitools allows you to perform visual UI Regression testing. By using it, you can run multiple cycles of test runs and all visual changes collected from one to another, are detected by Applitools servers and logged into the Dashboard.
Steps 6-7 – Create And Validate A Change
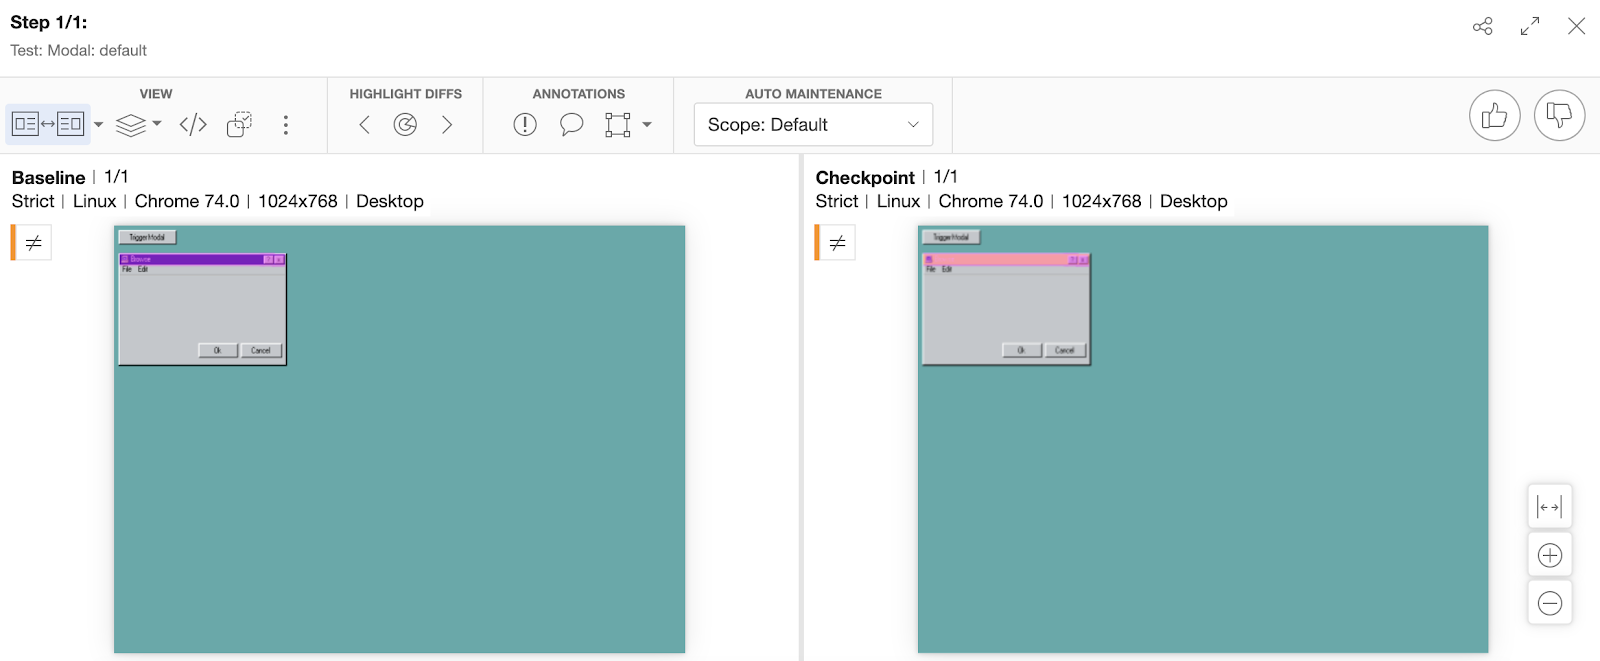
Step 6: Let’s introduce a visual change in the Modal component and run our tests again.
Navigate to /components/Modal/Modal.jsx file and change the background-color of the Title Bar to yellow:
const TitleBar = styled.div`

  height: 18px;

  margin-bottom: 2px;

  background-color: yellow;

  color: white;

  padding: 2px 2px 0;

  display: flex;

`;
The change causes the title bar of the Modal window to change color to yellow.
Step 7: Let’s run the second cycle of the visual UI testing by issuing this command:
npx eyes-storybook
Notice the logs on the terminal windows after running the command?
Modal: default [1024x768] - Failed 1 of 1

A total of 1 difference was found.
One of the tests failed and that’s exactly what we expect. Applitools detected the change we introduced to the background color of the Title bar and reported that accordingly.
Let’s switch back to the Applitools Test Manager Dashboard to check the results.
Applitools marks this new test run as Unresolved. Expand on the Modal test run to view the visual differences highlighted to you by Applitools:
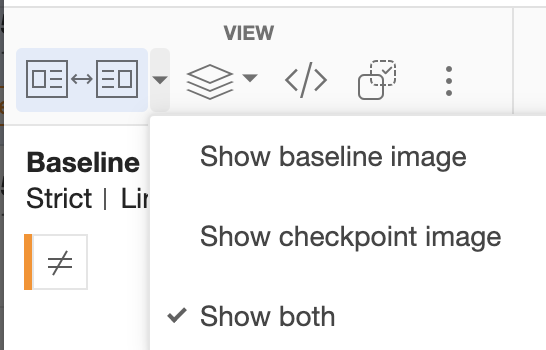
Make sure to select the option to view both snapshots so that you can easily view the differences. To do so, locate the following menu and choose the option Both as shown in the figure:
Any test run that results in status Unresolved requires someone’s manual intervention to validate or reject the change. In this case, you may accept the new change(s) and thus update the baseline snapshots.
With an undesirable change, you infer a bug in the source code. You can reject this new test run and keep the original baseline snapshot without any changes.
See The Video Demo
Check out all the steps above in this step-by-step video of how to test React and Storybook:
Want To Know More?
Read about Angular and Storybook with Applitools.
How to troubleshoot and fix React bugs fast [step-by-step tutorial]
Find out more about Applitools. Request a demo, sign up for a free account, or check out our tutorials.