UPDATE – It’s here! Explore Applitools Autonomous, the first AI-powered QA platform that replicates the intelligence and accuracy of the best QA practitioners, at unprecedented scale.
February 7, 2024
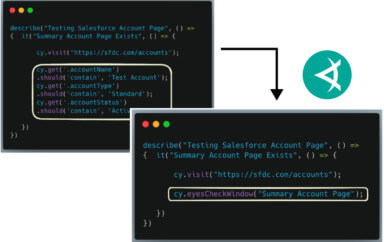
In our previous article, we learned what autonomous testing is all about: autonomous testing is when a tool can learn an app’s behaviors and automatically execute tests against them. It then provides results to humans who can determine what’s good and what’s bad. Fully autonomous testing solutions are not yet available today, but we can get part of the way there with readily available tools. Let’s learn how to build our own semi-autonomous solution using Playwright and Applitools Eyes!
The solution sketch
Let’s say you have a website with multiple pages. It would be really nice if a test suite could visit each page and make sure it looks okay: no missing buttons, no overlapping text, and no other kinds of visual bugs. The tests wouldn’t be very sophisticated, but they’d quickly catch a lot of problems. They’d be like smoke tests.
There’s a straightforward way to do this. Most websites have a sitemap file that lists the links for all the pages. We could use a browser automation tool like Selenium, Cypress, or Playwright to visit each of those pages, and we could use a tool like Applitools Eyes to capture visual snapshots of each page. Every time we run the suite, it would automatically discover new pages and avoid removed pages. Existing pages would be checked for visual differences. We wouldn’t need to explicitly code what to check – the snapshots would implicitly check everything on the pages! With the Applitools Ultrafast Grid, we could even test these pages against different browsers, devices, and viewport sizes.
This kind of test suite is technically “autonomous” because we, as human testers, don’t need to explicitly write the tests. The sitemap provides the pages, and visual testing covers the assertions.
The website to test
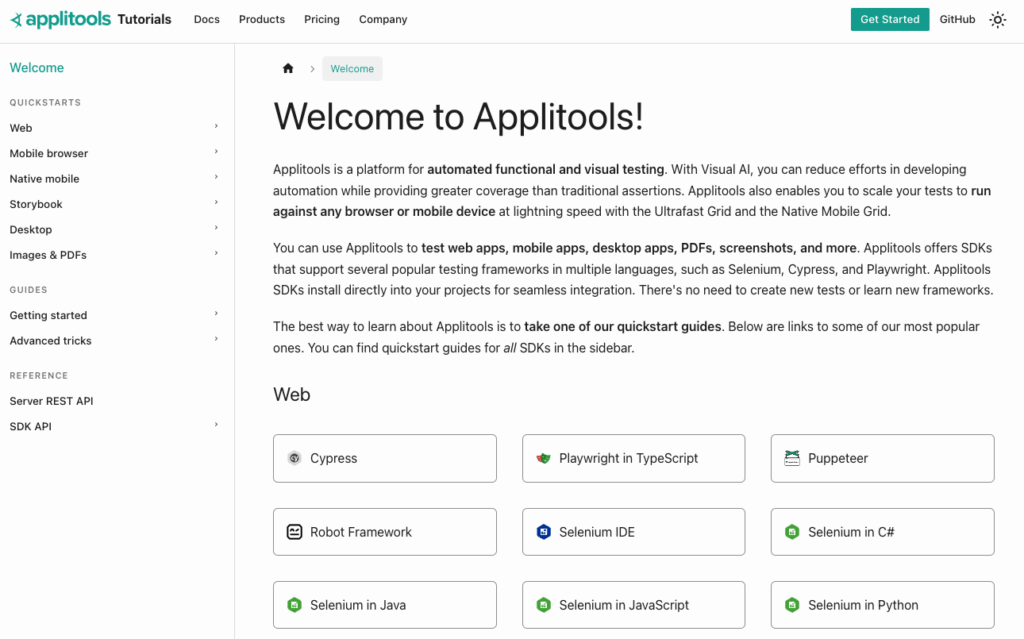
Last year at Applitools, we replaced our old tutorial website with a new website that uses Docusaurus, a very popular documentation framework based on React. We also rewrote several of the guides for our most popular SDKs. Presently, the site has about 60 pages of varying length. Since many of the pages host similar content, we use components to avoid duplication in text and in code. However, that means any change could inadvertently break multiple pages.
Our tutorial site is currently hosted at https://applitools.com/tutorials/:
The tutorial site also has a sitemap file at https://applitools.com/tutorials/sitemap.xml:
<urlset xmlns="http://www.sitemaps.org/schemas/sitemap/0.9" xmlns:news="http://www.google.com/schemas/sitemap-news/0.9" xmlns:xhtml="http://www.w3.org/1999/xhtml" xmlns:image="http://www.google.com/schemas/sitemap-image/1.1" xmlns:video="http://www.google.com/schemas/sitemap-video/1.1">
    <url>
        <loc>https://applitools.com/tutorials/</loc>
        <changefreq>monthly</changefreq>
        <priority>0.5</priority>
    </url>

    <url>
        <loc>https://applitools.com/tutorials/guides/advanced-tricks/troubleshooting-issues</loc>
        <changefreq>monthly</changefreq>
        <priority>0.5</priority>
    </url>
...
It would be very helpful to test this tutorial site with the semi-autonomous testing tool we just sketched out.
Writing the autonomous testing code
To follow along with this article, you can find the GitHub repository for the project at https://github.com/AutomationPanda/auto-website-testing. In the package.JSON file, you’ll find all the packages needed for this project:
- Playwright
- Applitools Eyes SDK for Playwright
- ts-node
Since I’ll be developing my code in TypeScript instead of raw JavaScript, the ts-node package will allow me to run TypeScript files directly.
{
  "name": "auto-website-testing",
  "version": "1.0.0",
  "description": "A semi-autonomous testing project that visually tests all the pages in a website's sitemap",
  "main": "index.js",
  "scripts": {},
  "repository": {
     "type": "git",
     "url": "git+https://github.com/AutomationPanda/auto-website-testing.git"
   },
   "keywords": [],
   "author": "",
   "license": "ISC",
   "bugs": {
      "url": "https://github.com/AutomationPanda/auto-website-testing/issues"
   },
   "homepage": "https://github.com/AutomationPanda/auto-website-testing#readme",
   "devDependencies": {
     "@applitools/eyes-playwright": "^1.13.0",
     "@playwright/test": "^1.29.1",
     "ts-node": "^10.9.1"
   }
}
The main file in our project is autonomous.ts. This isn’t a typical Playwright test that has described blocks and test functions, but rather autonomous.ts is just a plain old script. The first thing we need to do is read in some environment variables. For test inputs, we’ll need the base URL of the target website. We’ll need the site name of the website for logging purposes and reporting purposes, and we’ll also need a level of test concurrency for the Applitools Ultrafast Grid, which will handle our visual snapshots. If you’re on a free Applitools account, you’ll be limited to one, but I’ll be using a bit more in this example.
import { chromium } from '@playwright/test';
import { BatchInfo, Configuration, VisualGridRunner, BrowserType, Eyes, Target } from '@applitools/eyes-playwright';

(async () => {

     // Read environment variables
     const BASE_URL = process.env.BASE_URL;
     const SITE_NAME = process.env.SITE_NAME;
     const TEST_CONCURRENCY = Number(process.env.TEST_CONCURRENCY) || 1;
Once we read those in, we want to validate those environment variables to make sure their values are given and they’re good. Then what we’ll do is we will figure out what the sitemap URL is. Basically, the sitemap URL will be the base URL plus this standard XML file name.
 // Validate environment variables
 if (!BASE_URL) {
    throw new Error('ERROR: BASE_URL environment variable is not defined');
 }
 if (!SITE_NAME) {
    throw new Error('ERROR: SITE_NAME environment variable is not defined');
 }

 // Parse the base and sitemap URLs
 const baseUrl = BASE_URL.replace(/\/+$/, '');
 const sitemapUrl = baseUrl + '/sitemap.xml';
Next, we will set up Applitools to be able to do visual testing. These are all fairly standard Applitools SDK objects. If you take one of our Applitools SDK tutorials, you’ll see things just like this. Basically, we’ll need a visual grid runner to connect to the Ultrafast Grid for rendering our snapshots. We’ll create a batch which will have the name of our site so that we can see reporting, and we’ll have a configuration object to specify things like the batch, the browsers, and all these other things we want.
 // Create Applitools objects

 let runner = new VisualGridRunner({ testConcurrency: TEST_CONCURRENCY });
 let batch = new BatchInfo({name: SITE_NAME});
 let config = new Configuration();
 let widthAndHeight = {width: 1600, height: 1200};
 let snapshotPromises: Promise<any>[] = [];
With the configuration, we’re going to set the batch and we’re going to add one browser to test. I want to test Chrome with this particular viewport size. If we wanted to, we could also test other browsers in the Ultrafast Grid such as Firefox, Safari, and Edge Chromium. Even if you don’t have those browsers installed on your local machine, it’s all going to be done in the Applitools cloud. For this example, we’ll use one browser.
 // Set Applitools configuration
 config.setBatch(batch);
 config.addBrowser(1600, 1200, BrowserType.CHROME);
 // config.addBrowser(1600, 1200, BrowserType.FIREFOX);
 // config.addBrowser(1600, 1200, BrowserType.SAFARI);
 // config.addBrowser(1600, 1200, BrowserType.EDGE_CHROMIUM);
Now comes the fun part of getting that sitemap file. What we’ll need to do is launch a browser through Playwright, we’ll just use Chromium. Then we’ll need to create a new browser context from that browser and we’ll give it a standard width and height viewport. Then we’ll get a page object from that context, because with Playwright, all interactions happen through a page object.
 // Set up a browser
 const browser = await chromium.launch();

 // Set up a sitemap context and page
 const sitemapContext = await browser.newContext({viewport: widthAndHeight});
 const sitemapPage = await sitemapContext.newPage();
Once we’ve got that page, now we can visit the sitemap page and we can try to find all of the page links inside that sitemap file. Even though it’s XML, Playwright can still parse it just like it’s a regular webpage. Once we’ve got that list of page links, then we’re going to close that session and so this Playwright session will be done.
 // Get the sitemap
 await sitemapPage.goto(sitemapUrl);
 const pageLinks = await sitemapPage.locator("loc").allTextContents();
 sitemapContext.close();
Now that we have the list of all pages from the sitemap, we can visit each one and capture a snapshot. To do that, we’re going to iterate over that list with a for loop for each page we visit. We’re going to make a promise so that we can capture those snapshots asynchronously. In the background, for each page, we are going to create a new browser context and then from that context, create a new page object, and then start an Applitools Eyes session. This is what enables us to capture those visual snapshots.
 // Capture a snapshot for each page
 for (const link of pageLinks) {
     snapshotPromises.push((async () => {

       // Open a new page
       const linkContext = await browser.newContext({viewport: widthAndHeight});
       const linkPage = await linkContext.newPage();

       // Open Eyes
       const eyes = new Eyes(runner, config);
       await eyes.open(
           linkPage,
           SITE_NAME,
           link.replace(baseUrl, ''),
           widthAndHeight
     );
Taking the snapshot is pretty basic. We just visit the page and we say eyes.check, and we take a picture of the whole window. Once we do that, we can close our session so that Applitools knows that’s the only snapshot we’re taking. Firing these off in different promises means that we can run them asynchronously in the background, letting Applitools Eyes crunch through all of the visual validations, and that way we’re not waiting for them one at a time. They’ll just all go. Once we fired off all of the visual snapshots, we can wait for those promises to join at the end.
       // Take the snapshot
       await linkPage.goto(link);
       await eyes.check(link, Target.window().fully());
       console.log(`Checked ${link}`);

       // Close Eyes
       await eyes.close(false);
       console.log(`Closed ${link}`);

    })());
 }
And finally, once that’s complete, we can close the browser and be done with testing.
 // Close all Eyes
 console.log('Waiting for all snapshots to complete...');
 await Promise.all(snapshotPromises);

 // Close the browser
 await browser.close();
 console.log('Complete!');

})();
That’s all there is to our autonomous testing script. It’s pretty concise – only about 80 lines long. It doesn’t take a whole lot of logic to write autonomous tests.
Running the tests
Let’s run the script to test it out. The website I’m going to use in this example is the Applitools tutorial site, which has about 60 pages. You can use any site you want as long as you set your environment variables. If you want to run this, you will need an Applitools account, which you can register for free with your email or GitHub account. Once you register an account, you’ll take your Applitools API key and set that as an environment variable.
We need to run our tests in the terminal. If this is your first time, you’ll need to run npm install to install the npm packages as well as npx playwright install to install the Playwright browsers. Once you’ve run those installers and set your environment variables, you just need to run npx ts-node autonomous.ts to run the script.
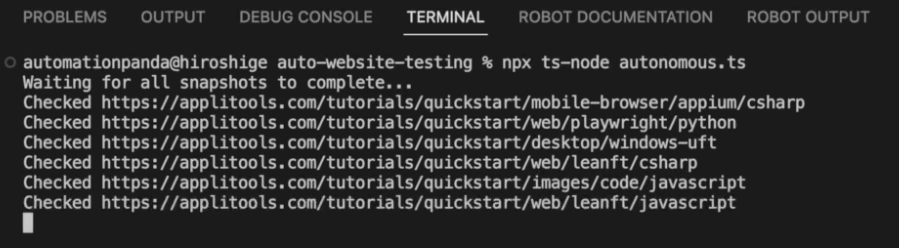
The script fetches the sitemap file, parsing out all of those links, and it’s firing off promises to start capturing visual snapshots for each one that’s happening asynchronously. The messages saying “Checked” link means those have now been initiated. What we’ll start to see is as they complete one by one in the Applitools Ultrafast Grid, we’ll see how the session becomes closed. Closed images code, JavaScript, closed mobile browser, that means one by one, the visual testing has been completed.

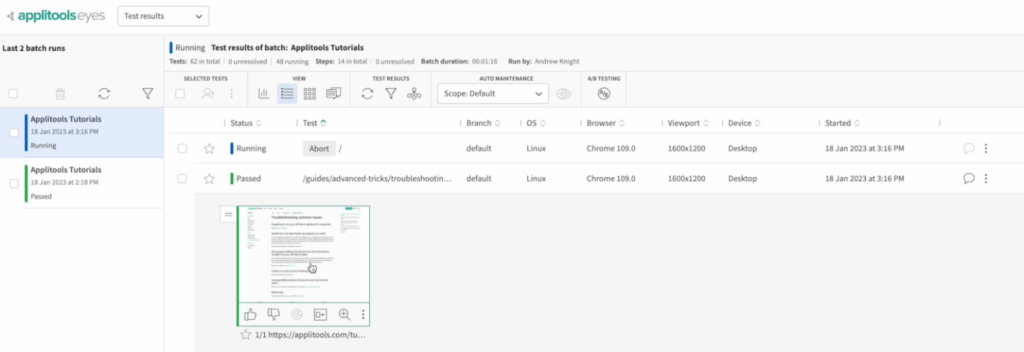
While the test is running, we can see results in the Applitools Eyes dashboard as a batch.
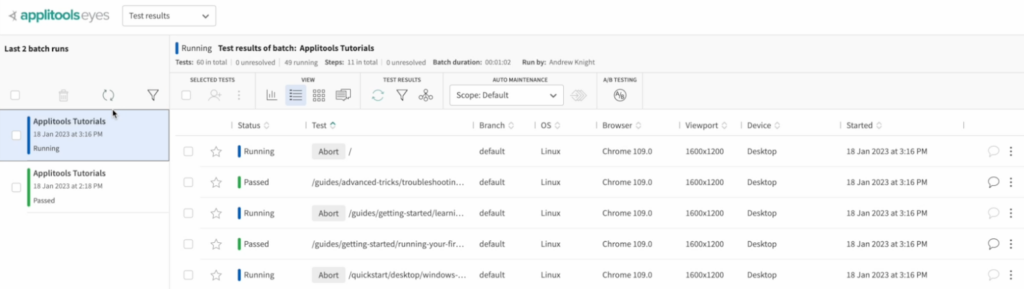
If I look at all the tests they’re popping in, we can see some of them are still running while others have passed.
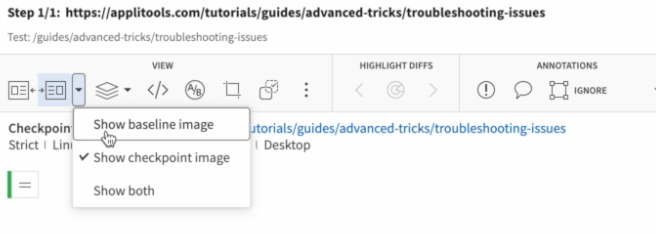
If I want to see what the visual comparisons look like, I can compare them side by side. If there are no visual differences, the test for this page will pass.
You can see on the page it captures everything, the title bar, the sidebar table of contents, main body and footer. It will even scroll all the way to the bottom to make sure it gets the full page worth of contents.
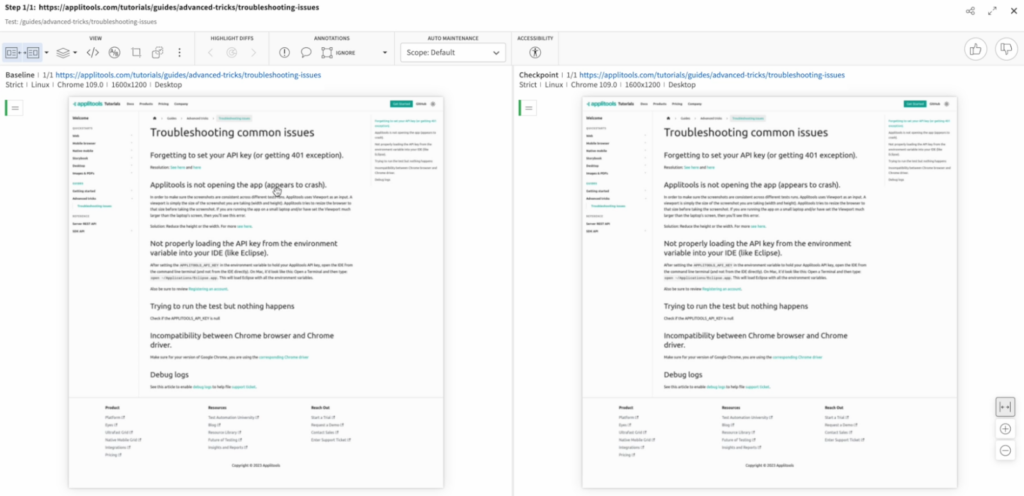
No matter how long the page is, everything is being compared visually. It’s pretty cool to see just how many tests our autonomous testing solution can uncover. As I said before, the tutorial site right now has about 60 pages, which means that’s 60 tests that I didn’t have to explicitly write. Playwright plus Applitools Eyes took care of it all for me.
Improving the tool
This example of a semi-autonomous testing tool is rather basic. There are plenty of ways we could improve it:
- Decoupling our tests: We could write separate scripts for fetching sitemap links and taking the visual snapshots. That would let us provide links to visit by ways other than a sitemap file. We could also add an intermittent step to filter links from a sitemap file.
- Expanding test coverage: We could add settings to test different browsers, devices, and viewports. This would provide autonomous cross-browser and cross-device testing coverage for multiple screen sizes.
- Target specific regions: We could exclude parts of pages like navigation bars and sidebars. This could allow us to target specific portions of a page in our tests while ignoring content that is dynamic or that we may want to test separately.
Even with the basics before any of these suggestions are implemented, this tool still provides a lot of value for a little bit of work. You can clone it from the GitHub repository and try it yourself. Let us know @Applitools how you use it!
Read more about Applitools Eyes.