Selenium IDE is not sitting still. Since its relaunch earlier this year, Selenium IDE developers have been busy responding to user enhancement requests. One highly-requested has just been released – the ability to export code from Selenium IDE for use in Selenium WebDriver. Code export from Selenium IDE today works with Java JUnit. The development team is looking for community members like you to add to the capabilities of Selenium IDE.
The code is being hosted and is available on Github. You can see examples as well as develop your own export capabilities.
But, first, here is what’s new.
Getting Started
You can export either a test or suite of tests to WebDriver code by right-clicking on a
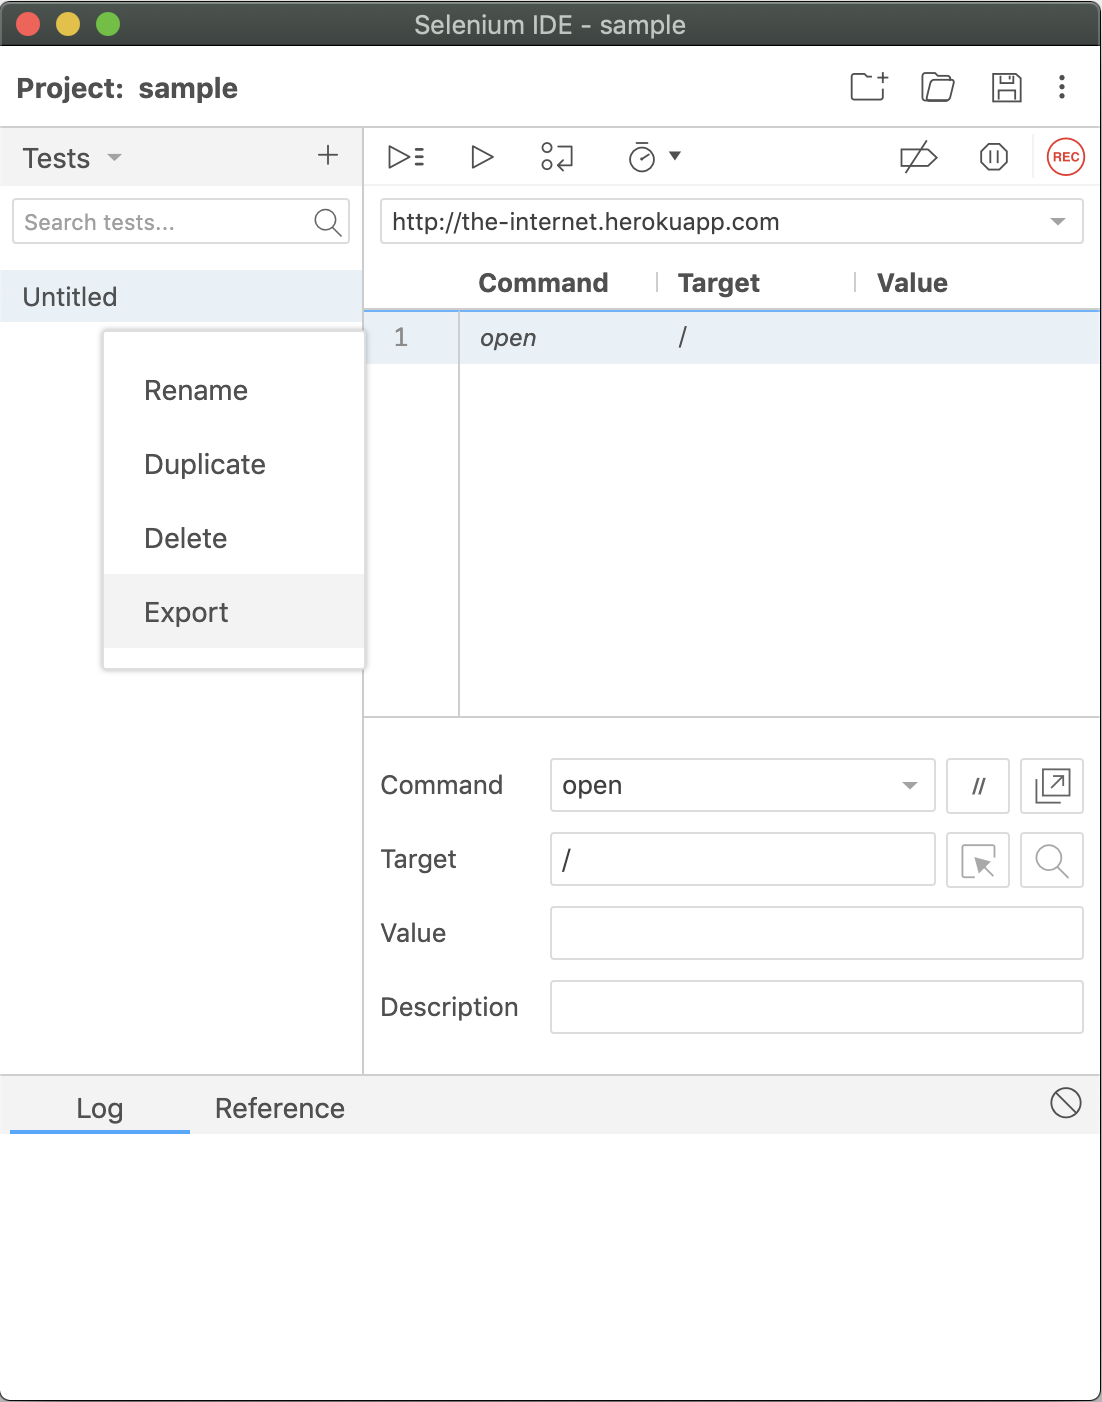
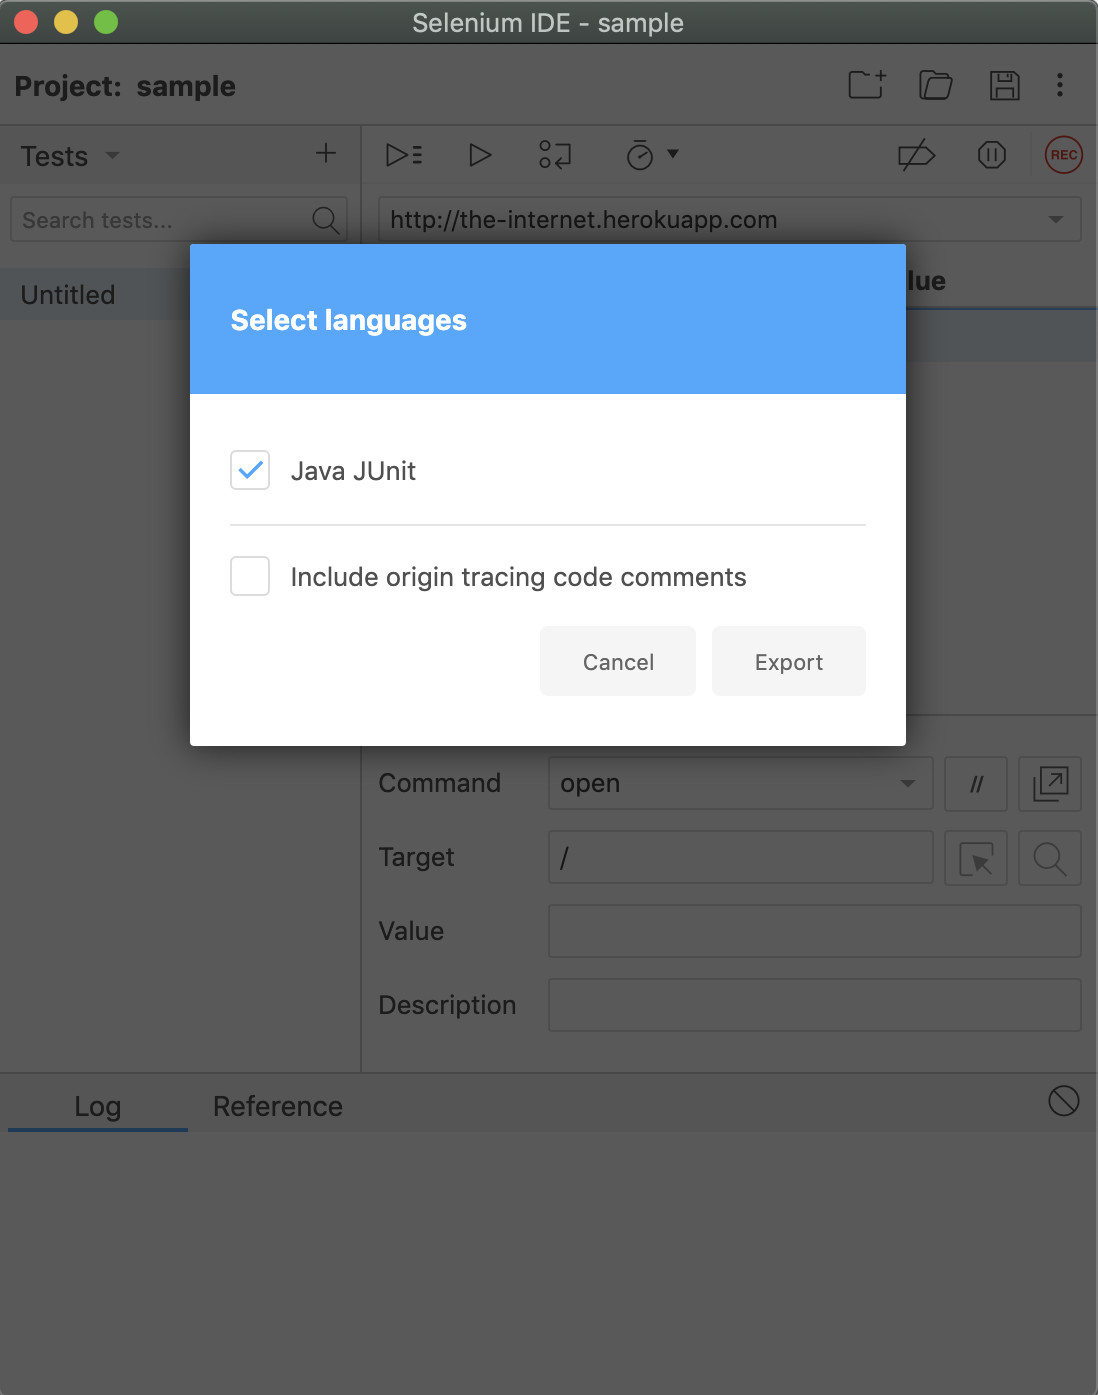
test or a suite, selecting Export, choosing your target language, and clicking Export.
This will save a file containing the exported code for your target language to your browser’s download directory.
Origin Tracing Code Comments
When exporting there is an optional toggle to enable origin tracing code comments.
This will place inline code comments in the exported file with details about the test step in Selenium IDE that generated it.
Supported Exports
Currently, Selenium IDE export to Java. Specifically, Java for JUnit.
The Selenium IDE team intends to support all of the officially supported programming language bindings for Selenium (e.g., Java, JavaScript, C#, Python, and Ruby) in at least one testing framework for each language.
Contributions are welcome to help add new languages and test frameworks for a given language. See How To Contribute for details on how.
Java JUnit
The exported code for Java JUnit is built to work with Java 8, JUnit 4.12, and the latest version of Selenium 3.
You should be able to take the exported Java file and place it into a standard Maven directory structure with a pom.xml file listing these dependencies and run it.
Contributing to Code Export for Selenium IDE
Code export was built in a modular way to help enable contributions.
Each language and test framework will have its own package containing the code to be exported. Each snippet of code maps to a command in Selenium IDE and each of these packages rely on an underlying “core” package which does all of the heavy lifting.
Here are the steps to create a package for a new language or for a new test framework within an already established language.
1. Create a new package
First, copy an existing language package (e.g., packages/code-export-java-junit) and rename it (e.g., the folder and the details in the package.json file) to the target language and framework you’d like to contribute (e.g., packages/code-export-ruby-rspec, etc.).
Next, add the new package as a dependency to the package.json in code-export.
Lastly, run yarn from the root of the project.
2. Update the locators and commands
The core function of code export is generating the language specific strings. The most prominent of these are the commands and locator strategies (e.g., the syntax for the “by” lookups).
For a given language, there is a file for each, along with accompanying test files.
You can see an example of that in github: packages/code-export-java-junit.
When declaring new commands you can either specify its output as a string, or as an object which specifies indentation levels).
Built into code-export is a prettifier which controls the indentation of the outputted code. This structure is useful if a command’s output is verbose and you want to be explicit. Or if the command changes the indentation level of the commands that come after it.
3. Create the hooks
Hooks make up a majority of the structure of the code to be exported (e.g., a suite, a test, and all of the things that go into it like setup, teardown, etc.). They are also what enables plugins to export code to different parts of a test or a suite.
There are 9 different hooks:
- afterAll (after all tests have completed)
- afterEach (after each test has been completed – before afterAll)
- beforeAll (before all tests have been run)
- beforeEach (before each test has been run – after beforeAll)
- command (emit code for a new command added by a plugin)
- dependency (add an addittional language dependency)
- inEachBegin (in each test, at the beginning of it)
- inEachEnd (in each test, at the end of it)
- variable (declare a new variable to be used throughout the suite)
See an example of hooks being implemented in packages/code-export-java-junit here: Hooks
4. Update the language specific attributes
In each language you need to specify some low-level details. Things like how many spaces to indent, how to declare a method, a test, a suite, etc.
Find an example of this being implemented in packages/code-export-java-junit here: Language specific options
5. Add it to the mix
Once you’ve got everything else in place, wire it up for use in the UI.
This is possible in packages/code-export/src/index.js.
You will need to:
- Import your new code-export package
- Update availableLanguages with details about your code-export language
- Update exporter to reference your code-export name and import
6. Test and tune
The best end-to-end test for code export applies a series of tests and verify that they run as you would expect.
From a development build, access the seed tests and verify that all of the standard library commands work for your new language.
Test, fix, and test again until you have confidence with the end result.
7. Submit a PR
You’ve done the hard part. Now simply submit a PR. Please do so against the v3branch.
For More Information on Selenium IDE:
The original version of this article appears in the Selenium IDE documentation site.
Selenium IDE pages
- Selenium IDE documentation
- Selenium IDE tutorial
- Selenium IDE on Google Chrome Store
- Selenium IDE on Firefox Store
- Selenium IDE GitHub page
- Selenium IDE (SIDE Runner) npm page
- Selenium IDE on Stackoverflow
- Selenium IDE on Quora
- Selenium IDE on Reddit
- Selenium IDE on Hackernews
Applitools for Selenium IDE pages
- Applitools for Selenium IDE product page
- Applitools for Selenium IDE documentation
- Applitools for Selenium IDE on Google Chrome Store
- Applitools for Selenium IDE on Firefox Store
Selenium IDE videos
- Selenium IDE tutorial video playlist
- Dave Haeffner presenting Selenium IDE at Selenium Camp
- Dave Haeffner presenting the new Selenium IDE launch webinar
- Tomer Steinfeld on how he built the new Selenium IDE
- Joe Colantonio presentation on Selenum IDE, part one and part two
- Simon Stewart: Selenium IDE – the next generation
- Other Selenium IDE videos


