The Compare and Merge Branches Page
Use the compare & merge page to merge one branch into another. This page lets you compare baselines, resolve conflicts, override defaults, and start the merge.
Comparing Baselines
-
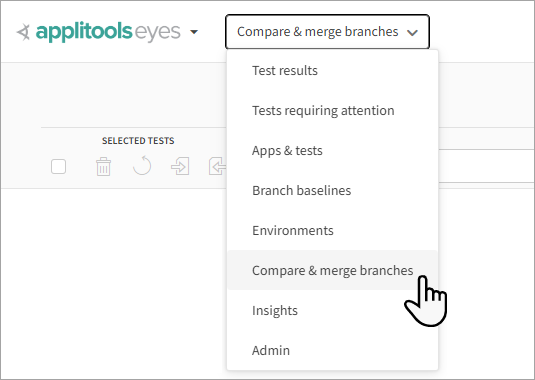
In the Page Navigator, select Compare & merge branches.
-
Select a Target and Source branch and click Compare

List of Changes
The page displays a list of all changes that have not yet been merged.
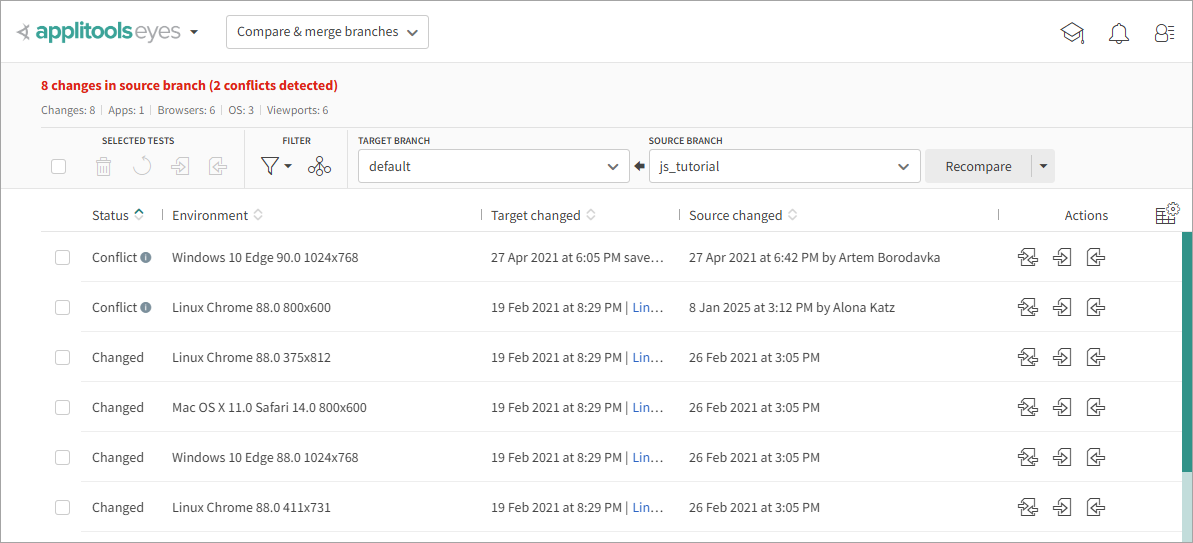
At the top of the page, a summary shows the number of changes, conflicts, and the number of apps, branches, operating systems, and viewports. The main section of the page lists all changes. Each row contains one of the following values:
- New – The baseline is new and exists only in the source branch. It can be added automatically to the target.
- Changed – The baseline exists in both the source and the target, and the changes in the source can be copied to the target without conflict.
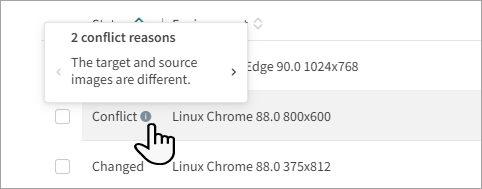
- Conflict – A conflict exists between the source and target baselines. For example, images might differ, different number of steps in the target and source, or different annotations were added to the source or target. You must resolve this manually. For details, see Merging Branches.
To view conflict details, hover over . If there is more than one conflict, click > to browse to the next conflict.
If a child branch does not have a baseline, Eyes uses a fallback baseline from its parent branch.
Modifying the Display
If the screen contains many items, click to filter the list. You can filter by Conflict, Changed, Ignored, or Saved by Others. You can also filter by columns, such as specific browsers or operating systems.
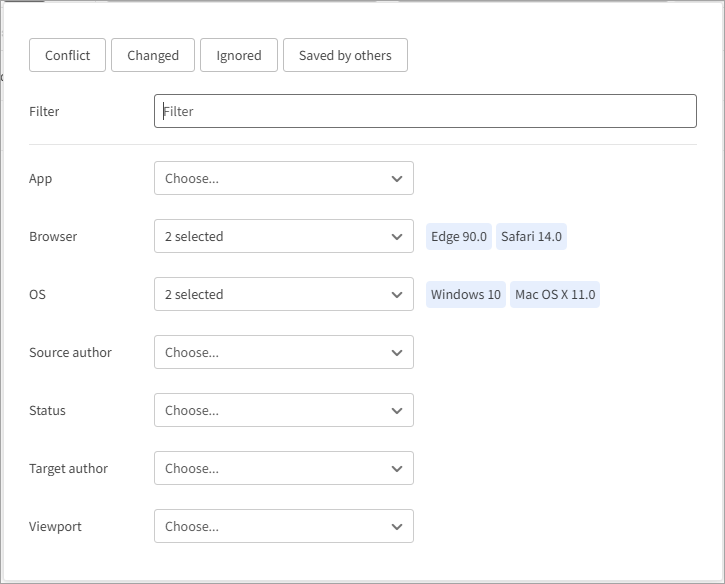
You can also modify how data is displayed:
- Click to group the columns.
- Click to select which columns are displayed.
Merging Branches
After resolving all differences, you must specify whether Eyes should use the baseline from the source or the target. Use the following buttons, which appear on each row and in the toolbar.
| Icon | Description |
|---|---|
| Keep the baseline information in the target branch and ignore differences in the source baseline. | |
| Merge the source baseline information into the target branch. |
You can specify the action for each baseline using the buttons in the corresponding row. Alternatively, select one or more baselines using the checkboxes and click the appropriate toolbar button to apply the action to all selected baselines.
You can also perform the following actions on selected rows:
| Icon | Description |
|---|---|
| Delete all selected source baselines. | |
| Merge the source baseline information into the target branch. |
Initiate the Merge Operation
When there are no more rows with a Conflict status, the Recompare button changes to a Merge button. Click Merge to open a confirmation dialog. When the merge is complete, the list of baselines will be empty, and a confirmation message will appear. If the merge fails—for example, if the target or source has changed in a way that creates a new conflict—the page updates to display the conflicting baselines.
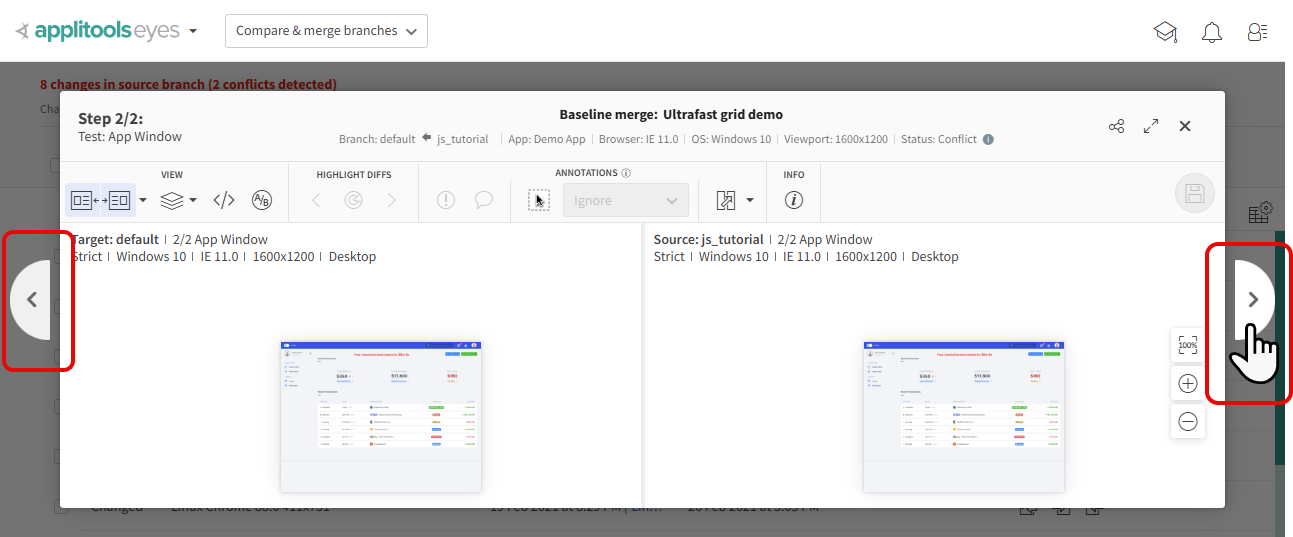
Compare Baselines Editor
You can use the compare baselines editor to view the differences between baseline on the source and target branches including comments and annotations.
To open the page, click on a row or click next to a row.
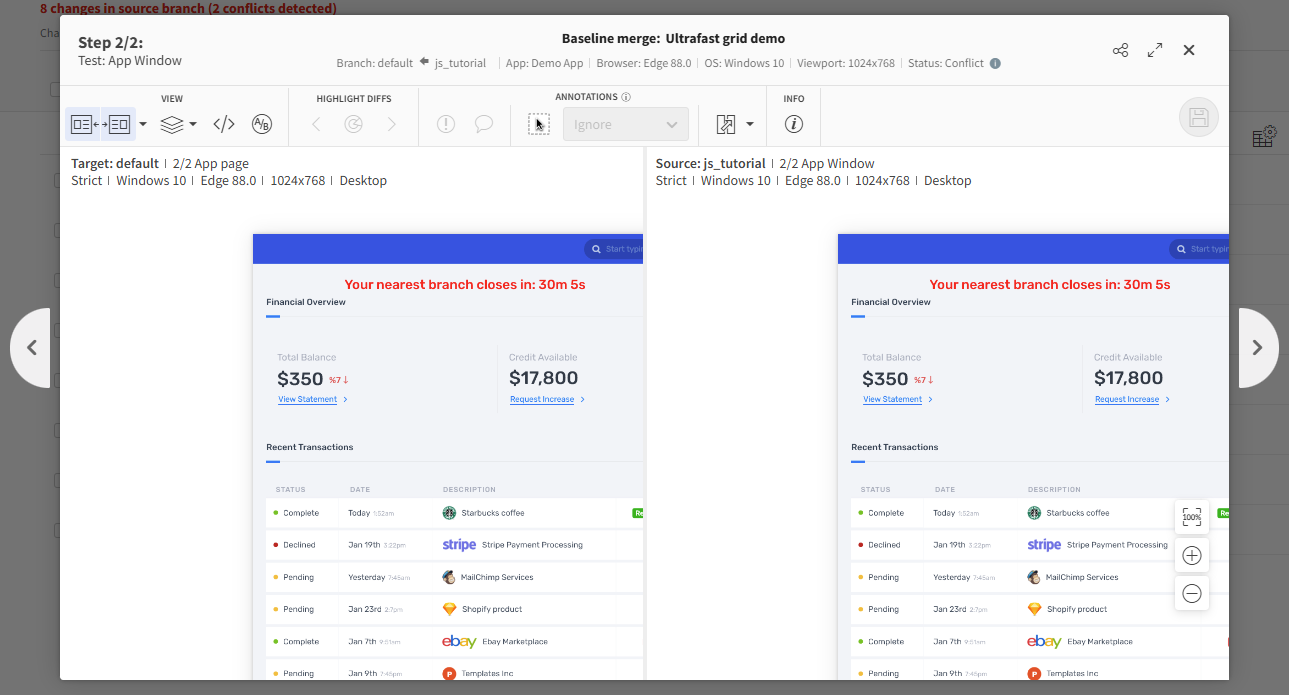
Click to select whether to view only the source, the target, or both images side by side.
Click to select which layers are displayed:
- Diffs - Areas with differences are colored pink.
- Remarks & Issues - Displays remarks and issues added by your team.
- Regions - Display Match level regions added by your team.
- Viewport - Displays a boundary box that represents the viewport size relative to the image size (relevant when the image is large than the viewport size).
You can use the zoom buttons to adjust the size of the images.
Information
The editor displays textual information about the baselines in three places:

Summary panel
Displays the following:
- The name of the test
- Merge target and source branches
- The application name
- The execution environment
Step details
Displays the following:
- Step number
- Test name
Similar information is displayed to the left of the source.
Info button
Click to view:
- The application and test names
- Details of the source and target baselines (ID, Revision number, Saved, Saved by, Branch)
Viewing Differences
The editor provides various ways to identify the differences between the two baselines easily and efficiently.
Steps that are different have a mismatch ![]() icon near the top left corner of the image. Steps that are the same have a match
icon near the top left corner of the image. Steps that are the same have a match ![]() icon.
icon.
Click to highlight differences in the images. Circles will flash wherever differences are found. If a difference is outside the current field of view, a circle flashes, and a blurred pink strip appears on the edge of the view to indicate the direction you need to scroll to see the difference.
Click or press the . key to move to the next difference. Click or press the , key to view the previous difference. After you view the last difference, the zoom level returns to its previous setting.
Annotations
A step in the two baselines being compared can be different in two ways:
- Differences in the captured image. The pixels that are different are highlighted in pink.
- Differences in user annotations. Remarks, comments, and match level regions which are different in the two baselines, or only appear in one baseline are colored in a dark pink - see the table below for examples:
| Annotation | Same in both baselines | Different or only in one baseline |
|---|---|---|
| Remark | ||
| Issues | ||
| Ignore region |  | |
| Floating region | ||
| Layout region | ||
| Strict region |
Changing the Source Annotations
Use , , and to add annotations to the baseline in the source branch
To delete an annotation, click on the annotation and click .
To modify the annotation, click and select one of the following:
-
Add annotations to source - Adds all the annotations in the current target step to the source step, keeping any existing annotations in the source.
-
Replace source annotations with targets - Adds all of the target annotations in the current target step to the source step, deleting any existing annotations in the source step.
-
Restore source annotations - If you previously changed or delete the source annotations, then this option will restore them to the state they were when last saved.
Changing the Match Level
You can see if a change in the would change the outcome of any differences detected in the image using the Match button which is found to the left of the zoom buttons. This button initially shows the match level that was used during the test. Clicking on the button and selecting a different match level will reprocess the images with the selected level and update the display. Note that this has no impact on the match level used for test runs - these depend on the match level set in the SDK and via the match level annotations.
Browsing through Steps
Click < and > at the side of the image to screen to the previous or next change.