Overview of Visual UI Testing
Introduction
Visual testing is a type of regression testing that ensures previously correct screens have not changed unexpectedly.
Visual testing of an application is performed by running the application and saving screen snapshots at key points called checkpoints. These screenshots are then compared to previously stored baseline images, and any visually significant differences are reported.
Implementing Visual UI Testing
Implementing visual UI testing typically involves four basic steps:
-
Write a test that exercises your application UI by simulating user interactions and capturing screenshots at key states.
-
Compare the captured screenshots to previously captured baseline images.
-
Review the detected differences:
- If a difference results from a new feature, accept the new screenshot, which becomes the new baseline image.
- If a difference indicates a bug, report the issue and reject the new image, keeping the existing baseline.
-
Save the baseline updates so they are used for the next test run.
The very first time a test is run, there are no baseline images, so the captured screenshots are adopted as the baseline images. On subsequent runs, the process follows the steps described above.
This process is illustrated in the diagram below and the description that follows it.
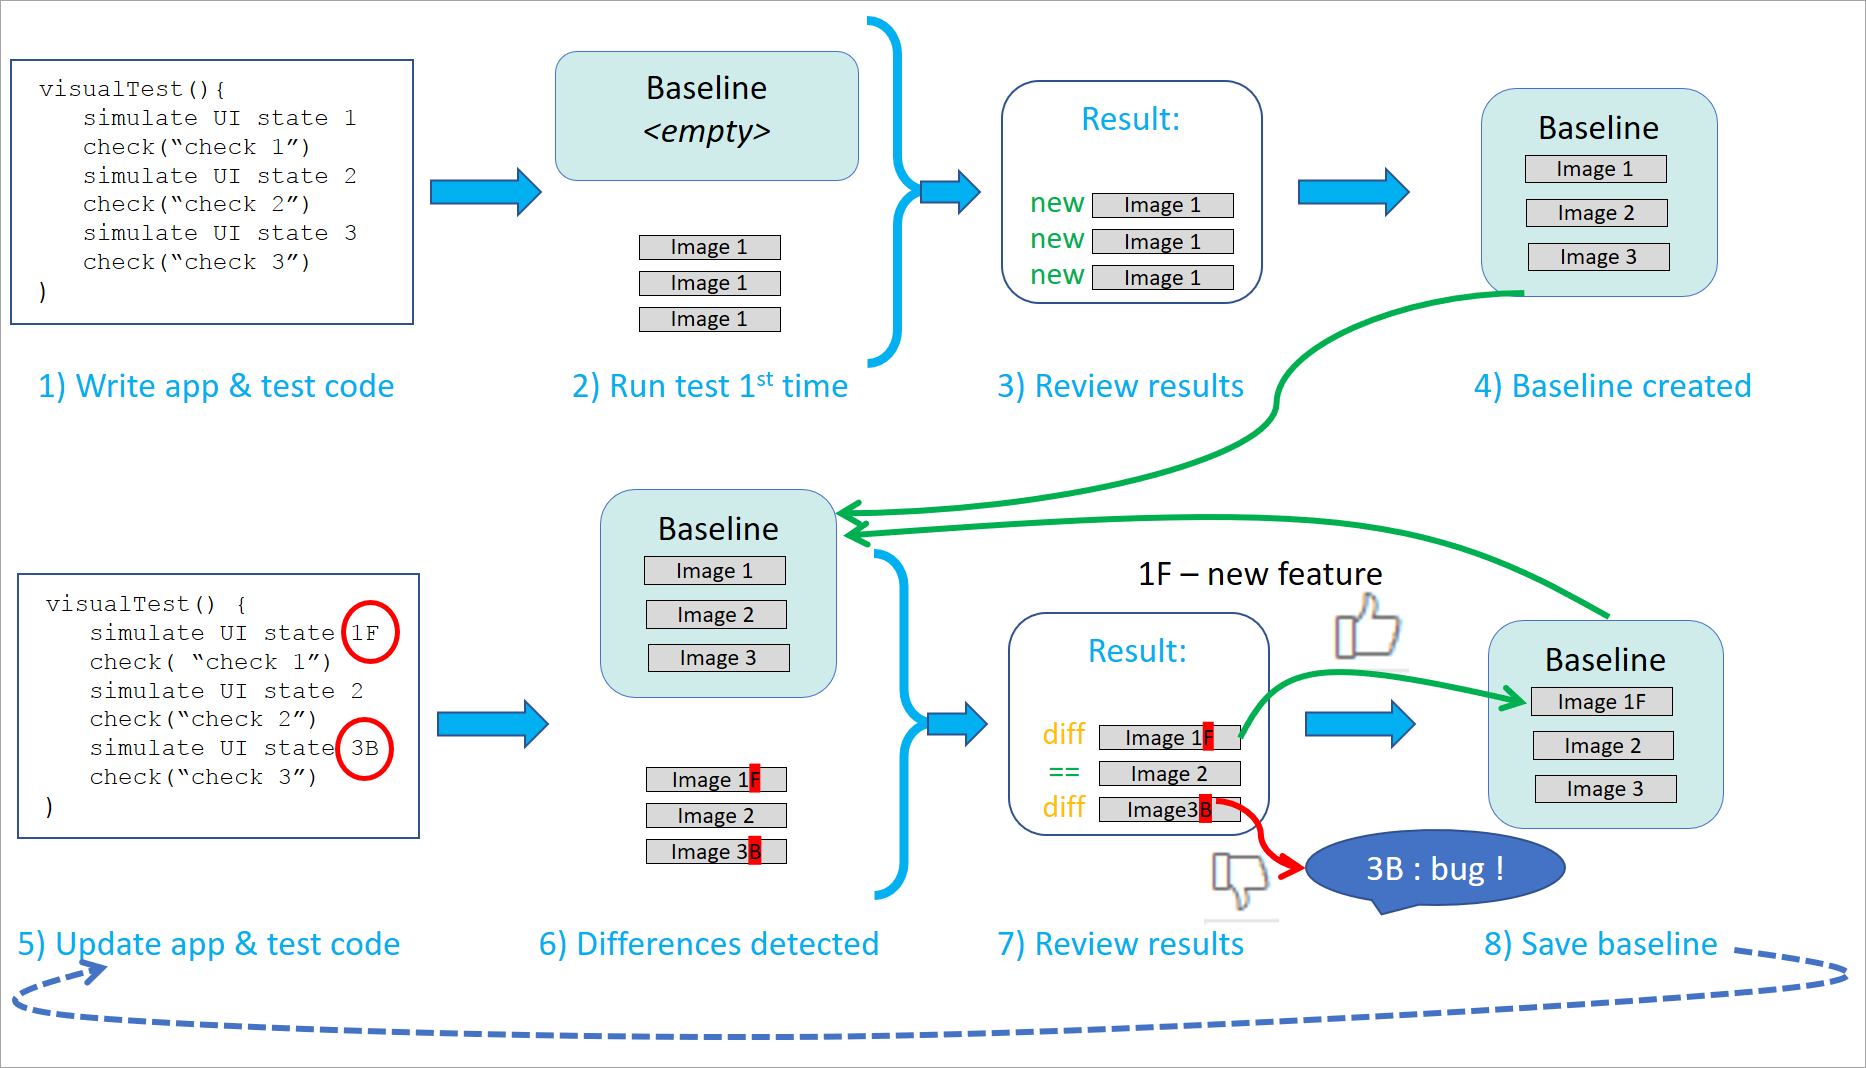
The figure shows two phases: the upper row represents the first run, and the second row represents subsequent runs, which may be repeated multiple times (hence the arrow from step 8 to step 5. The numbering in the sections below corresponds to the numbering in the figure above.
First Run
| # | Step Description |
|---|---|
| 1) | Write a test script that exercises the UI by simulating multiple states and capturing screenshots at each checkpoint. |
| 2) | Run the test for the first time. |
| 3) | Since no baseline images exist, all checkpoints are marked as "new." |
| 4) | All images captured during this run are automatically stored and used as baseline images in future tests. |
Subsequent Runs
| # | Step Description |
|---|---|
| 5) | Modify the application or test code. |
| 6) | Run the test again; differences are detected. In this example, the differences are marked as 1F and 3B in the figure. |
| 7) | Review the results:
|
| 8) | Save the updated baseline, which will be used as the reference for future test runs. |