Using Applitools With Azure Devops
CI/CD Integration
The Eyes-Microsoft Azure integration allows you to benefit from Eyes visual testing and branch and commit workflow on projects run using Microsoft Azure DevOps.
Microsoft Azure integrates with Eyes in the following aspects:
- All Eyes tests in a specific CI build are automatically grouped together as an Eyes batch, with a batch name that includes the Azure commit information.
- Eyes tests are automatically configured to use and save baselines in branches with names derived from the test's Azure branch name.
- The Azure Commits panel includes a status indicating the latest visual test results and commit push and pull requests.
- A push or pull request triggers a commit in Eyes.
Enabling Eyes/Azure integration
Generating a Personal Access Token
To link Eyes with Azure, you will need the URL of your Azure server and a Personal Access Token (PAT). The PAT requires read & write access for work items. All other scopes can be read-only. For details about creating a PAT in Azure, see the Azure documentation.
Configuring Eyes to interact with Azure
Integrating Microsoft Azure requires Eyes team administration privileges.
-
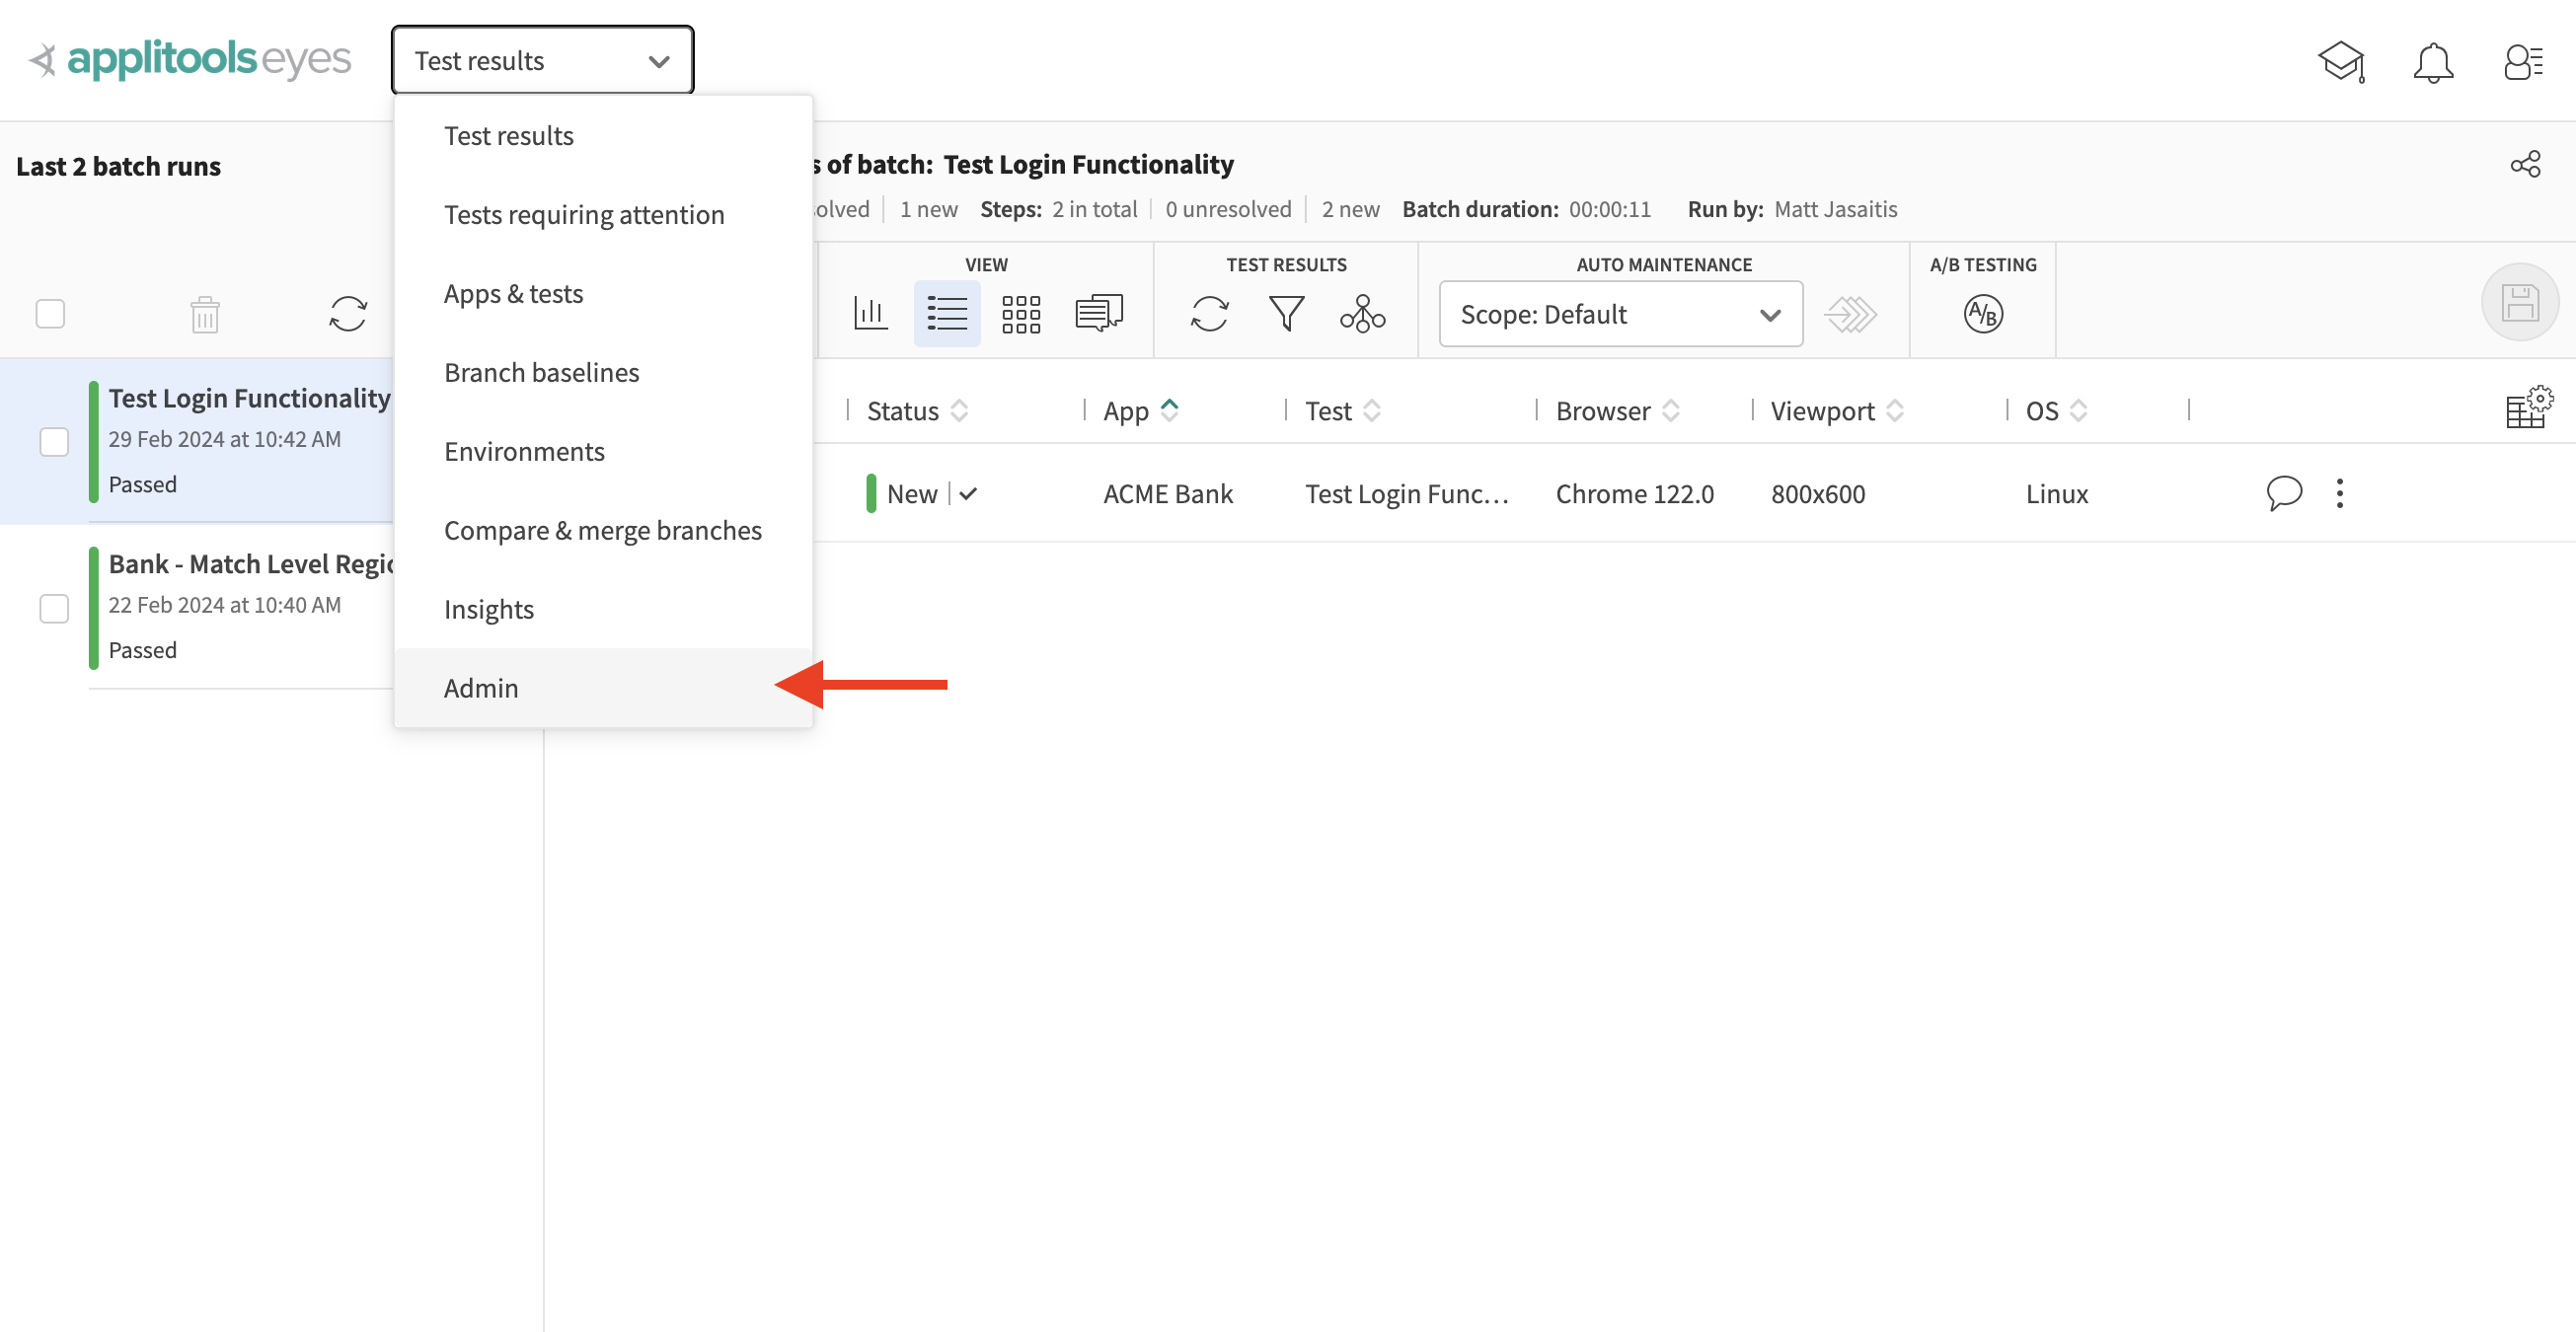
Navigate to the Admin Panel
-
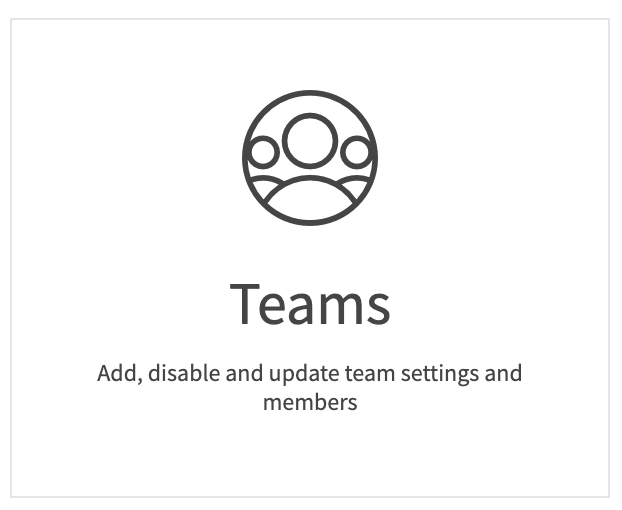
On the Admin panel, click on the Teams tile
-
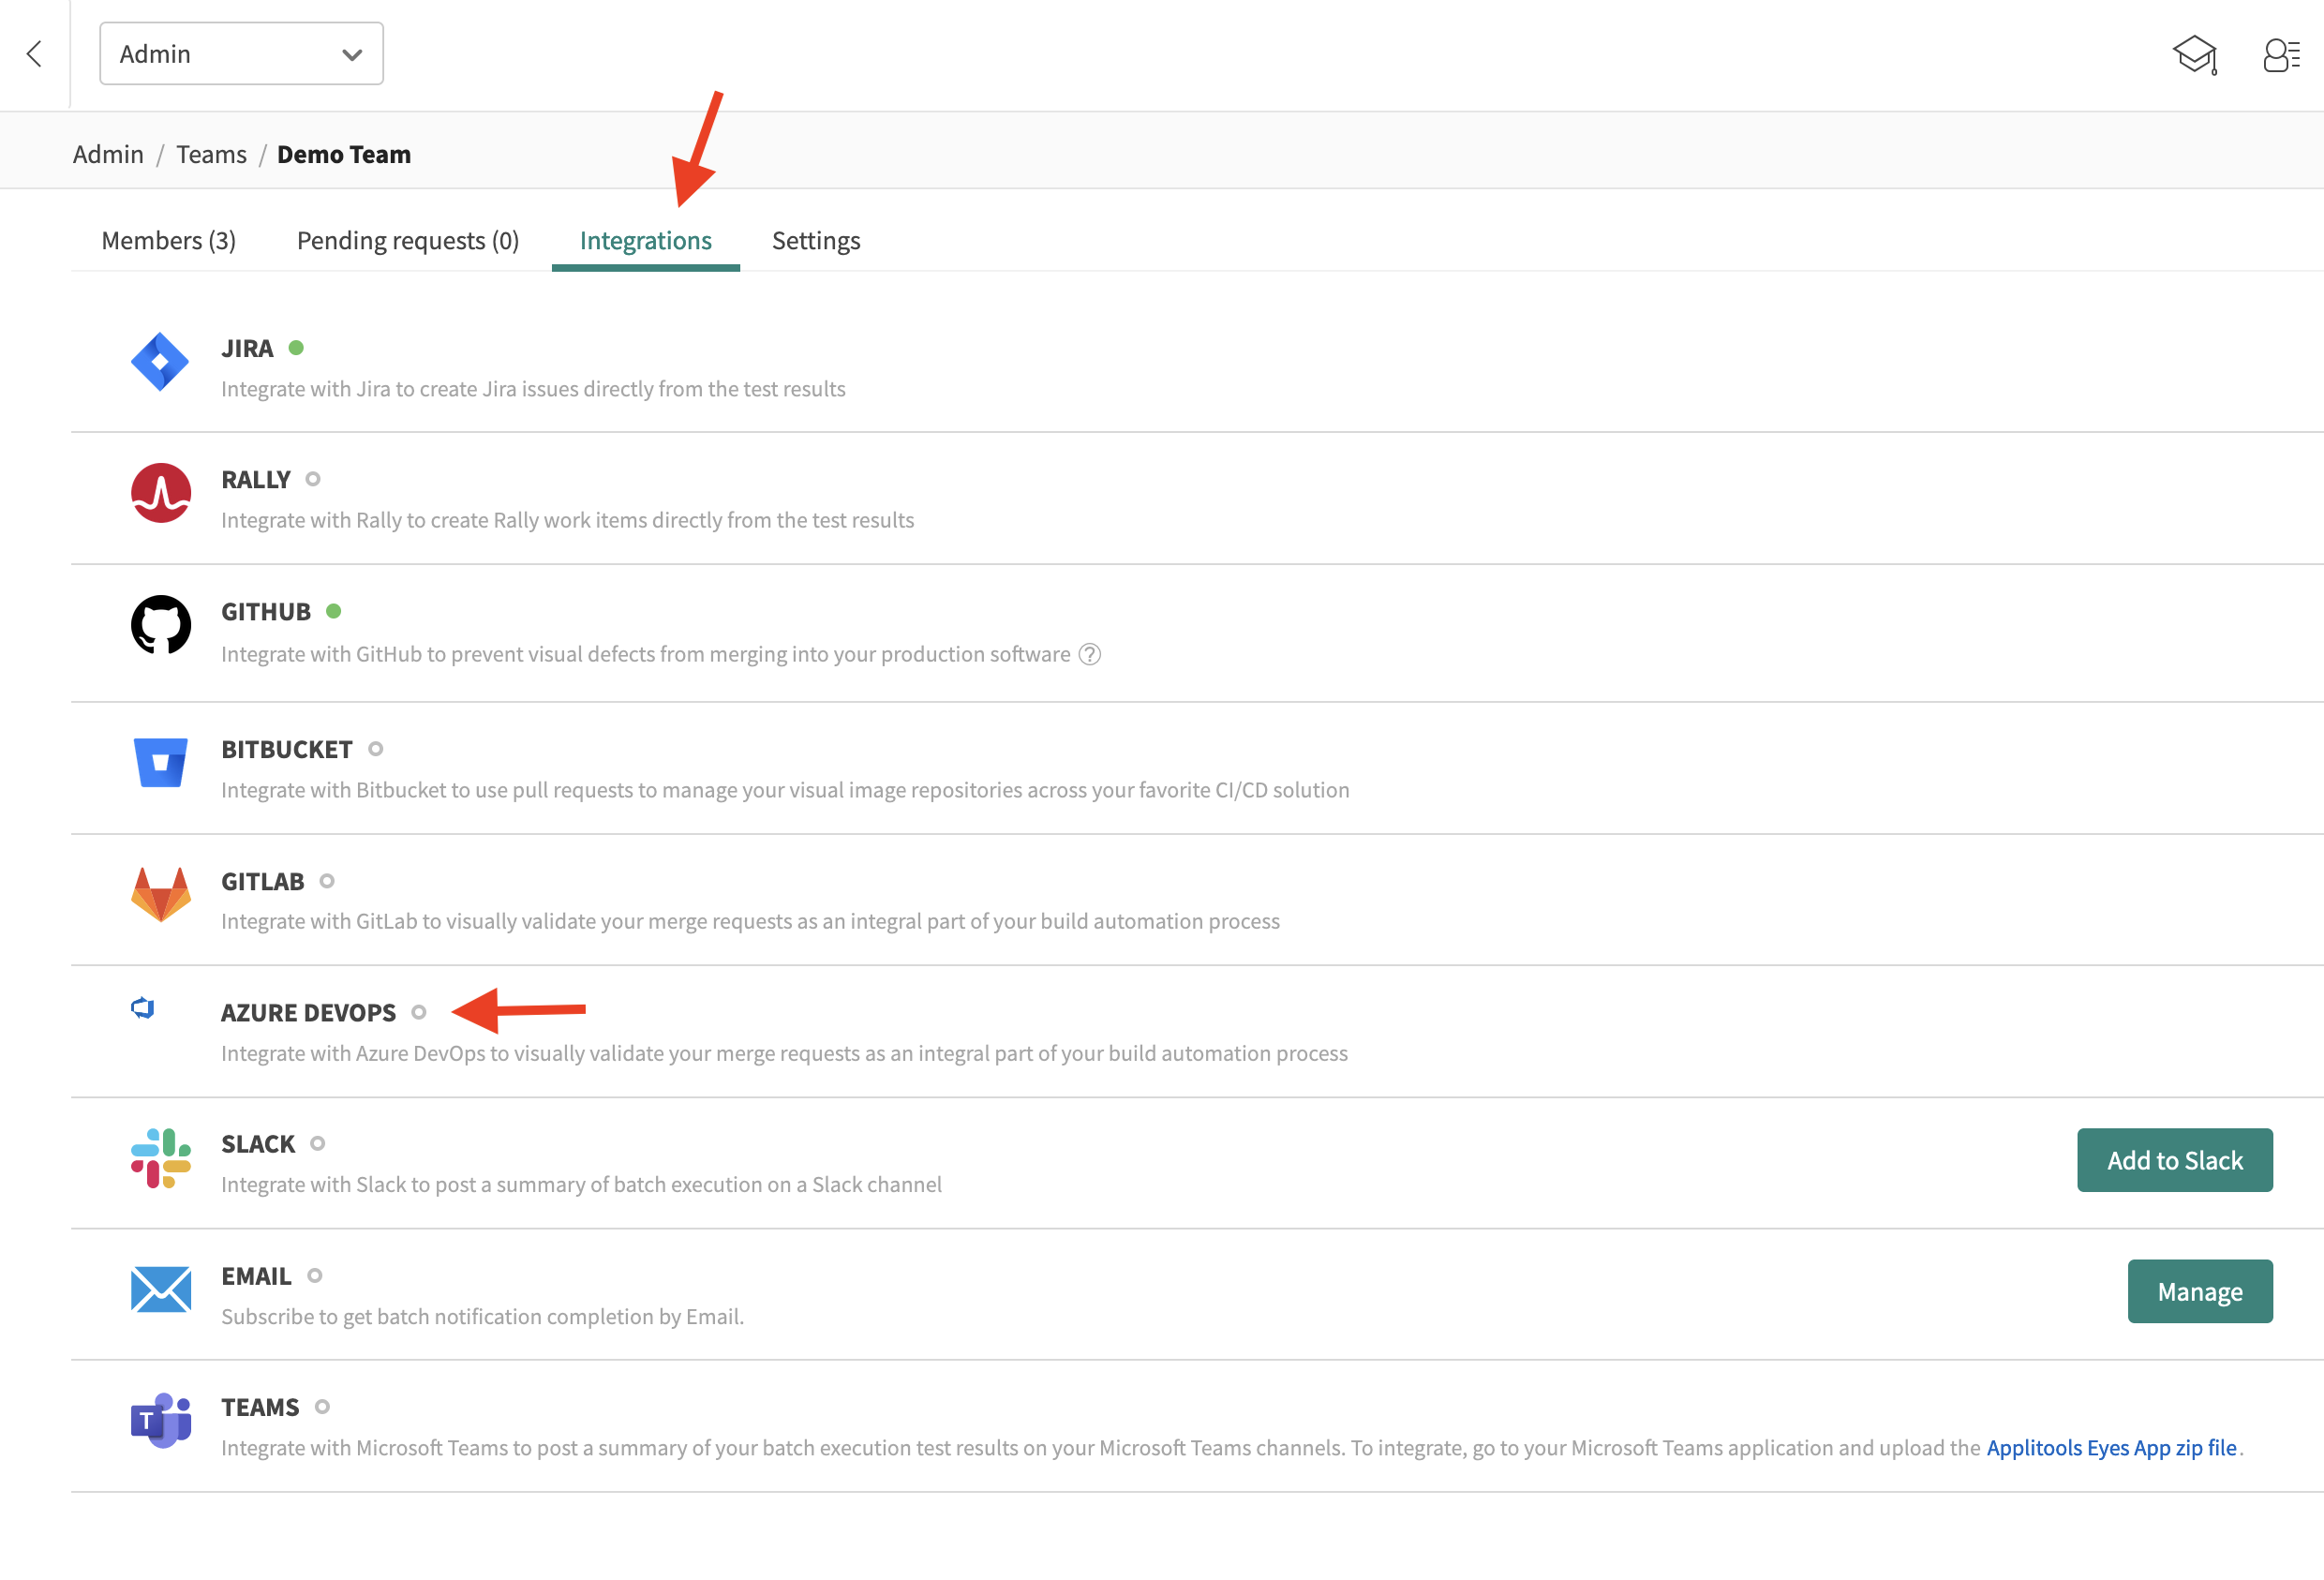
Click on the name of the team you want to configure.
-
On the Integrations tab, click Azure.
-
Click Add and enter the URL of your Azure Server/Organization and PAT (Personal Access Token).
-
Click the Manage repositories button.
-
In the list of repositories, select the required repositories and click Apply.
-
By default, Azure integration closes a batch automatically once the CI build operation is completed. If your build runs concurrently or consists of multiple tests and you want all of the results to appear together in a single batch, you need to disable automatic closing of the batch and close the batch explicitly when the build is complete in your CI.
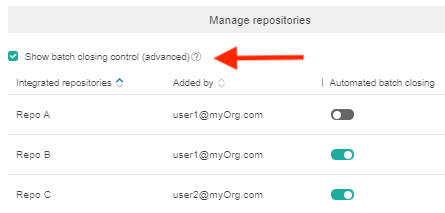
To control the batch closing operation for a repository, select the Show batch closing control checkbox and enable or disable auto-closing of the batch. If you disable batch auto-closing, you must explicitly close the batch.
If your organization uses an Eyes on-premise server, you need to white list inbound HTTPS traffic from the Azure server to your Eyes server in your organization's firewall.
Setting the API key in Azure
-
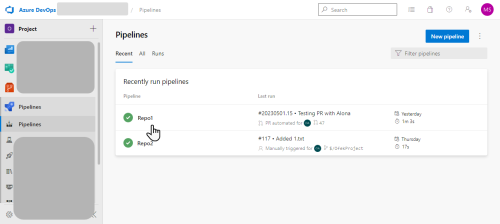
In Azure, select Pipelines and then click on the name of your repository.
-
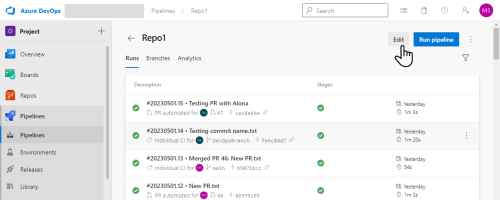
Click Edit.
-
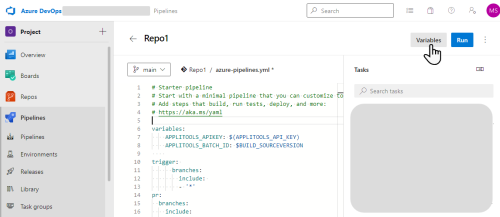
Click Variables and set the variable applitools.api.key with your API Key. To get the value of your API key, see How to retrieve your API key.
-
Add the following to the
azure-pipelines.yamlfile:variables:
- name: commitSha
# Use Build.SourceVersion if we aren't in a PR
${{ if ne(variables['Build.Reason'], 'PullRequest') }}:
value: $(Build.SourceVersion)
# Use System.PullRequest.SourceCommitId if we are in PR
${{ if eq(variables['Build.Reason'], 'PullRequest') }}:
value: $(System.PullRequest.SourceCommitId)
env:
APPLITOOLS_API_KEY: $(applitools.api.key)
for example:
# Starter pipeline
# Start with a minimal pipeline that you can customize to build and deploy your code.
# Add steps that build, run tests, deploy, and more:
# https://aka.ms/yaml

trigger:
- master

pool:
  vmImage: ubuntu-latest
variables:
  - name: commitSha
  # Use Build.SourceVersion if we aren't in a PR
    ${{ if ne(variables['Build.Reason'], 'PullRequest') }}:
     value: $(Build.SourceVersion)
  # Use System.PullRequest.SourceCommitId if we are in PR
    ${{ if eq(variables['Build.Reason'], 'PullRequest') }}:
     value: $(System.PullRequest.SourceCommitId)

steps:
- script: echo Hello, world!
  displayName: 'Run a one-line script'

- script: |

  # Run Applitools visual tests here

  displayName: 'Run a multi-line script'
  env:
    APPLITOOLS_API_KEY: $(applitools.api.key)
Preparing your code
The Eyes SDK obtains the API Key and the BatchID from the environment variables that are set up in the azure-pipelines.yaml file as described above. If you are converting existing tests, then ensure that the existing codes do not explicitly set the API key, batchID, or batch name.
Working with Microsoft Azure DevOps
Once you have configured the Azure repositories, you can use your CI and Azure in the usual way. A CI job is normally triggered by a commit or pull request to your repository, and this, in turn, runs your Eyes tests.
The Eyes/Azure integration, Eyes adds the following functionality to your Azure workflow:
-
When you initiate a build that includes an Eyes test, Eyes detects that the run is associated with a Azure pull request and searches for a baseline to use as a reference. Eyes checks for a matching baseline in the following order:
- On a branch that corresponds to the repository name and source branch.
- If there is no such branch, Eyes creates a branch and populates it with the latest baseline for that test from the repository name and target branch defined by the all commits
- If there is no such baseline, Eyes marks the test as New.
-
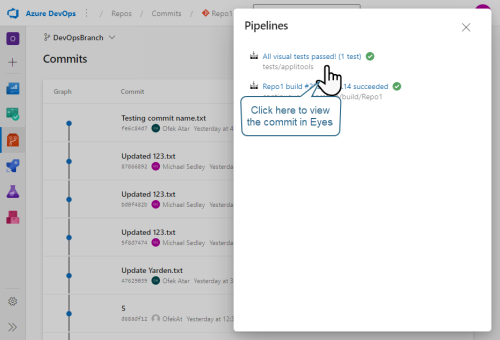
Eyes sends Azure status information that is displayed on the Azure Commits panel as shown below. The name of the Applitools team is included in the build name. Click on the test status to view the batch in Eyes.
-
The window indicates the results of the visual UI test that ran as part of this build.
Succeeded - the visual UI tests passed.
Failed - differences were found and need to be resolved, that the test failed to complete successfully, or that the commit process identified conflicts.
Running - commit is in progress.
-
In Eyes, if you Accept all the steps of all the tests, or resolve all conflicts then when you go back to the Azure Commits panel,
(failed) is replaced by
(success).
-
You can commit the baseline changes of the source branch with the target branch in the following ways:
- Click the Merge button on the Compare and merge branches page in the Test Manager (enabled only after all conflicts have been resolved). This operation is independent of any commit process in Azure and occurs immediately, even if the Azure commit was not done.
- Commit the Azure pull request as usual. This first merges the Azure files and, once this has completed successfully, Eyes is notified that it should merge the visual UI test baselines.
By default, code merge is blocked if there are unsaved changes to the checkpoint as the SCM will not be marked as Passed. To enable or disable this setting, contact Customer Support.
Creating commits
When you push a commit in your Azure repo, it triggers the pipeline that also runs An Eyes test. When the pipeline ends, the integration updates the tests status. Following is an example of a push workflow:
-
In Azure, select Repos > Files.
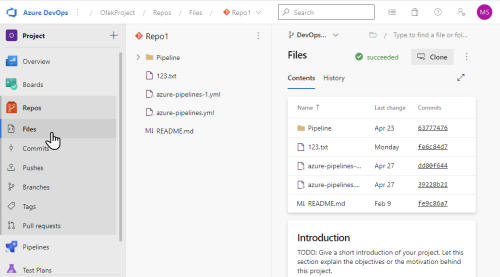
-
Click on a file, click Edit, and modify the file.
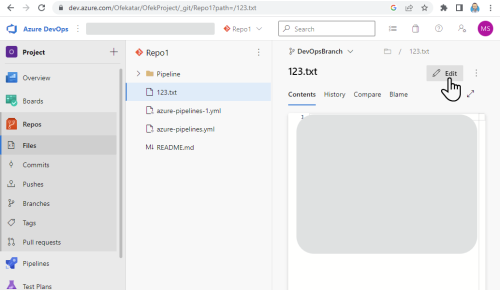
-
Click Commit.
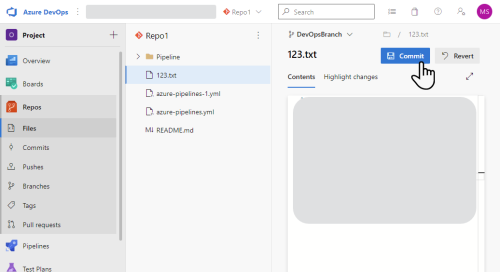
-
Enter a comment and click Commit.
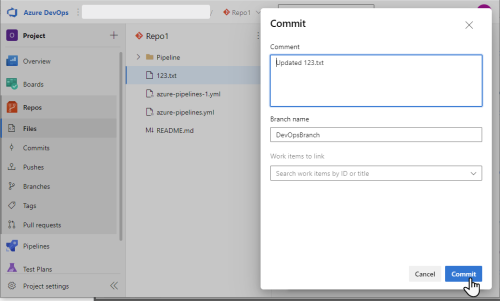
-
Select Repos > Commits.
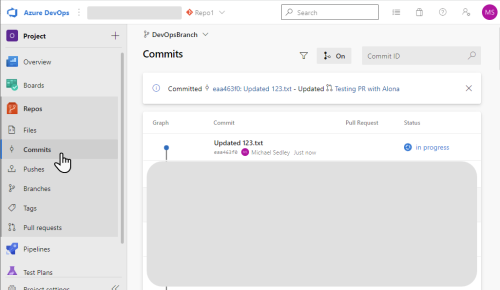
Notice that the commit has a icon to indicate that commit is in progress. The status of the commit is indicated with one of the following icons:
Succeeded - the visual UI tests passed.
Failed - differences were found and need to be resolved, that the test failed to complete successfully, or that the commit process identified conflicts.
Running - commit is in progress.
-
To open the commit in Eyes, click Commits and click on the status of the commit (succeeded or failed).
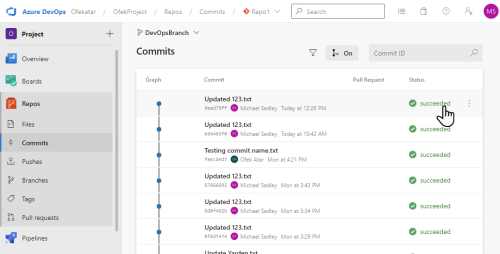
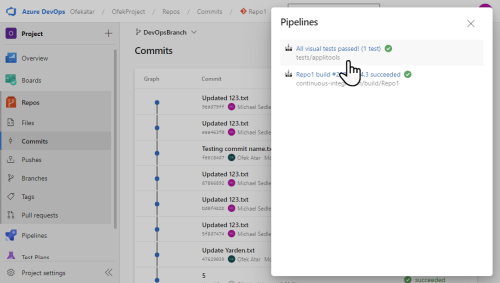
In the Pipelines panel, click on the status
-
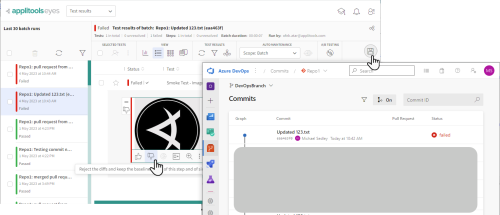
In Eyes, if you reject the changes and click Save, the commit will get a status of Failed in Azure.
Working with pull requests
You can create a pull request in Azure and view it in the Compare and merge branches page in Eyes. The following example shows how you can create a pull request and view and merge the changes in Eyes.
-
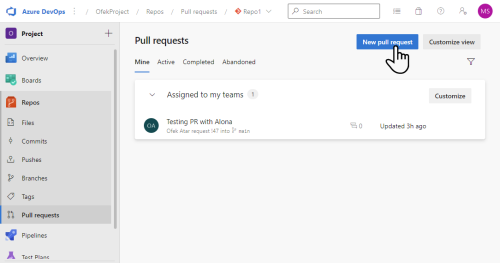
In Azure, select Repos > Pull requests.
-
Click New pull request.
-
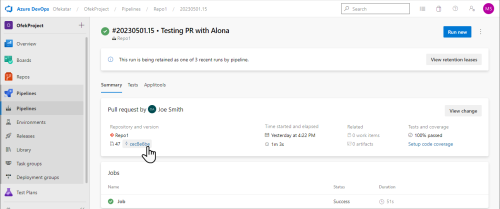
Open the pull request summary and click on the SHA.
-
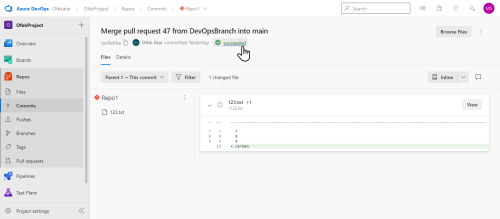
Click on the status (succeeded or failed).
-
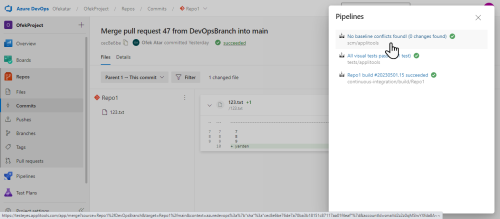
Click on the pull request to view it in the Compare and merge branches page in Eyes.
Azure Devops Eyes Extension
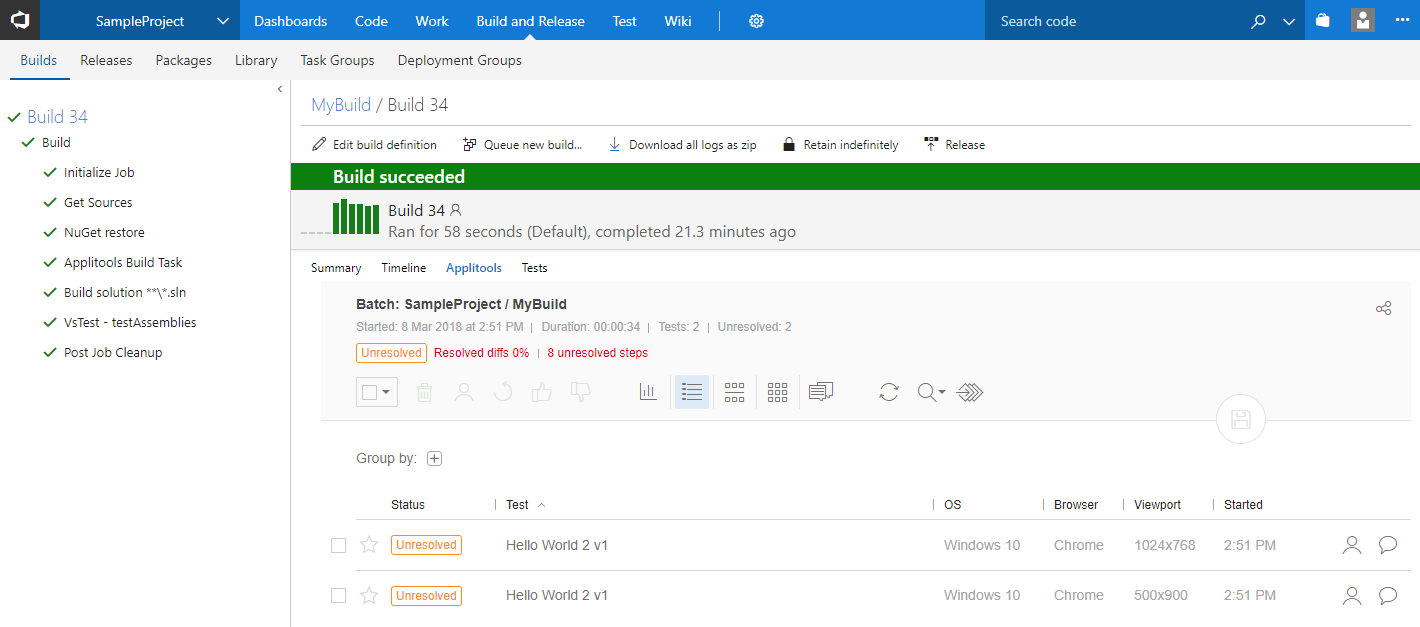
Once you have done the one time setup described in this article you will be able run your visual UI test from within the Azure DevOps environment and see the Eyes results within a Azure DevOps build results window as shown below:
Preparing your Eyes code
The Eyes extension automatically generates a Batch name and batch ID and assigns them to environment variables. Your code should access the environment variables and use these values.
The batch name defined by the Eyes Extension is composed of the project name and the build definition name as defined in the Azure DevOps environment.
Note that the extension uses environment variables in two different ways.
APPLITOOLS_API_KEY is an environment variable that you need to define in your operating system or in Azure DevOps, as explained in the next section.
The environment variables APPLITOOLS_BATCH_NAME and APPLITOOLS_BATCH_ID are defined and set by the Eyes SDK Azure DevOps extension; you should not define these variables in your operating system.
Setup your Azure DevOps build
The Eyes extension needs access to your Eyes API key. It obtains the value of the key from an environment variable called APPLITOOLS_API_KEY You can set the environment key externally via your operating system, or you can do it internally in Azure DevOps as follows:
-
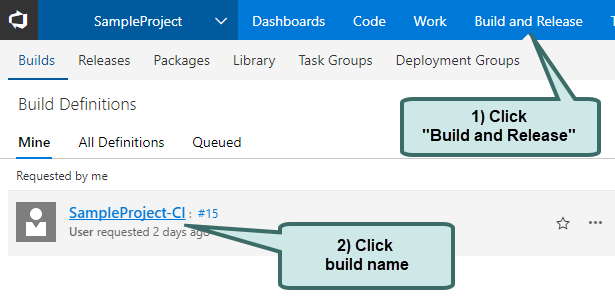
On the "Builds and Release" page, "Builds" tab select your build by clicking on it.

-
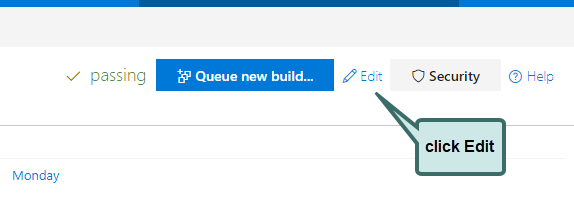
Click on the Edit button.

-
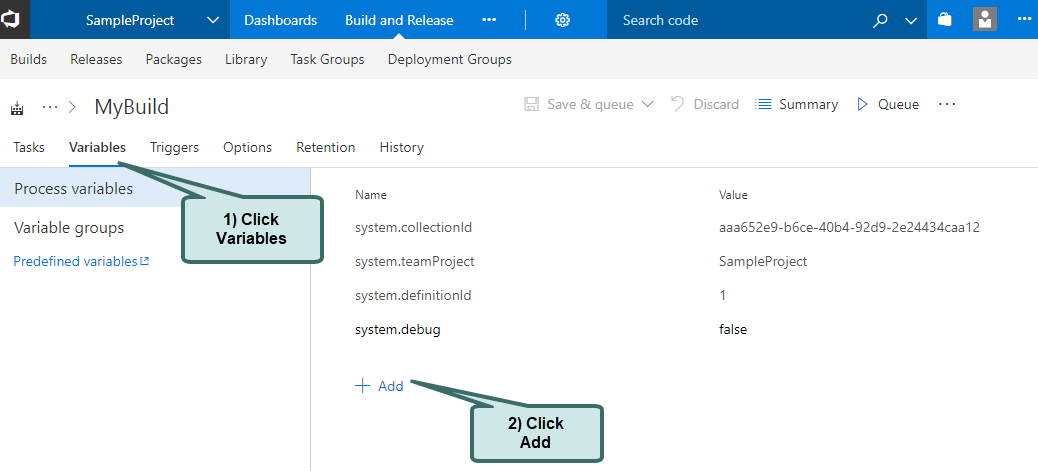
In the Variables tab, click the Add button.
-
In the left input field type the name of the environmental variable
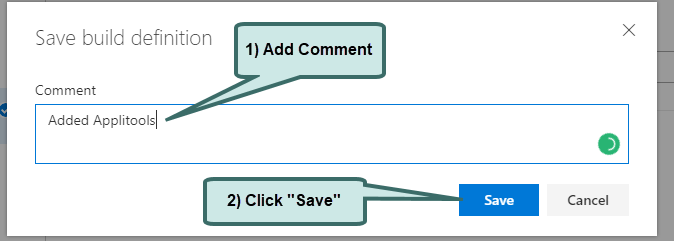
APPLITOOLS_API_KEY, and in the right field type your API key. To obtain your API key see How to obtain your API key. Click on save, and in the Dialog that opens add a comment and click Save.
Installing the Eyes Extension
-
Add the Applitools Eyes build task. In Azure DevOps, click on the "Build and Release" tab, then click on the build definition to which you want to add the Eyes task.
-
Click on the Edit button.
-
Click on Add Task.
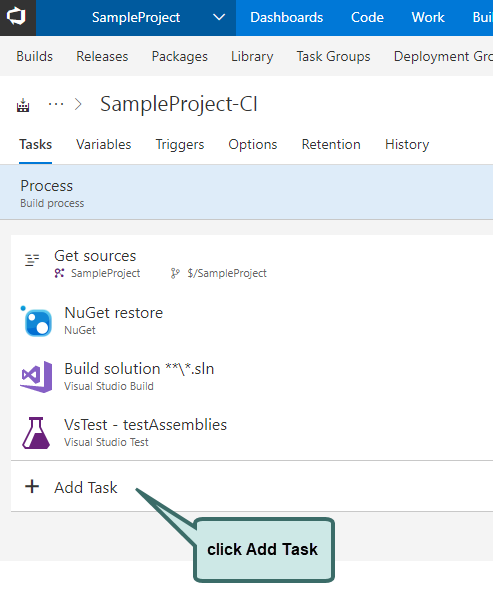
-
Click on "Check out our Marketplace".
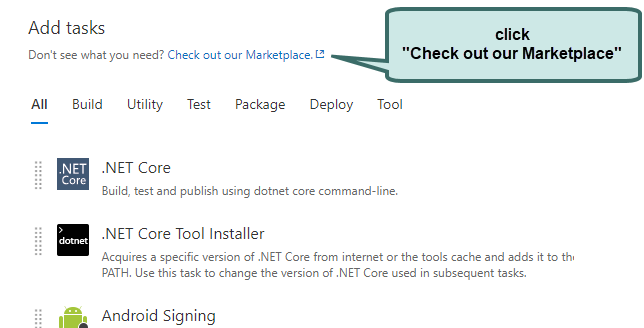
-
Type "applitools", click the search icon and you should see the Applitools Eyes Integration Extension. Click on the Applitools Eyes Integration Extension.
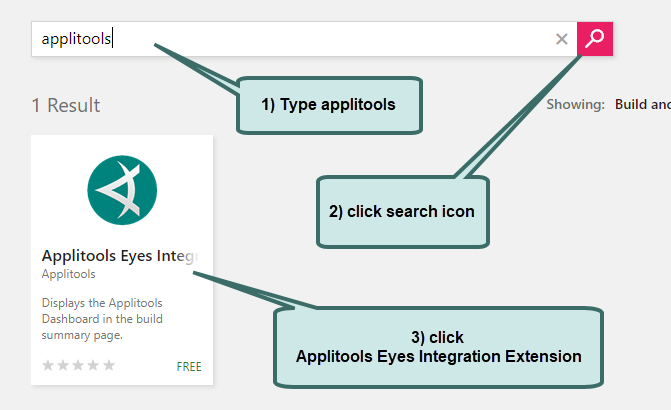
-
Click on the Install button.

-
Click "Confirm".
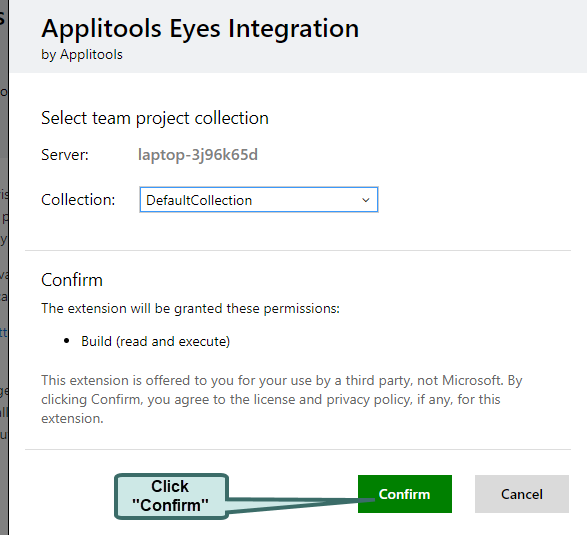
-
Click the "Close" button.
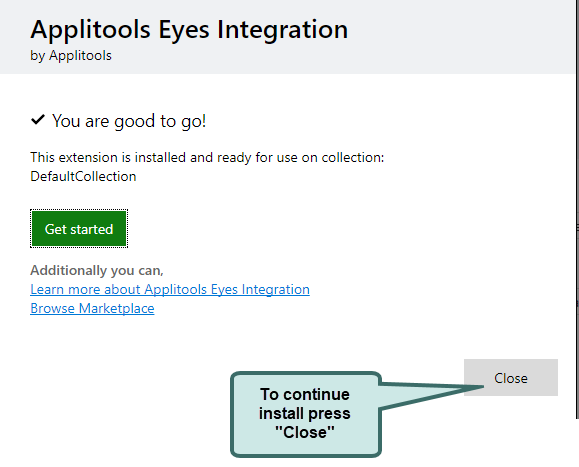
-
Refresh the browser.
-
Click "Add Task".

-
In the search box start typing applitools, when the Applitools Build Task appears, put your cursor over it until the "Add" button is displayed and then click it.

-
The Applitools task appears at the end of the list of tasks.
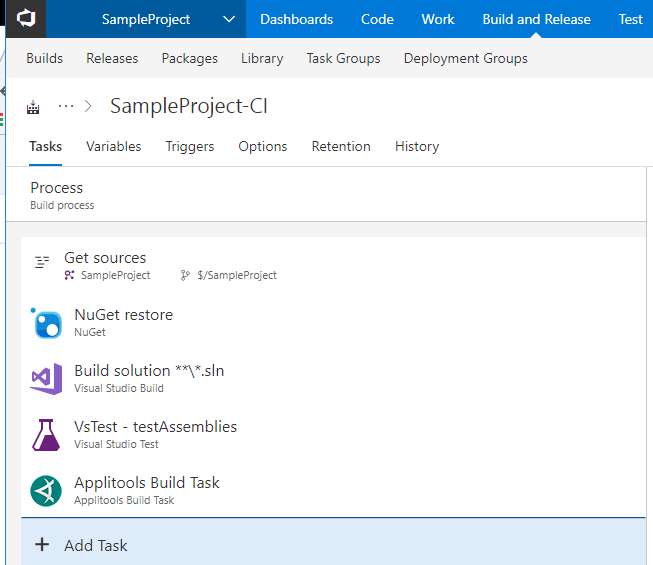
-
Drag it up so that it is before the "Build Solution".
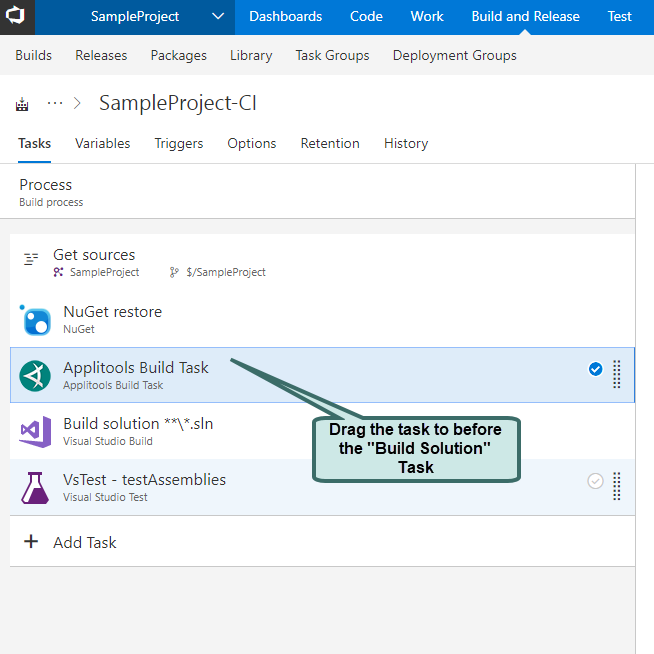
-
Click "Save & Queue", click "Save", add a comment in the popup and click "Save".
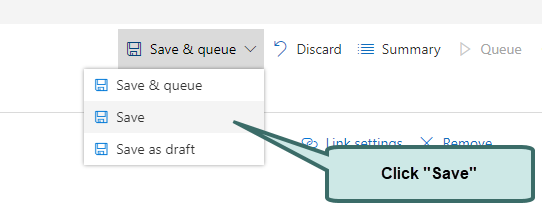
Running your tests
-
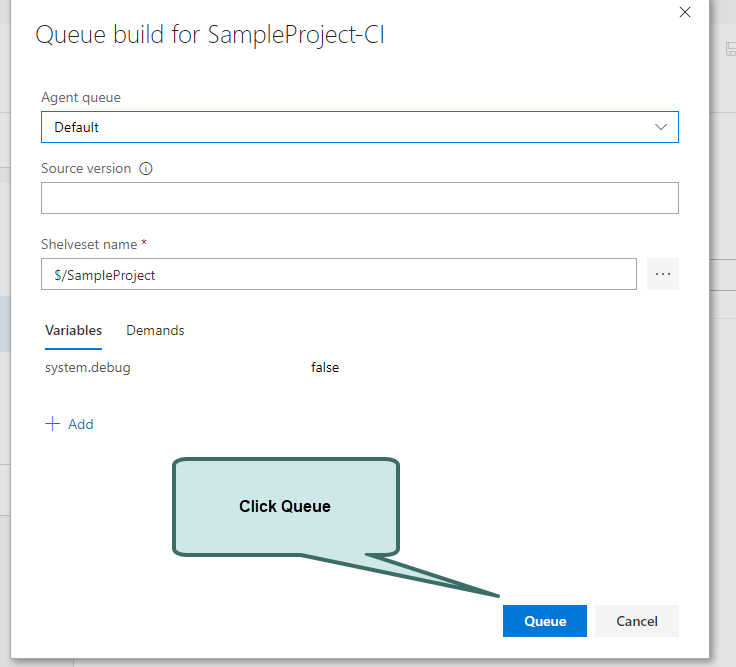
Click the "Queue" button.
-
Click the "Queue" button on the popup.
-
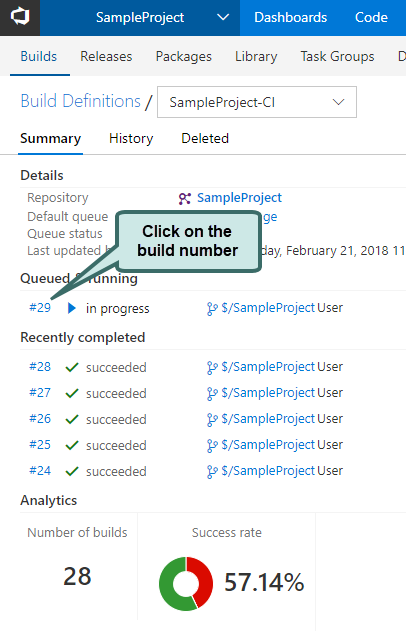
Click on the build number of the current job.
-
This will bring up the Azure DevOps Build results window. Click the Applitools tab, and then, when the test is complete, you will see the main panel of the Applitools Test Manager with the results of the current build loaded.

You will see the results of the current job. To see the results of other builds you can select them from the Azure DevOps "Recently Completed" list. You can also enter full Test Manager mode where you can see all the results of all your tests runs. To do this do as follows:
-
Click any test to see the steps of that test.
-
Click on the step thumbnail to enter the Test Editor.
-
If you click the button, the display will return to Azure DevOps. If you click the Applitools logo, the display will show the main Test Manager panel where you can see all the runs.
