Applitools Github Integration
The Eyes GitHub integration allows you to benefit from Eyes visual testing using a branch and merge workflow on projects using GitHub.
Eyes supports multiple branches, each of which can consist of multiple test baselines. You can create a new branch based on an existing branch, make independent updates to the baselines in each branch, compare branches to detect conflicts, and merge baselines in branches.
GitHub integrates with Eyes in the following aspects:
- Eyes tests are automatically configured to use and save baselines in branches with names derived from the Git branch names.
- All Eyes tests that are in a specific CI build are automatically batched together, with a batch name that includes the Git commit information.
- The GitHub Pull Request panel includes a status indicating the latest Eyes test results and merge status.
- The GitHub Commits panel includes a status indicating the visual UI test result.
- When you execute a commit that triggers CI, the Applitools test status is updated to reflect the result of the test.
This article focuses on the modern integration that leverages the Github Application. If you're installing the integration for the first time, continue with this article.
If you're using the legacy integration, see the section at the bottom for information on the legacy integration.
Setting up the Eyes Github Integration
Eyes/GitHub integration is based on a GitHub App created by Applitools that defines the minimum access that Eyes requires to interact with GitHub on the repositories where Eyes tests are run. You can install multiple GitHub Apps that represent different GitHub Organizations for each team.
To avoid problems during the integration, the user that is running the integration requires the following authorization:
- Eyes team admin
- GitHub Organization
To enable GitHub integration:
-
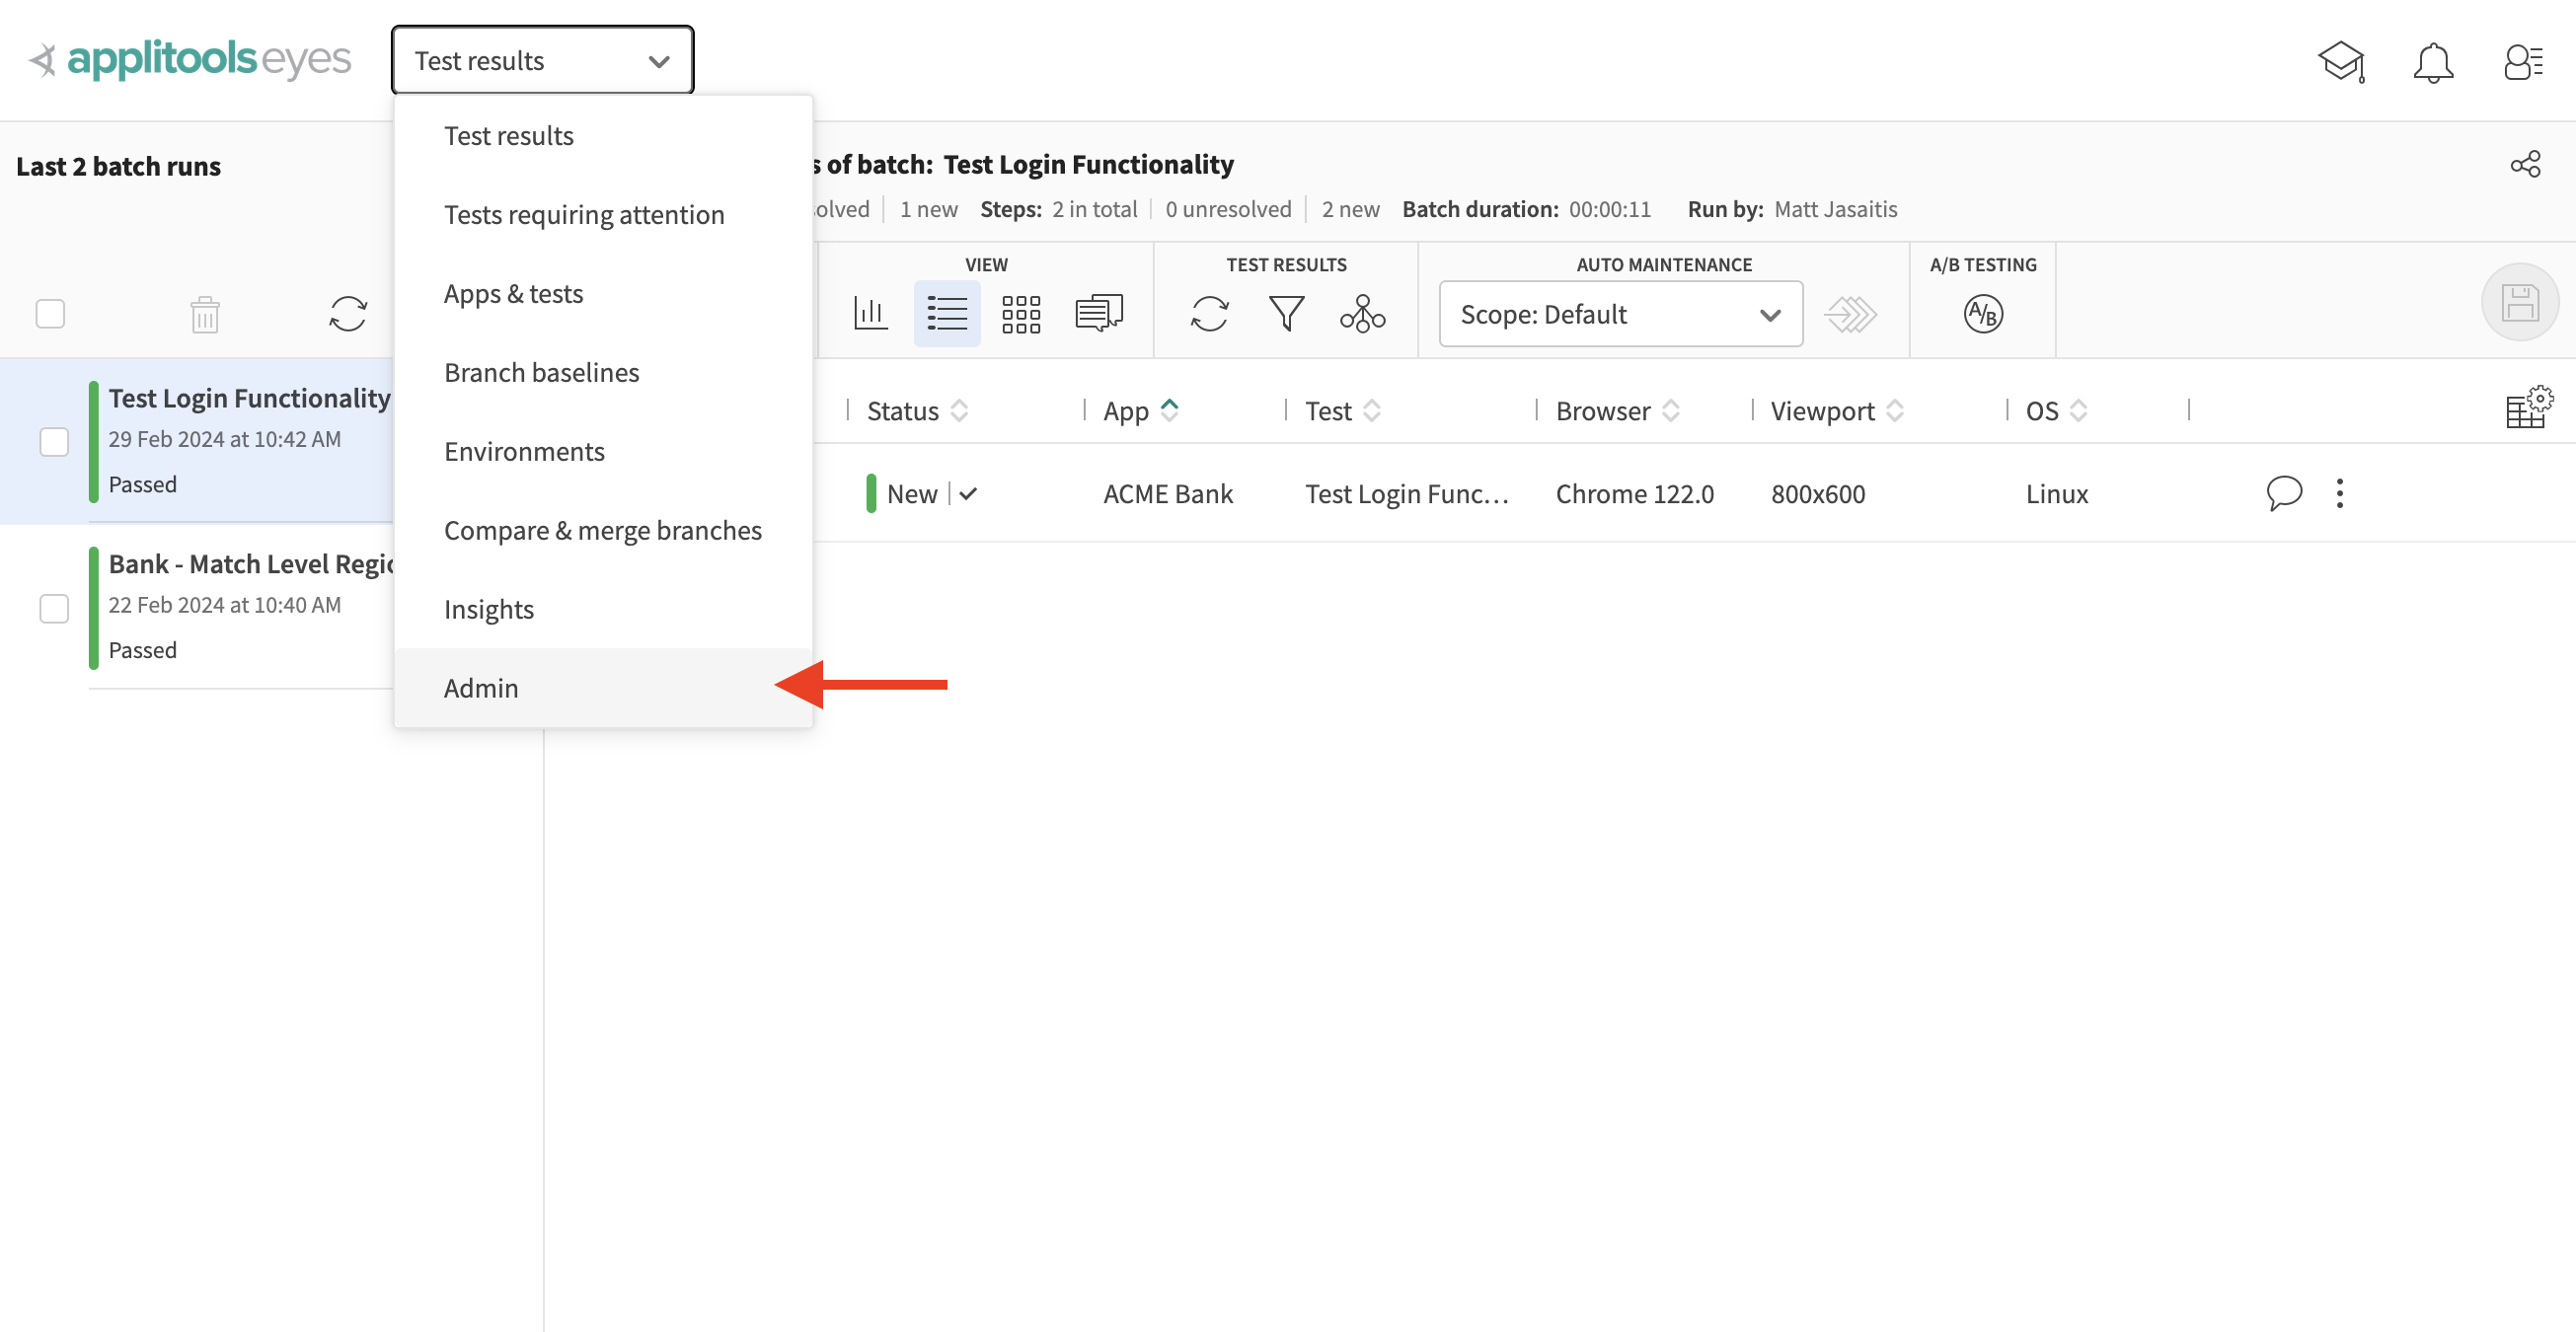
Navigate to the Admin Panel
-
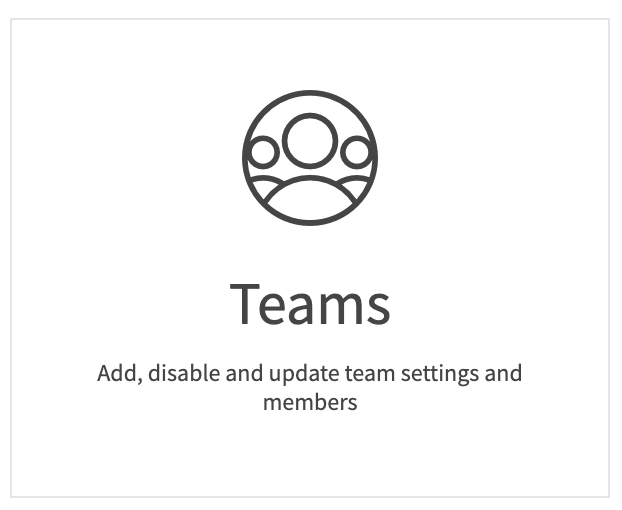
On the Admin panel, click on the Teams tile
-
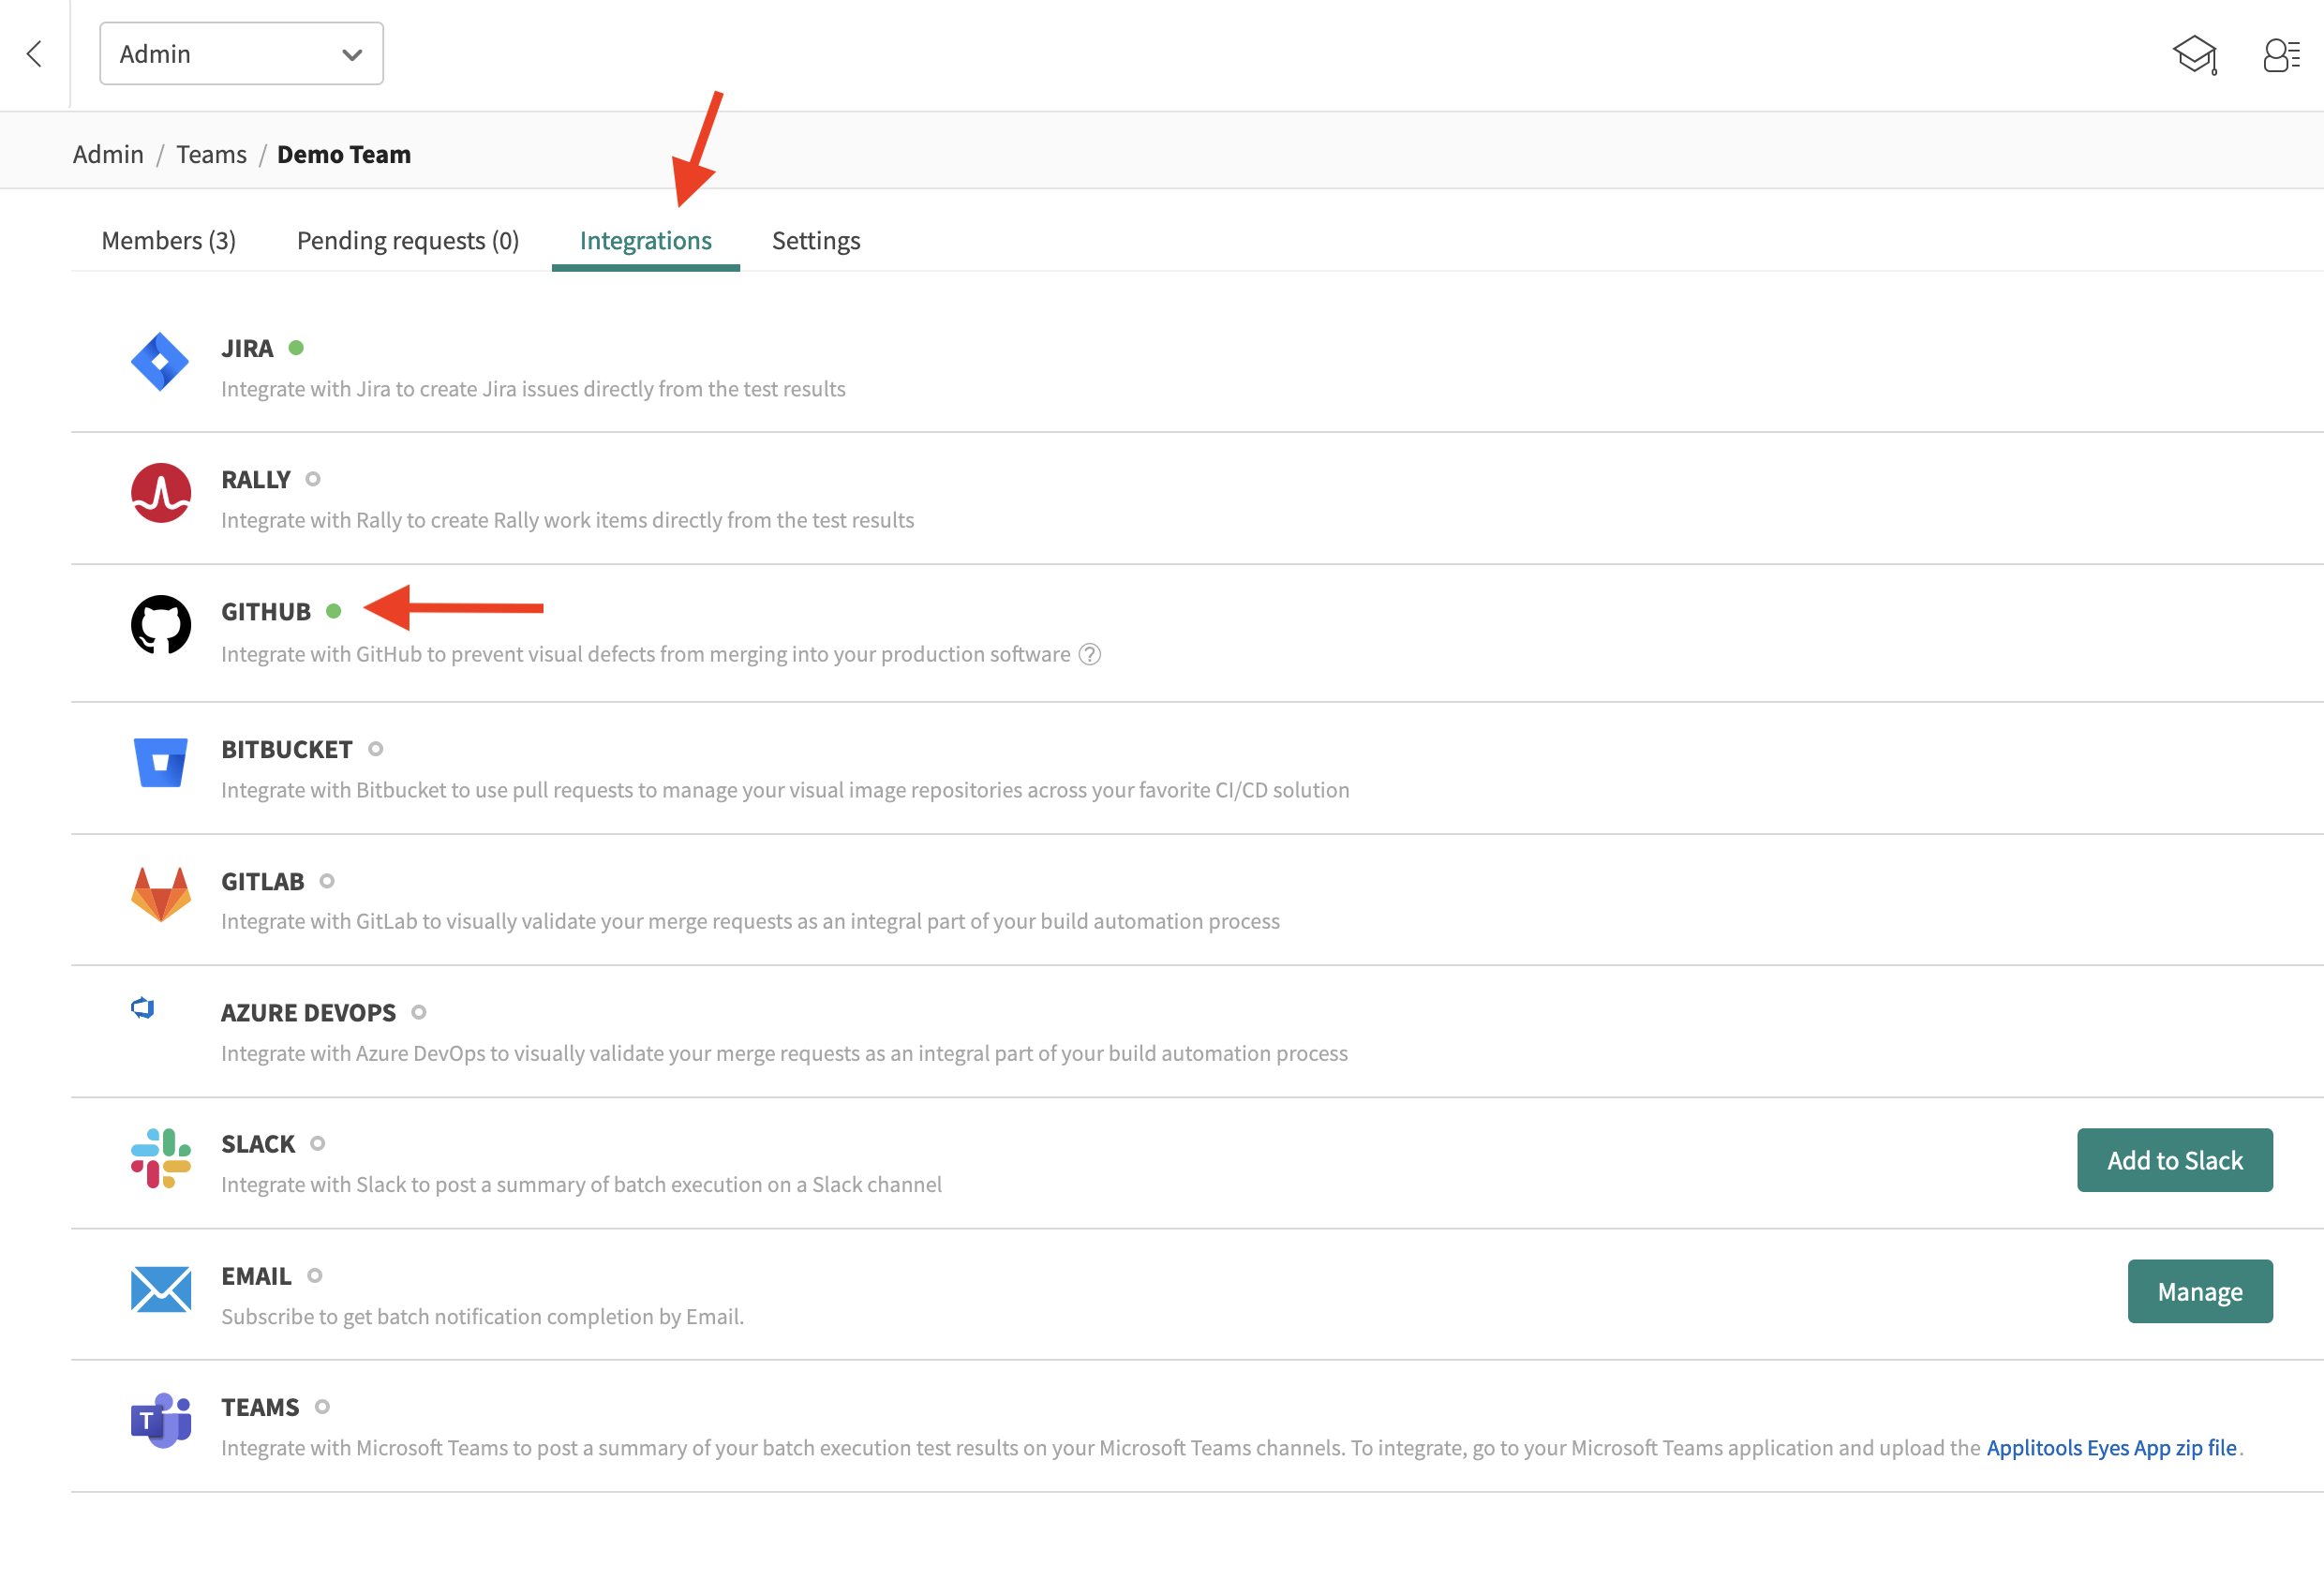
Click on the name of the team you want to configure.
-
On the Integrations tab, click GITHUB.
-
Depending on your previous configuration, continue with one of the following:
-
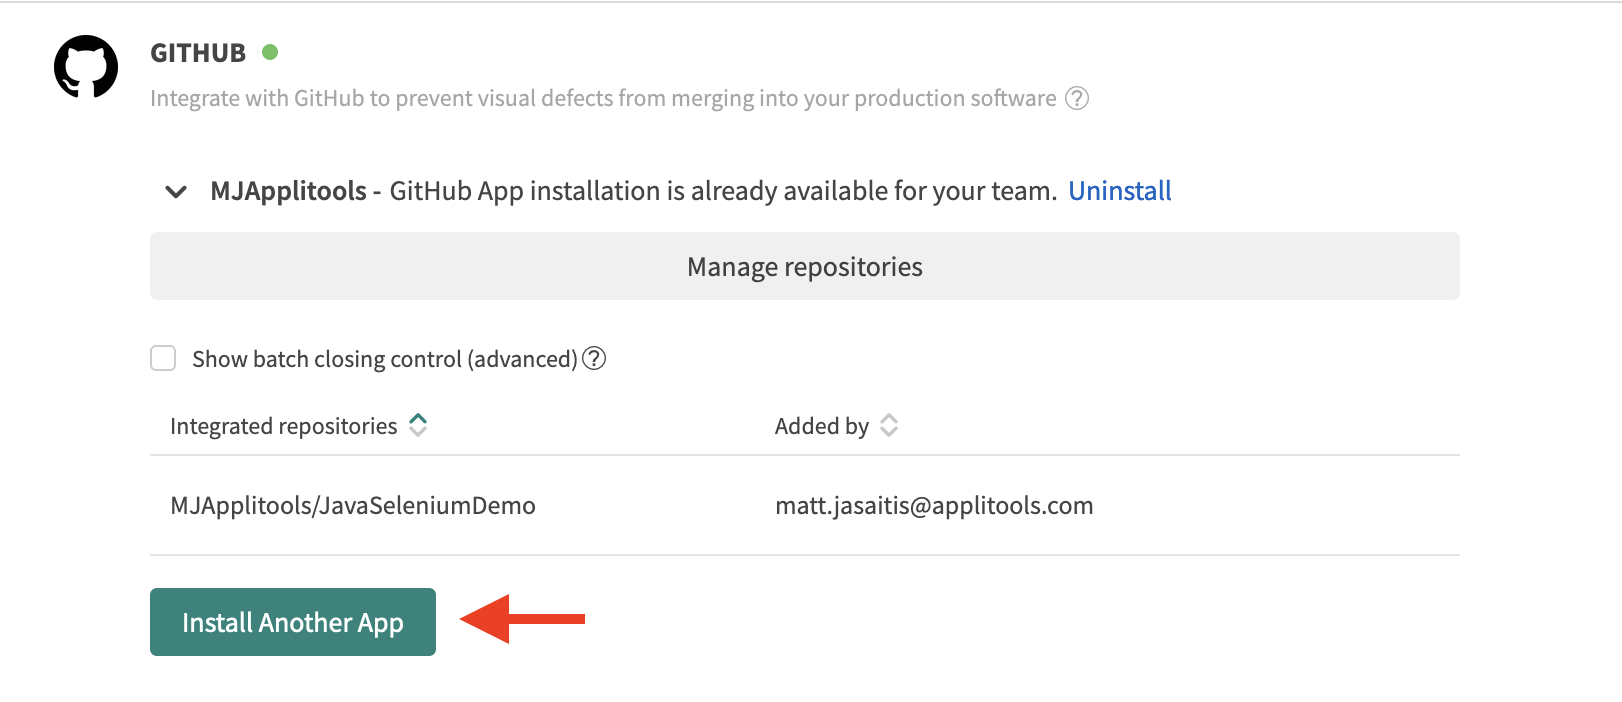
If at least one GitHub app has been installed, click Manage repositories to select which repositories to work with. Continue with Configuring GitHub repositories.

-
If no Apps have been installed, or you need additional Apps, continue with Installing the GitHub App.
-
If you are prompted to select Applitools direct integration or GitHub App integration, then your system is currently configured to interact with GitHub using the legacy direct (OAuth-based) integration.
We recommend that you switch to using the GitHub App-based integration; select GitHub App integration, and continue with Installing the GitHub App below.

If you install multiple GitHub installations, the Applitools Org administrator can set Team permissions for each GitHub Installation on the Admin > Account screen. If permission settings have been enabled, any new GitHub installations will need to have permissions granted by the Applitools Org Admin.
-
Installing the GitHub App
This integration solution is intended for users that use the GitHub cloud and the Eyes Cloud. If you use a self-hosted GitHub system or have a private cloud or on-prem Eyes system, then you should use the Appltiools GitHub proxy service.
-
Click Install the App or Install Another App to start the installation process.
-
The GitHub installation wizard opens in a separate window. Select the GitHub Organization or user name under which you want to install the Applitools GitHub App. Typically, this will be your GitHub Organization and not a specific user.
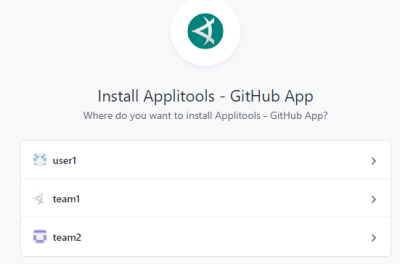
-
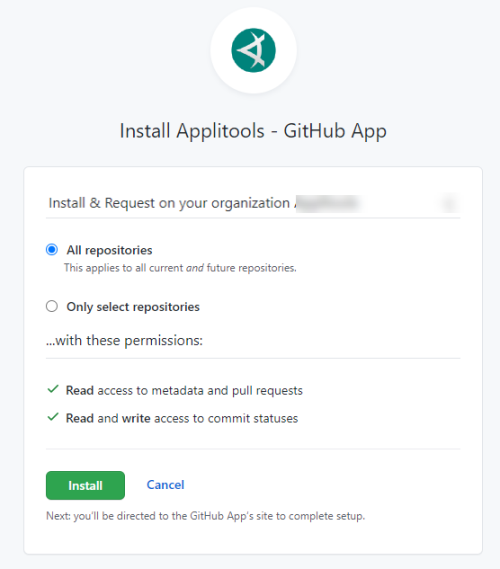
The GitHub wizard asks you which repositories you want to allow the GitHub App to access and tells you what access type is being granted. We recommend that you allow access to all current and future repositories, since this GitHub App installation serves your entire organization.
If you select only specific repositories at this point, if other repositories need to be added at later point in time, you will need to configure the Applitools GitHub directly on the GitHub site.
-
Click on the Install button. A confirmation message appears. Click OK to complete the process.
If in the GitHub dialog you see a Install and Request or Request button, instead of Install then there is an issue with your GitHub permissions. Click Cancel to exit from the GitHub installation process. The Installation process has not been completed window will open with a link that you can copy and send to your GitHub organization administrator to complete the integration.
Configuring Github Repositories
-
Click Manage repositories

-
Select the GitHub organizations and repositories on which your team runs tests and click the Apply button.
If the list of repositories is large, you can type text in to the filter to display only repositories that include that text.
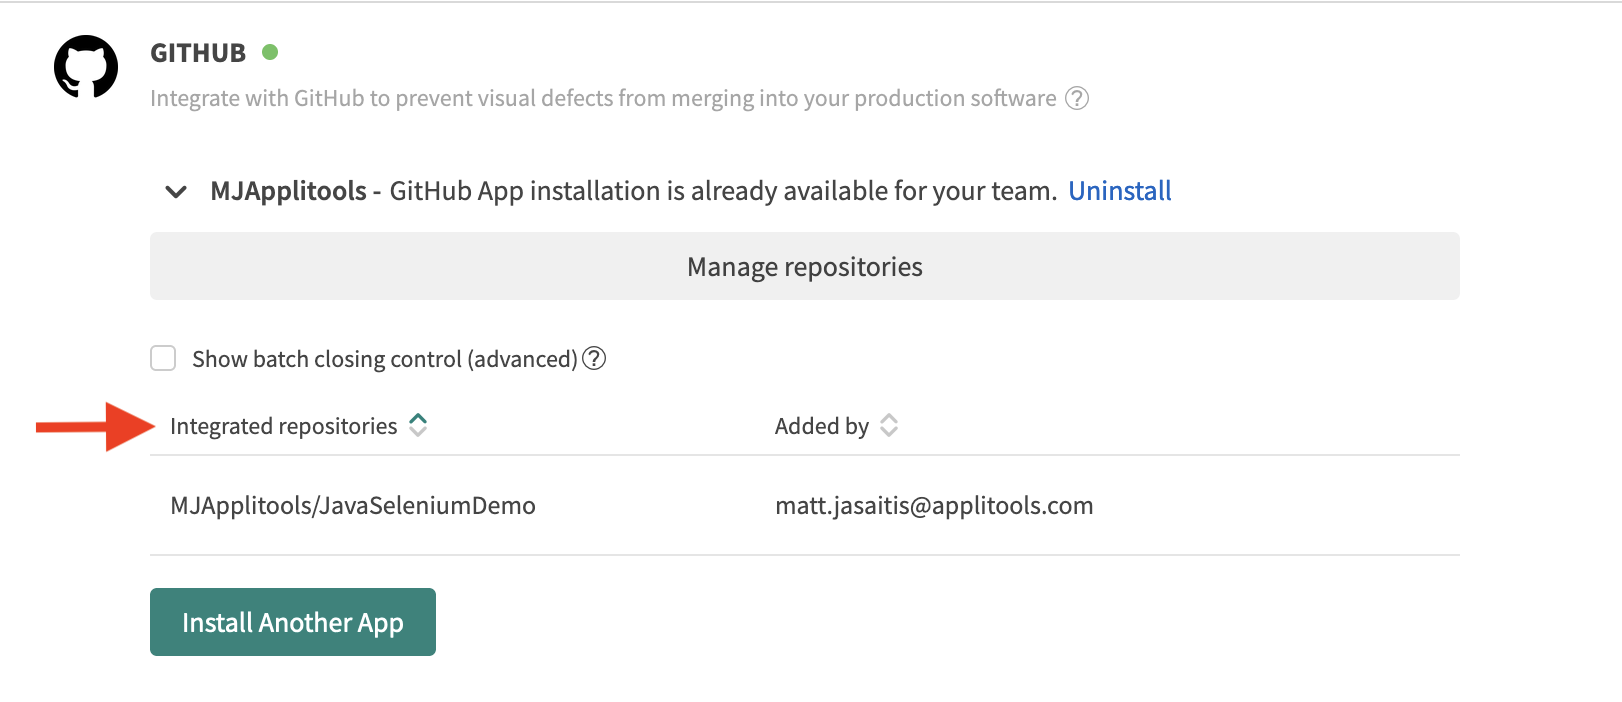
After you click Apply a list of integrated repositories is displayed in the Github Integration section.
-
By default, GitHub integration closes a batch automatically once the CI build operation is completed. If your build runs concurrently or consists of multiple tests and you want all of the results to appear together in a single batch, disable automated batch closing and close the batch explicitly when the build is complete in your CI.
To set which repositories should have automated batch closing, select Show batch closing control.
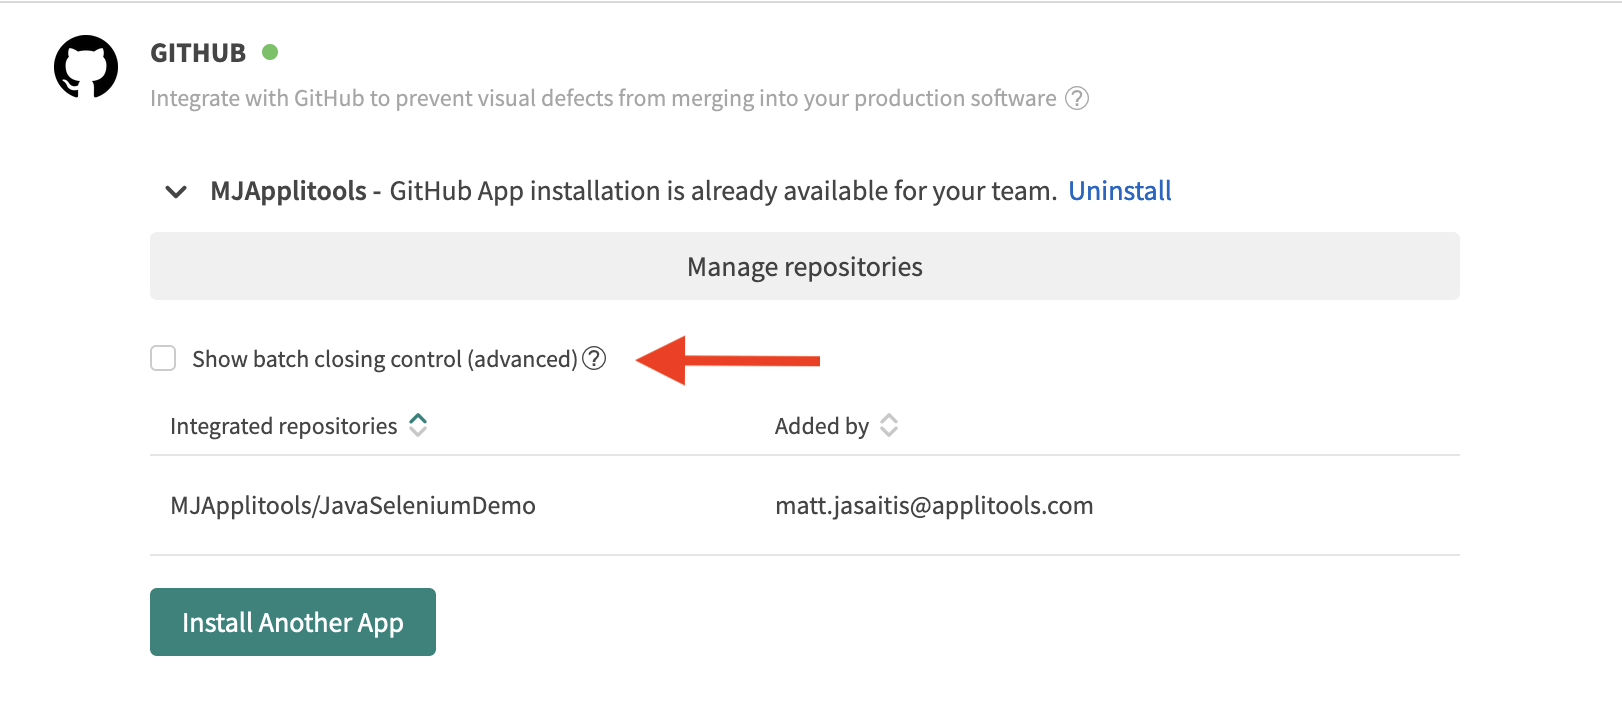
If you disable automated batch closing, then you must notify closing of the batch explicitly, as described in Configuring Your CI.
Uninstalling the GitHub App
If the GitHub App is installed, and you want to uninstall it:
-
Navigate to the Admin page. Note that this page is only available if you have Admin privileges.
-
Click on the Teams tile.
-
Click on the row of the team you want to configure.
-
Click on the Integrations tab.
-
Click on the GITHUB row.
-
Click on the Uninstall button.
-
A warning message appears stating that the GitHub App will be uninstalled for all the teams in the organizations.
-
Click Uninstall.
-
If you do not want to uninstall the GitHub App, click Cancel to close the warning message.
If a problem occurs during the uninstall procedure, for example you do not have the appropriate permissions on the GitHub site, a message is displayed with information about the problem that you can provide to your GitHub Admin.
Configuring Your CI
Once you have enabled Github integration, you need to set up your CI to configure the Eyes SDK with information related to the GitHub pull request or commit request. To allow the Eyes Batch to integrate data received from the GitHub server, you need to set the following Environment variables:
-
APPLITOOLS_API_KEY- Your API key. See How to obtain your API key. -
APPLITOOLS_BATCH_ID- The GitHub commit SHA of the current build. This also must be set as an environment variable before running Eyes tests.- For a Pull request, the SHA value must be the last commit in the source branch.
- For a Push action, the SHA value must be the last commit in the branch that was pushed.
-
APPLITOOLS_BATCH_BUILD_ID- (optional) The GitHub build ID. This is required if you run multiple builds in parallel on the same commit SHA, for example, parallel push and PR builds of the same source branch. You can obtain the GitHub build ID from your CI, for example in GitHub Actions, access the build ID using theGITHUB_RUN_IDenvironment variable which contains the unique identifier for the current workflow run.If you run parallel push and pull requests, you need to disable Automatic Batch Closing, (see Disabling automated batch closing) and notify Eyes when a build is complete.
If Eyes cannot recognize the End of Build event, (for example in your CI system, GitHub cannot recognize identify an End of Build event, or you have multiple concurrent builds), you also need to add a cURL command to notify Eyes when all builds are complete. For details, see Notifying Eyes when a build is complete.
Preparing Your Code For A Commit Push Action
You need to add an API call to the CI script that will inform Applitools each time there is a commit push action.
curl -L -d '' -X POST "$APPLITOOLS_SERVER_URL/api/externals/github/push?
apiKey=$APPLITOOLS_API_KEY&CommitSha=$APPLITOOLS_BATCH_ID&BranchName=<Branch name>
&ParentBranchName=<Parent branch name>"
<Branch name>represents the full GitHub branch name, including the organization, the repository, and the branch in the format my-org/my-repo/my-branch.<Parent branch name>is optional. The default is the master branch of the repository.- The
APPLITOOLS_API_KEYargument must be passed in the query and cannot be passed in the body. <APPLITOOLS_BATCH_ID>is the GitHub commit SHA of the current build.
Notifying Eyes When A Build Is Complete
By setting the APPLITOOLS_BATCH_ID environment variable, Eyes puts the results of all tests in a particular CI build in the same Test Manager batch. In some setups, you need to disable this automatic notification and add a command to notify Eyes when a build is complete. Below are the most common setups when this command is needed:
- In your CI system, GitHub cannot recognize an End of Build event, in which case add the cURL command to the end of the build script to notify Eyes that the build is complete.
- If you have multiple concurrent builds, or parallel push and pull requests, add the cURL command to the end of main script build to prevent Eyes from receiving End of Build notifications before all builds have completed.
Synchronizing multiple concurrent builds
-
In the GitHub integration page of the Test Manager, follow the instructions to disable automatic batch closing described in Configuring GitHub repositories. This is a one-time configuration that needs to be done by each team for each repository that has concurrent builds.
-
Add an cURL command at the end of the build script to tell Eyes that the build is complete. The following is an example of the required script in a Linux-based system:
curl -X POST "$APPLITOOLS_SERVER_URL/api/externals/github/servers/<github server host>/commit/$APPLITOOLS_BATCH_ID/$APPLITOOLS_BATCH_BUILD_ID/complete?apiKey=$APPLITOOLS_API_KEY"Where:
$APPLITOOLS_SERVER_URL- The URL of the Eyes server as configured in Configuring Your CI.<github server host>- The URL of the Eyes server. If you use the public GitHub server, the URL isapi.github.com.$APPLITOOLS_BATCH_ID- The Commit SHA of the current build as configured in Configuring Your CI.APPLITOOLS_BATCH_BUILD_ID(optional) - The GitHub build ID$APPLITOOLS_API_KEY- Your API key.
Working With The Github Integration
Once you have configured the GitHub repositories, you can use your CI and GitHub in the usual way. A CI job is normally triggered by a push to your repository, and this, in turn, runs your Eyes tests.
The Eyes/GitHub integration is based on the GitHub all commits. When there is an open all commits, Eyes adds the following functionality to your GitHub workflow:
-
When your CI initiates a build that includes an Eyes test, Eyes detects that the run is associated with a GitHub pull request and searches for a baseline to use as a reference. Eyes checks for a matching baseline in the following order:
- On a branch that corresponds to the repository name and source branch defined by the all commits.
- If there is no such branch, Eyes creates a branch and populates it with the latest baseline for that test from the repository name and target branch defined by the all commits
- If there is no such baseline, Eyes marks the test as New.
-
Eyes sends GitHub status information that is displayed on the GitHub All Commits panel. Lines with an Eyes test status have an Applitools icon .
-
There is an option to have the name of the Applitools team included in the check name, this allows you to divide batches by Applitools team and use the same pipeline whenever a commit is done, even on the same repository (monorepo configuration), to enable this option, contact Applitools support.
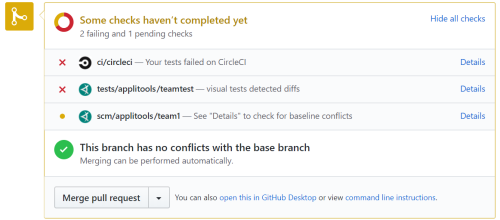
-
The item labeled
tests/applitoolsindicates the results of the Eyes test that ran as part of this build. In this case, theicon indicates that some differences were found and need to be resolved.
A
icon indicates that all of the Eyes tests passed. If you click on the Details link, the browser switches to the Test results screen of the Eyes Test Manager, showing the results of the tests in the most recent build related to that all commits.
If you click Accept on all of the steps of all of the tests, the
icon is replaced with the
(passed) icon in the GitHub pull panel.
-
The item labeled
scm/applitoolsrepresents the merge conflict status. In this example, theicon indicates that baseline conflicts have not yet been checked.
A
icon indicates that there are merge conflicts. After you resolve any conflicts, Eyes sends an updated status to GitHub, and the
next to the scm/applitools item is replaced with a
icon. Click on the Details link to open the Merge branches screen in the Test Manager. See Reviewing Branch Differences for more details.
-
You can merge the baseline changes of the source branch with the target in one of the following ways:
Merge the GitHub all commits as usual. This merges the Git files and, once this has completed successfully, Eyes is notified that it should merge the Eyes test baselines. Click on the Merge button on the Merge branches screen in the Test Manager (enabled only after all conflicts have been resolved). This operation is independent of any merge process in Git and occurs immediately, even if the GitHub merge has not been done.
By default, code merge is blocked if there are unsaved changes to the checkpoint as the SCM will not be marked as Passed. To enable or disable this setting, contact Customer Support.
Reviewing Branch Differences
Merging an Eyes source branch with a target branch results in adding new baselines to the target branch or updating its existing baselines according to baseline changes found in the source branch. Changes can include both updated baseline images and new, changed, or removed annotations (e.g. an added ignore region).
When working on a branch that is a child of another branch (the parent branch) and the child branch doesn't have a baseline, Eyes will use a fallback baseline from the parent branch.
Eyes knows how to compare two baselines and determine whether they can be merged automatically or whether user intervention is required. For example, an ignore region added to a source baseline step that did not change in the target baseline can be automatically added to the target baseline, but if another ignore region was added to the same step in the target baseline, user intervention is required to determine whether to keep only one of the added regions or both of them.
As described above, the item on the GitHub pull request page marked scm/applitools/team-name indicates the merge status of the Eyes baselines in the source branch.

Click on the Details link for this item, to view the Test Manager Merge branches page preloaded with the source and target branches derived from the pull request. If there are no conflicts, then the Test Manager displays a pop-up window to confirm this.
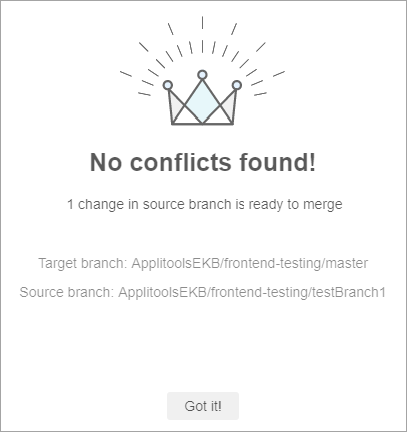
Click Got it! to close the pop-up.
Once you have resolved all conflicts, the merge status of the scm/applitools item in the GitHub pull request page changes to green (passed), and you can proceed to merge the branches, either from within the Test Manager by clicking the Merge button, or via the GitHub pull request page.
Github Proxy service
Eyes/GitHub integration requires two ways communication between the Eyes server and the GitHub server.
Communication from the Eyes server to the GitHub server is needed during the setup phase, when you select repositories to integrate with. The Eyes server uses the GitHub API to create webhooks in the selected repositories which send all the relevant GitHub events to Eyes. The GitHub API is also used to update the status when an Eyes batch is completed and the status needs to be updated on the GitHub commit or pull request.
Communication from the GitHub server to the Eyes server is needed when events are sent by the webhooks to the Eyes server
If your GitHub server is protected behind a firewall, and you cannot add a custom rule that exposes the relevant GitHub APIs so that Eyes can call them, you can use the Eyes-scm application to create webhooks on the relevant GitHub repositories. Using Eyes-scm, the Eyes server never calls the GitHub APIs directly, all calls are made through the application.
To use Eyes-scm, you need to set up integration and select the required repository in the Eyes-scm interface, not in the Eyes server admin dashboard.
Once integration is complete, the commit or pull request status update flow is also performed by Eyes-scm. The Eyes-scm application constantly polls the Eyes server for status update commands and updates the status when needed on the GitHub server.
Creating the GitHub App for the Eyes integration
A GitHub App is an entity created and stored on the GitHub server that defines the access permission for third-party tools. The Applitools Eyes/GitHub integration requires such a GitHub App so that it can receive pull and push request events and update status information on the repositories where the executed test code runs.
-
On the GitHub server that stores your repositories, click on the option to create a GitHub App.
We recommend you name the app Applitools Eyes Integration, so that other teams in your organization can easily find the app and use it as well.
-
Enable the Webhook option.
-
Set the Webhook URL to:
https://<My_Org>.applitools.com/api/externals/github/v2/events?orgId=<orgId>&serverId=<GitHub server host>where
<My_Org>is the name of your Eyes server. This is the value that is typically assigned to the environment variableAPPLITOOLS_SERVER_URL, or is passed in the test code to the methodConfiguration.setServerUrlorEyes.setServerUrl.
- In the Webhook secret field, enter the text you want to use as the secret. Save this text, you will need it later when configuring Eyes.
- In the Repository Permission section, set the following permissions:
- Metadata - read only
- Pull requests - read only
- Commit statuses - read & write
- In the Subscribe to events section, select Pull request.
- Copy the value displayed in the App ID field. You will need this later when configuring Eyes.
- Click the Generate a private key button. This downloads a file with a .pem suffix. You will need the contents of the file later when configuring Eyes.
Installing the GitHub App
Once the GitHub App exists, you need to install it on your GitHub account. The procedure for doing this is described in the GitHub documentation.
All of the Eyes teams in your organization can share a GitHub App, or each team can create its own. The difference is only in the list of repositories configured for the GitHub App. The simplest scheme is that a single GitHub App provides access to all of the repositories used by all of the Eyes teams. Alternatively, each Eyes team can create its own GitHub App that provides Eyes with access to that team's repositories.
Installing the proxy service
The Applitools proxy service is a Node.js-based program that runs in the background, continually polling the Eyes server to see if it needs to update the GitHub server with status information. When Eyes indicates that it wants to update the status, the proxy service interacts with GitHub on behalf of Eyes.
Users need to complete a one-time configuration of the proxy service in order to provide access permission and other information that the service needs to implement the Eyes/GitHub interaction. This is done by accessing the proxy server using a browser.
Prerequisites
Before installing the proxy service, you must have:
- Node.js installed (version 12 or later)
- Yarn Installed
- Information from the GitHub App creation:
- Webhook secret
- App ID
- Content of the .pem file from the GitHub App installation.
- The Eyes server URL, this is the URL that you use the open the Test Manager
- Your Eyes organization ID, available in the Admin/Account page in the ID field.
One-time setup
Set up the following environment variables so that they are available to the proxy service.
# set the Eyes server URL to your server
EYES_SERVER_URL=https://myOrg-eyes-api.applitools.com
#set the Eyes organization ID
EYES_ORG_ID=xx1234HxxXv987AB24q1vlF25BxxYaZ1234x5Hk3XaSa111
# set the HTTP port the proxy service should use (optional - default is 4000)
PORT=1234
To install the proxy server run the following from any command shell:
npm i -g @applitools/eyes-scm
Running and configuring the server
Use the following command to start the server:
eyes-scm
Configuring repositories and access credentials
The first time your run the server, you need to define the repositories you want to allow Eyes to access and provide the necessary Eyes and GitHub credentials. To do this, start the proxy service and then access it with a browser.
-
Make sure the proxy service is running as described in One-time setup.
Start a browser on the server where the proxy is running and navigate to the proxy service. The default URL is
localhost:4000. -
Select Github as the source control management system.
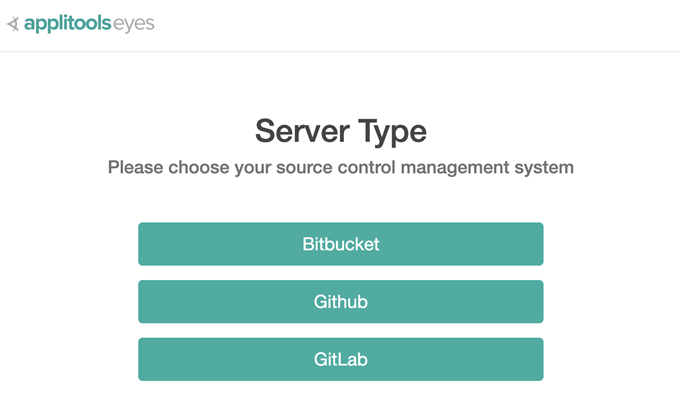
-
Enter an Eyes API key with Team Admin rights and full privileges.
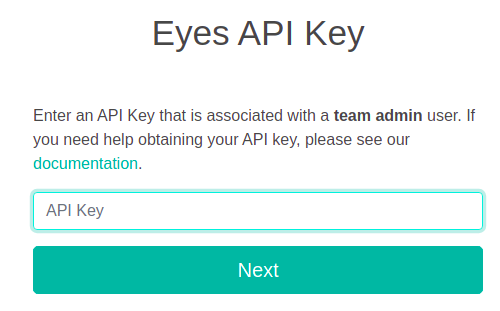
-
Click Next
-
If this is your initial installation, click Add a new server.
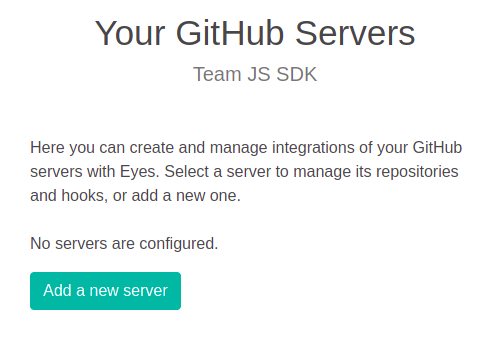
If you are reconfiguring an existing installation, then you will see a list of GitHub servers that are currently installed. Either select an existing server from the list or click on Add a new server.
-
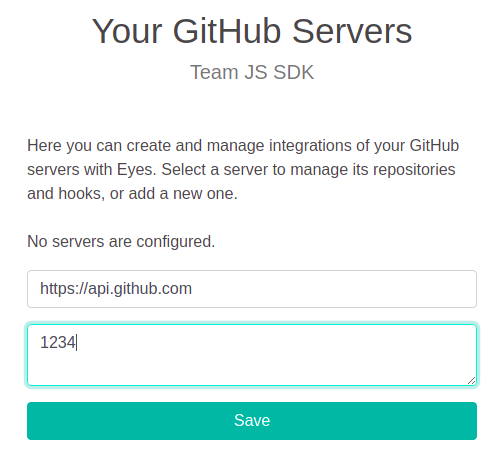
Enter the URL of your GitHub server and the secret entered when the GitHub App was created.
-
Click Save
-
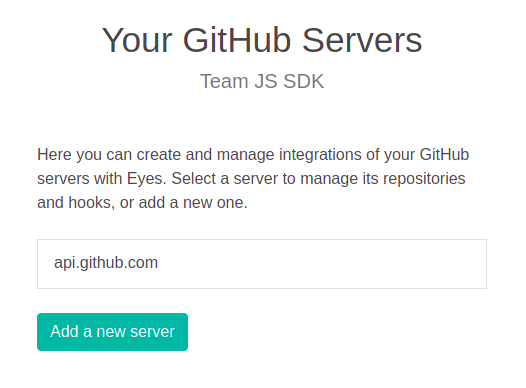
In the list of servers, click on the server to configure it.
-
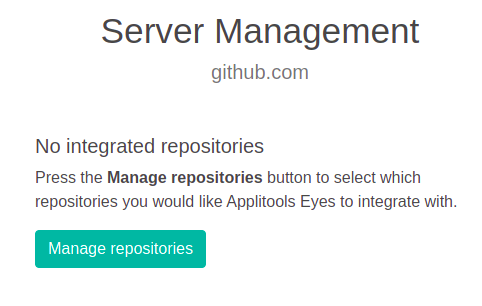
On the first installation, no repositories will have been enabled, click Manage Repositories to select the repositories that you want Eyes to integrate with.
-
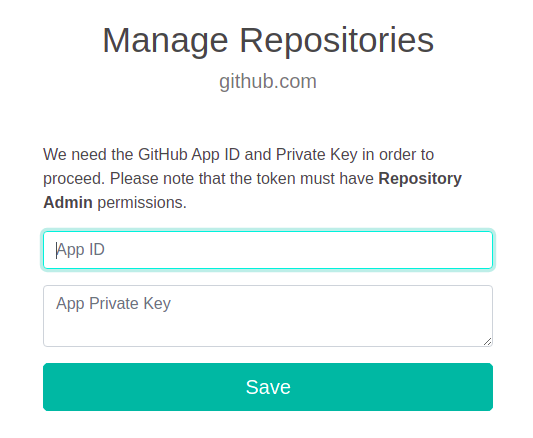
On the first installation, as repositories have been enable the dialog will ask you to enter the GitHub App ID and the App private key (the entire contents of the downloaded .pem file). Enter these details and click Save.
-
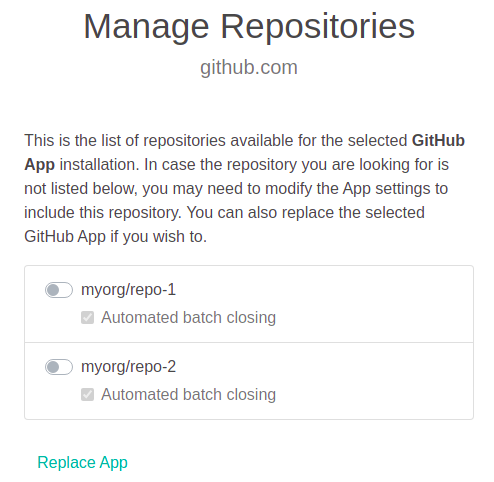
A screen with a list of all the repositories on the SCM server is displayed. The first time you configure the proxy service, all of the repositories are disabled (grayed out). Enable the repositories that you want Eyes to access.
-
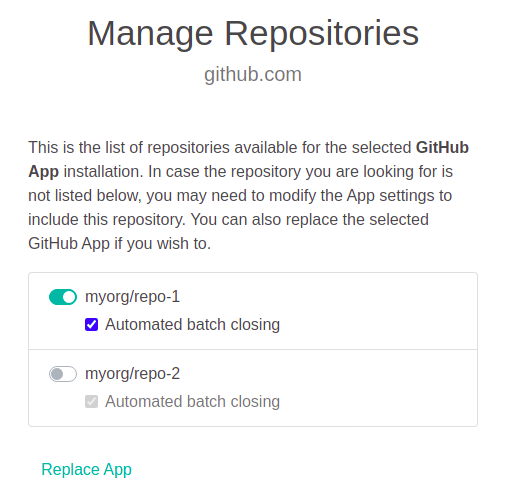
By default, GitHub integration closes a batch automatically once the CI build operation is completed. If your build runs concurrently or consists of multiple tests and you want all of the results to appear together in a single batch, disable automated batch closing and close the batch explicitly when the build is complete in your CI.
To disable Automated batch closing, clear the checkbox for the that repository.
Disabling automated batch closing
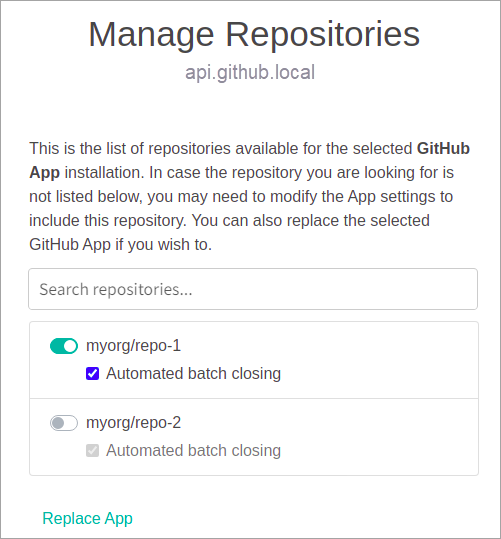
By default, GitHub integration closes a batch automatically once the CI build operation is completed. You many need to disable automatically closing, for example if you have parallel push and pull requests, or run builds concurrently or you have builds that consists of multiple tests and you want all of the results to appear together in a single batch. If you disable automated batch closing, you need to close the batch explicitly when the build is complete in your CI.
To disable Automated batch closing, clear the checkbox for the that repository.
Changing the configuration
If you want to enable or remove access to repositories, or to change the Eyes API Key or the GitHub App, then open the browser to the proxy service, as described above, and make the necessary changes.
As part of the GitHub integration, the Eyes server sends batch status information to the GitHub server. Applitools provides two different ways to implement this Eyes/GitHub interaction:
-
Eyes/GitHub HTTPS interaction. This is the recommended method when Eyes can directly interact with a GitHub cloud or on a on-premise GitHub server where Eyes has permission to access the network.
-
Eyes/GitHub interaction using a proxy service. This method is used when direct access by Eyes to GitHub is not available.
Configuring Direct Eyes/GitHub Integration (Legacy)
This section describes how to configure the legacy Eyes/GitHub integration (based on OAuth authorization). This option is only available if it was previously configured by your organization before GitHub App based integration was available. The solution typically requires you to whitelist the Eyes server on the GitHub server, you can avoid this by using the GitHub App based Eyes integration.
Configure The Integration
You must have Eyes Team admin rights to configure the Eyes/GitHub integration.
The configuration consists of the following steps:
-
Navigate to the Admin page. Note that this page is only available if you have Admin privileges.
-
Click on the Teams tile.
-
Click on the row of the team you want to configure.
-
Click on the Integrations tab.
-
Click on the GITHUB row.
-
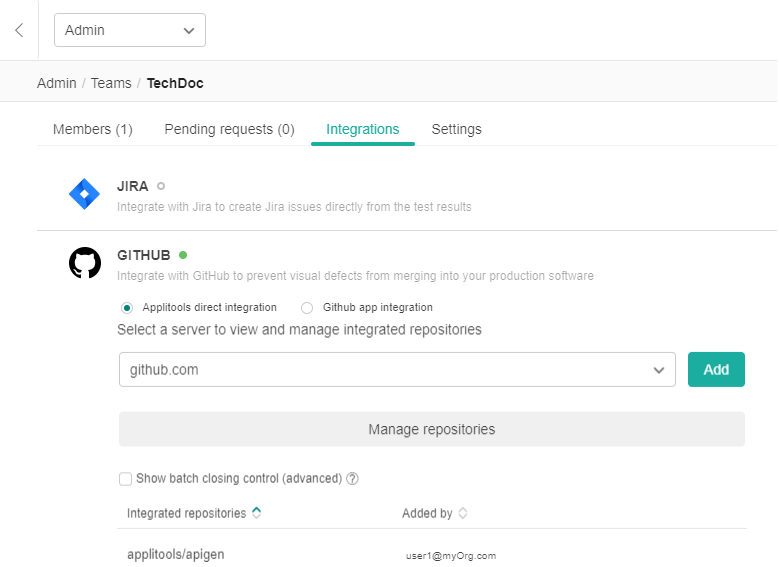
Make sure that the Applitools direct integration option is selected.
-
If your organization uses an Eyes Cloud server and the public github.com cloud, then you can skip this step and continue with step 9 below. If your organization has a GitHub Enterprise server or if you have an on-premise Eyes Server, then this one-time step needs to be completed, and it is then applied to all of the teams in the account. In the box displaying the server names, click on the dropdown to open the server selection menu and select your GitHub server. If your server is not yet on the list, then click on the Add button and add the hostname of your GitHub server and the other details as directed by the wizard.
-
The GitHub Enterprise server is an on-premise server; therefore, you need to white list the Eyes server. You should white list inbound HTTPS traffic from the Eyes server to the on-premise GitHub Enterprise server in your company's firewall. If you use the public cloud, then you need to white list
eyes.applitools.com, and if you use a private cloud, then you need to white listhttps://myServer.applitools.comIf you can not whitelist your server then the recommended solution is to use the Applitools GitHUb proxy server see Using the Applitools GitHub proxy service. -
Click the Manage repositories button and in the dialog that opens, select the check boxes of the repositories that you want to activate in the Eyes/GitHub integration. The dialog includes a Filter repository name field that you can use to narrow down the set of repositories that are displayed. If you enter text in the box, only repositories that include that filter text are displayed.
-
If your build runs as a single instance, you can now proceed to configure the CI - see Configuring your CI.
-
If your build runs as multiple concurrent instances, then you need to take extra steps to ensure that the test results from all of the builds appear together in a single Test Manager batch. This is required if you have parallel push and pull requests.
-
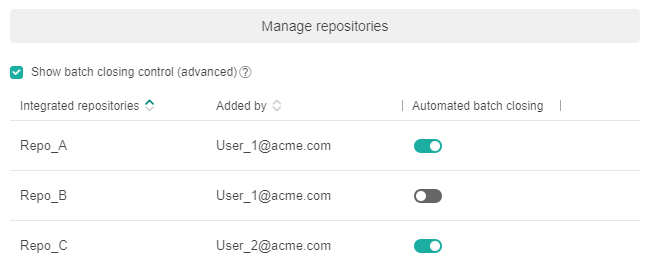
Select the Show batch closing control (advanced) check box. The Test Manager adds an another column labeled Automated batch closing that provides a toggle switch for each repository in the list of repositories.
-
If the toggle switch for a repository is enabled (the default), when a build finishes execution, Eyes closes the batch. If the CI runs the build in multiple concurrent instances, then the test results from the concurrent build may appear in the same batch or in a different batch. In order to ensure that for a given repository build, all of the test results from all of the builds appear in a single batch, disable the toggle for that repository.
-
If you disable automated batch closing for a repository, you need to ensure that the CI notifies Eyes when all of the concurrent builds are complete so that Eyes can then close the batch.
-