Applitools Bitbucket Integration
The Eyes-Bitbucket integration builds on the branching capabilities in Eyes, and on the Bitbucket pull request and commit functionality.
Eyes supports multiple branches, each of which can consist of multiple test baselines. This lets you create a new branch based on an existing branch, make independent updates to the baselines in each branch, compare branches to detect conflicts, and then merge the baselines in each branch.
Bitbucket integrates with Eyes in the following aspects:
-
Eyes tests are automatically configured to use and save baselines in branches whose name is derived from the Git branch names.
-
All visual UI tests that are in a specific CI build, are automatically batched together, with a batch name that includes the Git commit information.
-
The Bitbucket Pull Request panel includes a status indicating the latest visual UI test results and merge status.
-
The Bitbucket Commits panel also includes a status indicating the visual UI test result.
-
When you initiate a Bitbucket pull-request merge, an Eyes branch merge is automatically triggered.
Setting up the Eyes Bitbucket Integration
You can integrate Bitbucket with Applitools Eyes using the Bitbucket public cloud (bitbucket.org), or a private Bitbucket server.
If the Bitbucket server or data center are deployed behind a company firewall, you need to whitelist inbound HTTPS traffic from the Eyes server to your Bitbucket server. If you use the Eyes Public server, the Eyes server is https://eyes.applitools.com. If you have a dedicated on-prem server, enter a URL in the format https://<My Organization>eyes.applitools.com.
If you cannot whitelist the Eyes server then you should use the Applitools proxy server, for details see Configuring Bitbucket integration with a proxy server.
The Bitbucket repository access token requires full Eyes team administration privileges.
Enabling Bitbucket integration
-
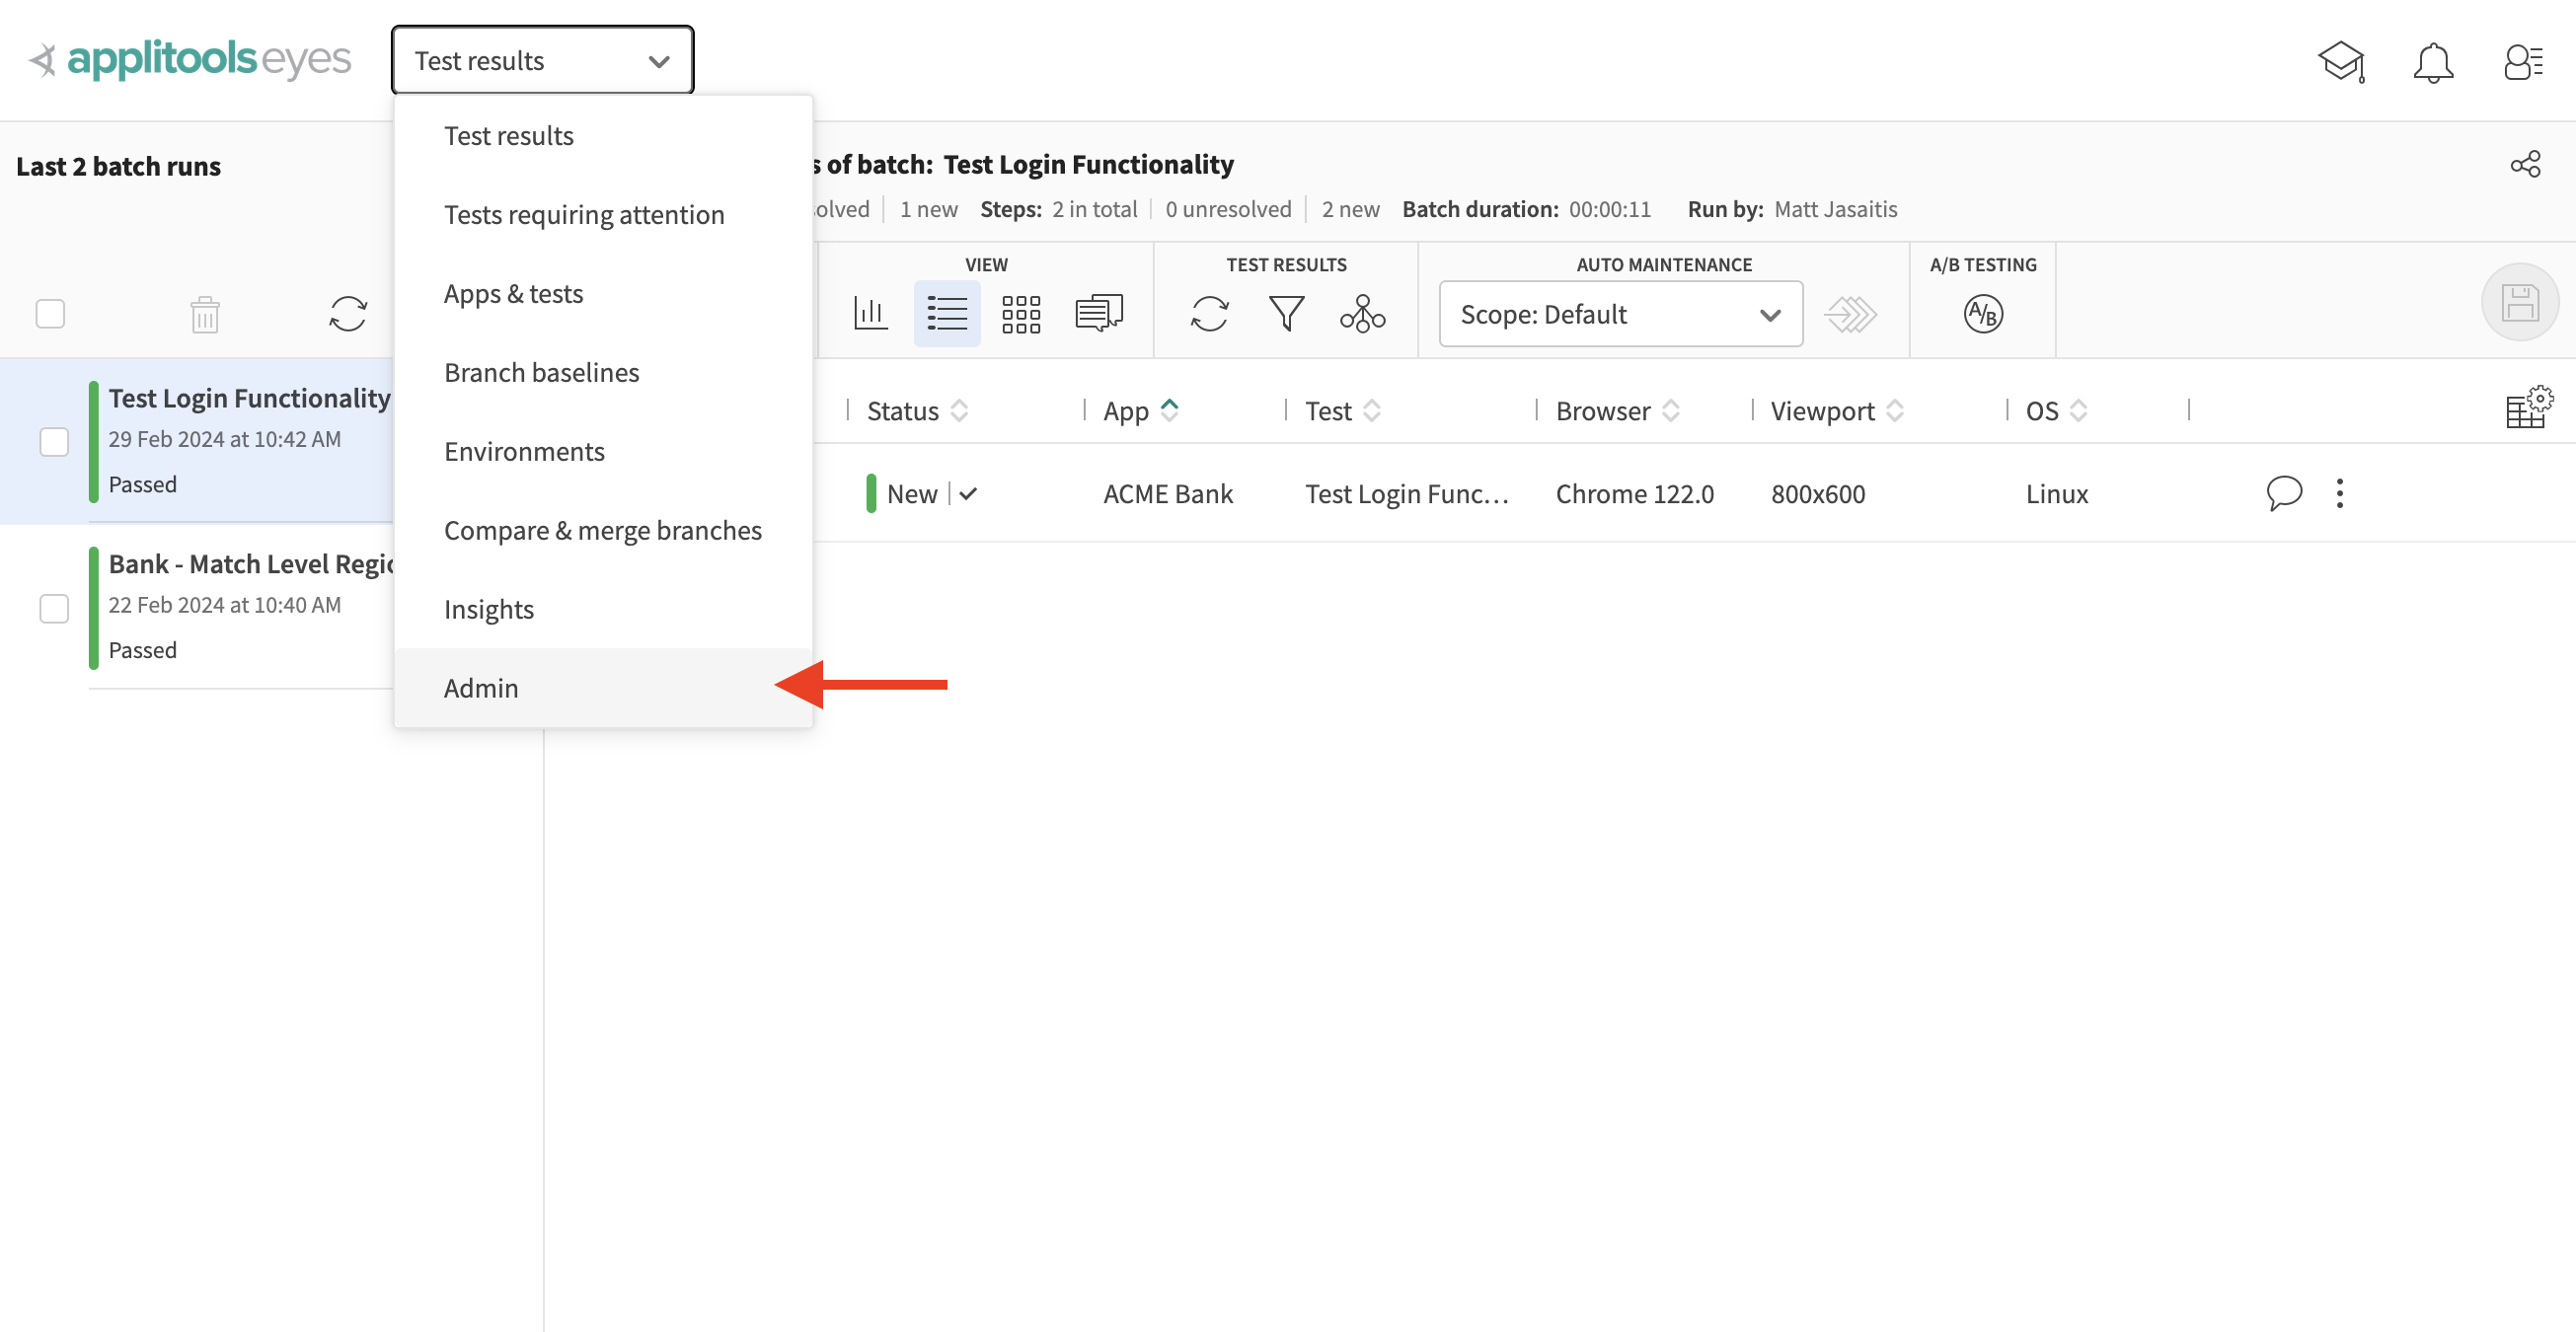
Navigate to the Admin Panel
-
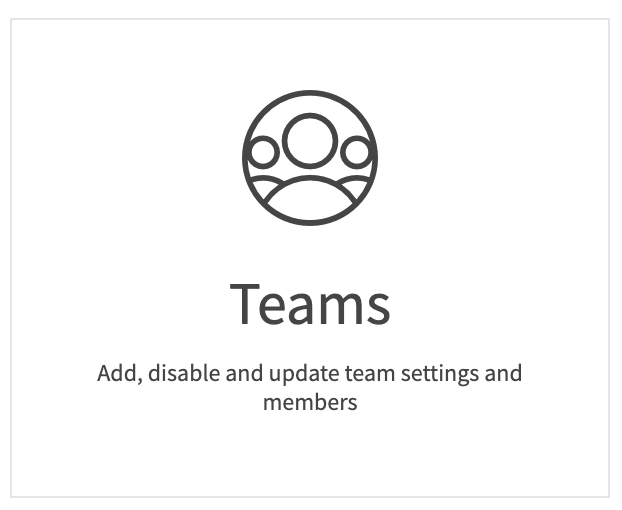
On the Admin panel, click on the Teams tile
-
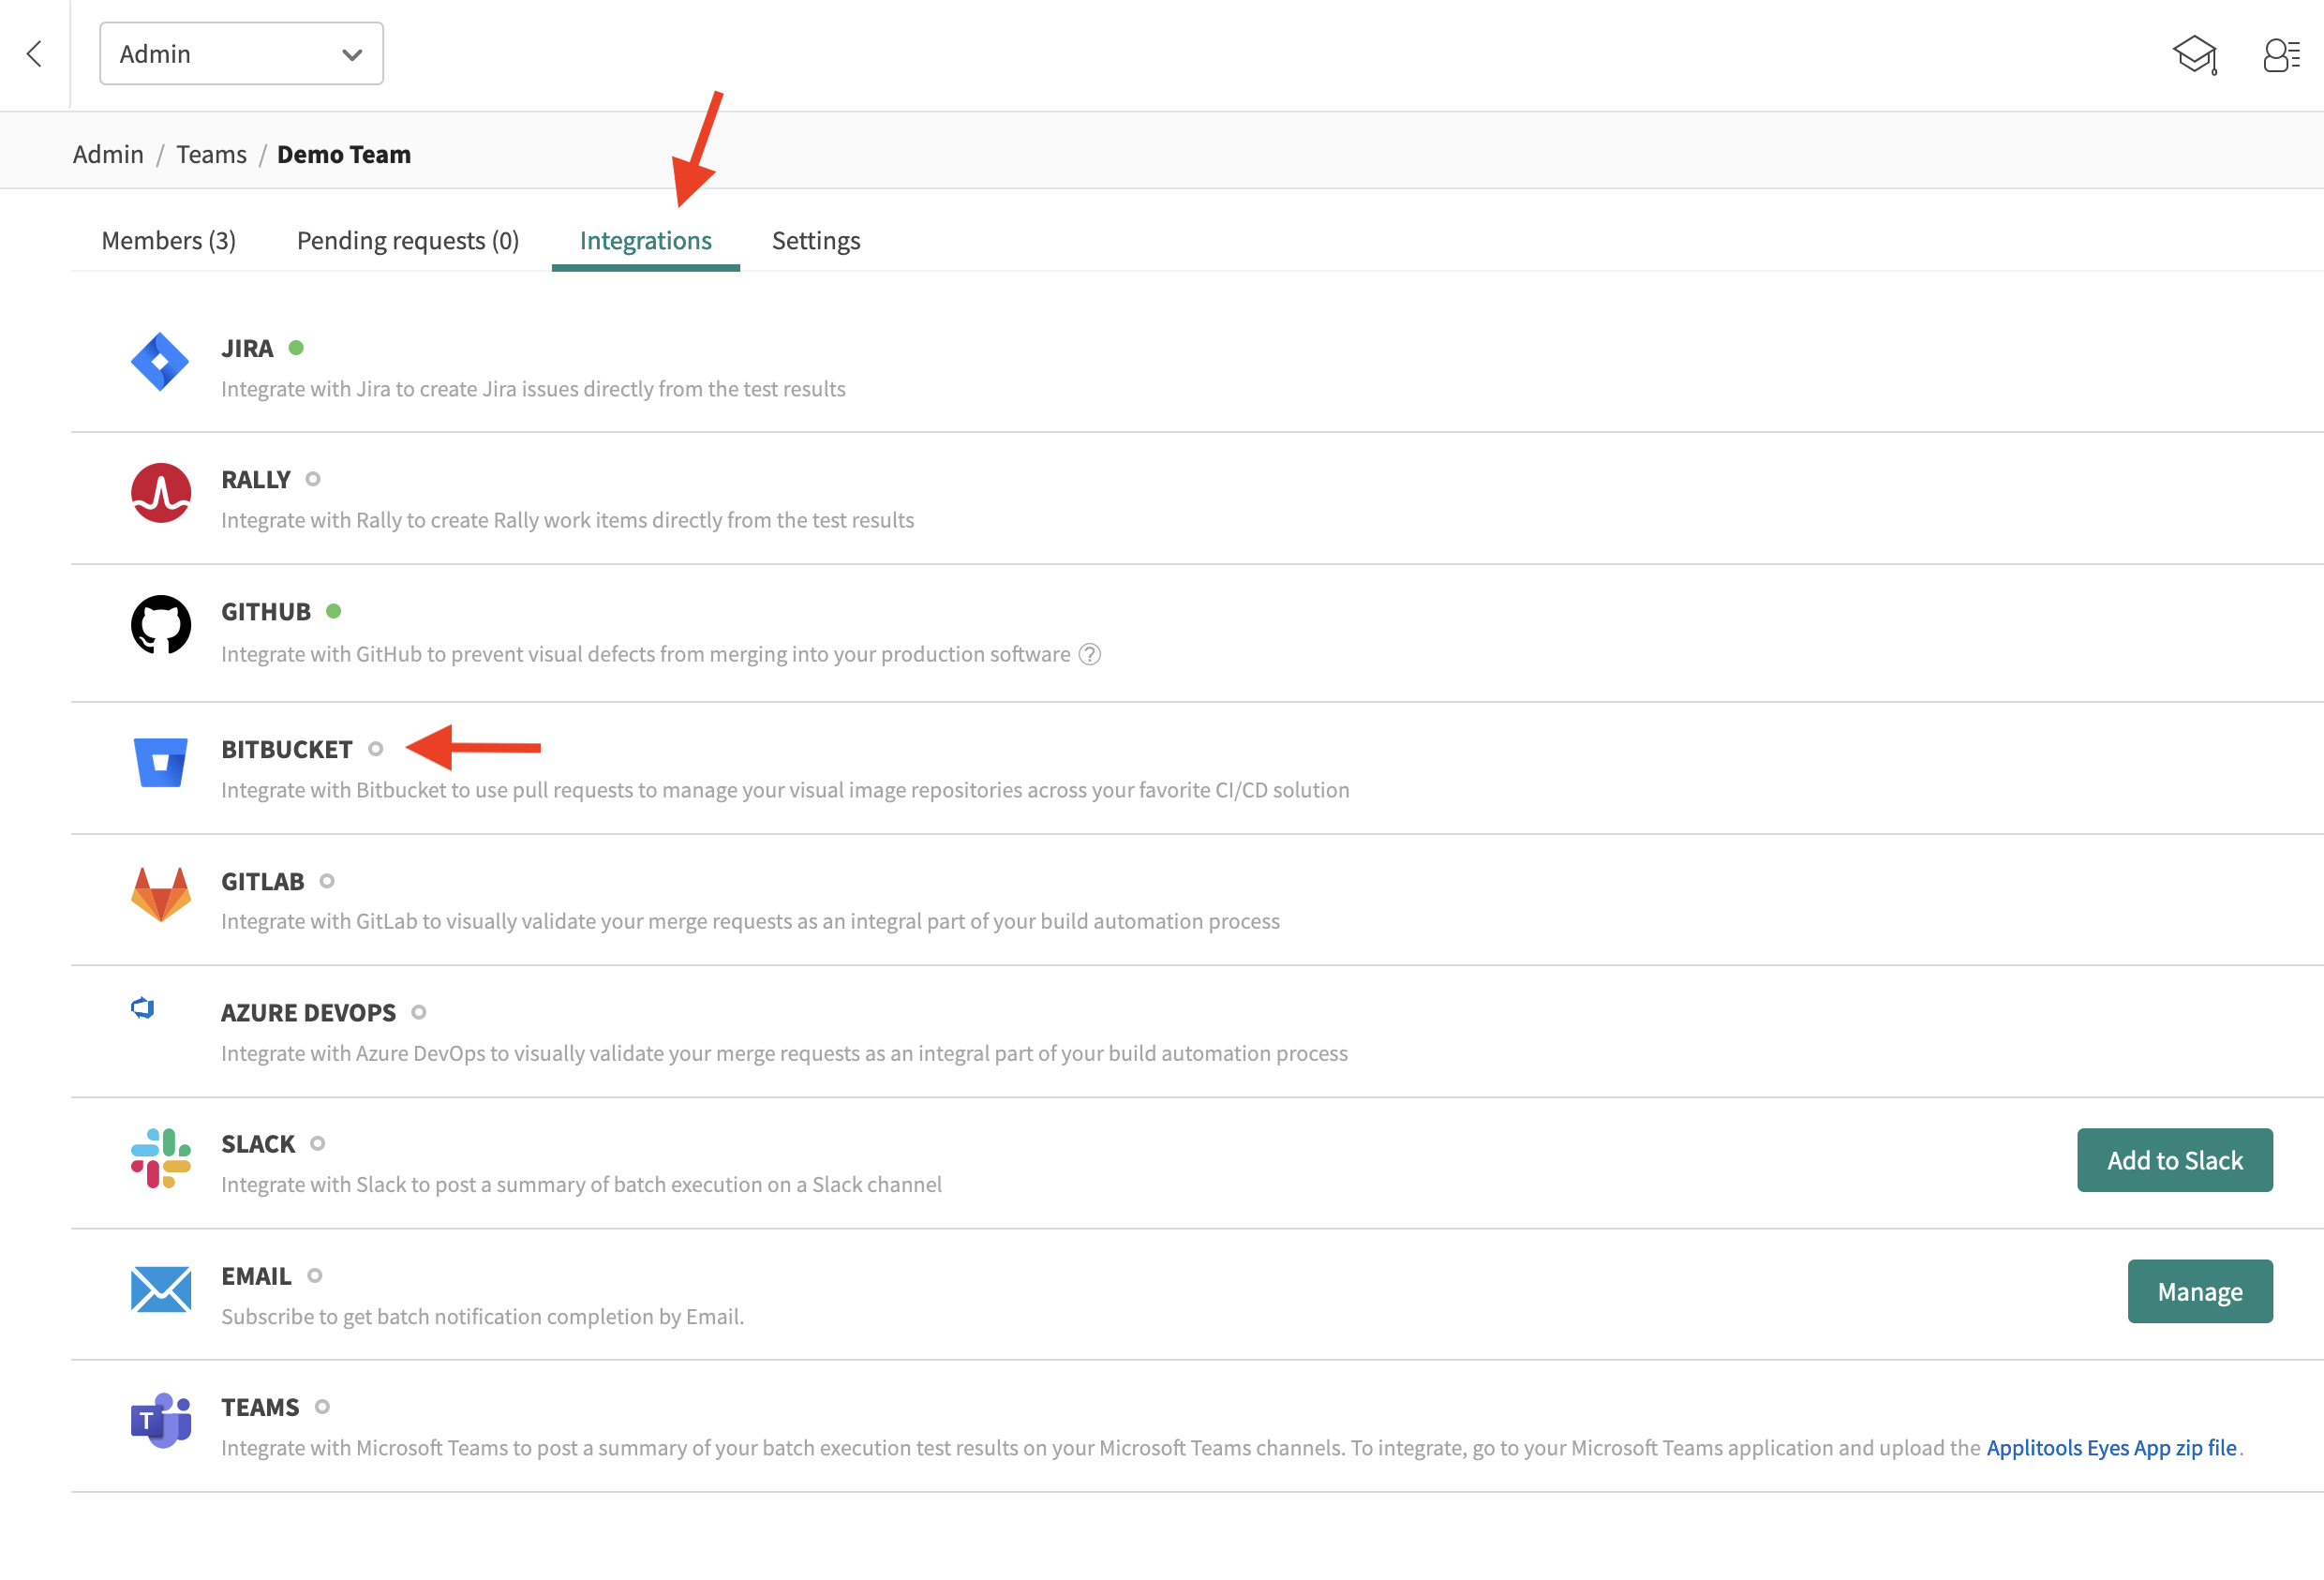
Click on the name of the team you want to configure.
-
On the Integrations tab, click Bitbucket.
-
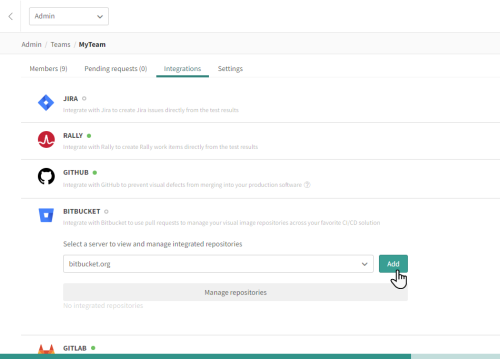
If you use the public Bitbucket server, select bitbucket.org
If you use a private Bitbucket server, click Add and enter the URL of the bitbucket server. You must have authorization to add and remove webhooks for the repositories that you want Eyes to be integrated with.
-
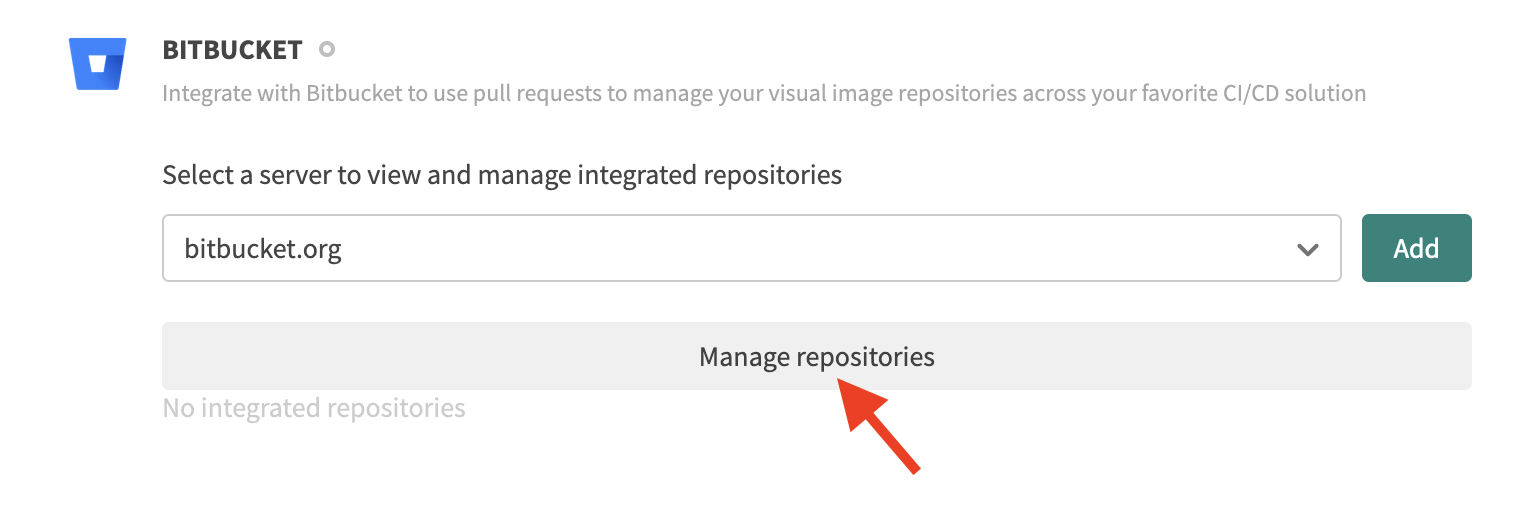
Click the Manage repositories button.
-
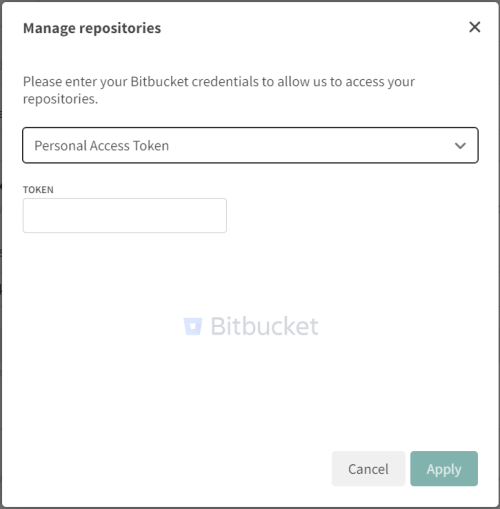
If you use a public cloud, click sign in with Bitbucket and give Bitbucket access to the repository.
If you use a private Bitbucket server, In the Manage repositories window, enter your PAT and click Apply.
Configuring Your CI
Once you have setup Bitbucket integration, you need to set up your CI to configure the Eyes SDK with information related to the Bitbucket pull request or commit request. To allow the Eyes Batch to integrate data received from the Bitbucket server, you need to set the following Environment variables:
-
APPLITOOLS_API_KEY- Your API key. To obtain your key see How to obtain your API key. -
APPLITOOLS_SERVER_URL- The URL of the Eyes server. If you use the public Eyes server, the URL ishttps://eyes.applitools.com
You also need to set the following Build configuration:
APPLITOOLS_BATCH_ID - The Commit SHA of the current build. This also must be set as an environment variable before running Eyes tests.
If Eyes cannot recognize the End of Build event, (for example in your CI system, Bitbucket cannot recognize identify an End of Build event, or you have multiple concurrent builds), you also need to add a cURL command to notify Eyes when all builds are complete.
Working With The Bitbucket Integration
Once your system is configured to work with Bitbucket, use your CI and Bitbucket in the usual way. A CI job is normally triggered by a push to your repository, which then runs your visual UI tests.
Pull request workflow
When there is an open pull request, Eyes adds the following functionality to your Bitbucket workflow:
-
When your CI initiates a build that includes an Eyes test, Eyes detects that the run is associated with a Bitbucket pull request and searches for a baseline to use as a reference. Eyes checks for a matching baseline in the following order:
-
On a branch that corresponds to the repository name and source branch defined by the pull request.
-
If there is no such branch, it creates a branch and populates it with the latest baseline for that test from the repository name and target branch defined by the pull request.
-
If there is no such baseline, the test is be marked as "New".
-
-
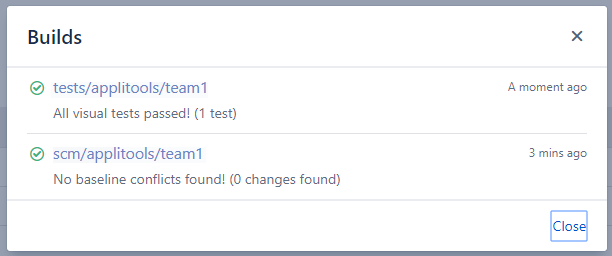
Eyes sends Bitbucket status information that is displayed on the Bitbucket Pull requests panel as shown below. Similar information is also displayed in the Bitbucket Commit panel. The name of the Applitools team is included in the build name.
-
The item labeled tests/applitools/team1 indicates the results of the visual UI test that ran as part of this build.
indicates that all the visual UI tests passed.
indicates that some differences were found and need to be resolved, that the test failed to complete successfully, or that the merge process identified conflicts.
indicates that the test is in progress.
-
The item labeled
test/applitools/team1is a link. Click on the link to open the Test results screen of the Eyes Test Manager, which shows the results of the tests in the most recent build related to that pull request.- When dealing with differences, if you Accept all the steps of all the tests, then when you go back to the Bitbucket Builds panel, the (error/difference) is replaced by a (passed).
-
The symbols adjacent to the item labeled
scm/applitools/team1represents the merge conflict status. An icon indicates that there are merge conflicts. After you resolve any conflicts Eyes will send an updated status to Bitbucket, and you will see an icon next to the scm/Applitools/team1 item.-
You can merge the baseline changes of the source branch with the target branch in the following ways:
-
Click the Merge button on the Compare and merge branches page in the Test Manager (enabled only after all conflicts have been resolved). This operation is independent of any merge process in Git and occurs immediately, even if the Bitbucket merge was not done.
-
Merge the Bitbucket pull request as usual. This first merges the Git files and, once this has completed successfully, Eyes is notified that it should merge the visual UI test baselines.
-
By default, code merge is blocked if there are unsaved changes to the checkpoint as the SCM will not be marked as Passed. To enable or disable this setting, contact Customer Support.
-
-
Reviewing and resolving branch
Merging an Eyes source branch with a target branch results in adding new baselines to the target branch or updating its existing baselines according to baseline changes found in the source branch. Changes can include both updated baseline images and new, changed, or removed annotations (e.g. an added ignore region).
When working on a branch that is a child of another branch (the parent branch) and the child branch doesn't have a baseline, Eyes will use a fallback baseline from the parent branch. For details, see Baseline management on a child branch.
Eyes knows how to compare two baselines and determine whether they can be merged automatically or whether user intervention is required. For example, an ignore region added to a source baseline step that did not change in the target baseline can be automatically added to the target baseline, but if another ignore region was added to the same step in the target baseline, user intervention is required to determine whether to keep only one of the added regions or both of them.
As described above, the item on the BitBucket pull request page marked scm/applitools/team-name indicates the merge status of the Eyes baselines in the source branch.

Click on the Details link for this item, to view the Test Manager Merge branches page preloaded with the source and target branches derived from the pull request. If there are no conflicts, then the Test Manager displays a pop-up window to confirm this.
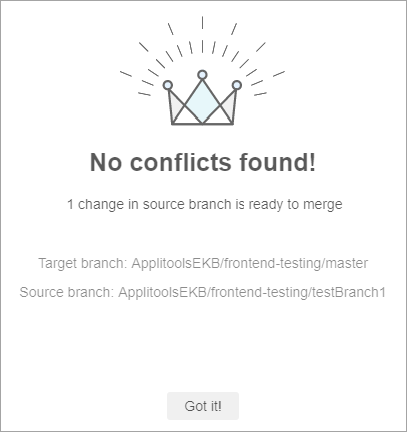
Click Got it! to close the pop-up.
If there are conflicts found, then you need to handle them by selecting either the target or source version of the conflicting baseline.
Once you have resolved all conflicts, the merge status of the scm/applitools item will update and the check will be marked as passed.
Commit push workflow
When a commit is pushed to a branch, Eyes adds the following functionality to your Bitbucket workflow:
-
When your CI initiates a build that includes an Eyes test, Eyes detects that the run is associated with a Bitbucket commit and searches for a baseline to use as a reference. Eyes checks for a matching baseline in the following order:
- On a branch that corresponds to the repository name and the name of the branch that the commit was pushed to.
- If there is no such branch, it creates a branch and populates it with the latest baseline for that test from the repository name and the master branch as defined in APPLITOOLS_PARENT_BRANCH. If the master branch has not been defined it will use the Eyes default branch.
- If there is no such baselines the test is be marked as "New".
-
Eyes sends Bitbucket status information that is displayed on the Bitbucket Commit panel as shown below. The name of the Applitools team is included in the build name.
Bitbucket Proxy Service
Eyes/Bitbucket integration requires two ways communication between the Eyes server and the Bitbucket server.
Communication from the Eyes server to the Bitbucket server is needed during the setup phase, when you select repositories to integrate with; the Eyes server uses the Bitbucket API to create webhooks in the selected repositories, the webhooks send all the relevant Bitbucket events to Eyes. The Bitbucket API also is used to update the status when an Eyes batch is completed and the status needs to be updated on the Bitbucket commit or pull request.
Communication from the Bitbucket server to the Eyes server is needed when events are sent by the webhooks to the Eyes server
If your Bitbucket server is protected behind a firewall, and you cannot add a custom rule that exposes the relevant Bitbucket APIs so that Eyes can call them, you can use the Eyes-scm application to create webhooks on the relevant Bitbucket repositories. When using Eyes-scm, the Eyes server never calls the Bitbucket APIs directly, all calls are made through the application.
To use Eyes-scm, you need to set up integration and select the required repository in the Eyes-scm interface, not in the Eyes server admin dashboard.
Once integration is complete, the commit or pull request status update flow is also performed by Eyes-scm. The Eyes-scm application constantly polls the Eyes server for status update commands and updates the status when needed on the Bitbucket server.
Installation
Prerequisites
Before installing the proxy service, you must have:
- Node.js installed (version 12 or later)
- The URL of the Eyes server that you use to open the Test Manager
- Your Eyes organization ID, available on the Admin/Account page in the ID field.
One-time setup
Set up the following environment variables so that they are available to the proxy service.
# set the Eyes server URL to your server
EYES_SERVER_URL=<https://myorganizationeyesapi.applitools.com>
#set the Eyes organization ID
EYES_ORG_ID=<org ID>
# set the HTTP port the proxy service should use (optional - default is 4000)
PORT=<1234>
To install the proxy server run the following from any command shell:
npm i -g @applitools/eyes-scm
Running the proxy service
Configuration prerequisites
To set up Eyes-scm you need the following:
- The API key of an Eyes user with team admin rights. See How to retrieve your API key.
- The URL of the SCM server.
- The Personal Access Token (PAT) that provides access to Bitbucket with read admin rights, available from Bitbucket.
- The names of the repositories that you want to provide Eyes access to. You will select the required repositories from the list of available repositories displayed by the proxy service.
Starting the proxy service
Use the following command to start the server:
eyes-scm
Configuring repositories and access credentials
The first time you run the server, you need to define the repositories you want Eyes to access, and provide the necessary Eyes and SCM credentials. You do this by starting the proxy service and the accessing it with a browser.
-
Make sure the proxy service is running.
Start a browser on the server where the proxy is running and navigate to the proxy service. The default URL is localhost:4000.
-
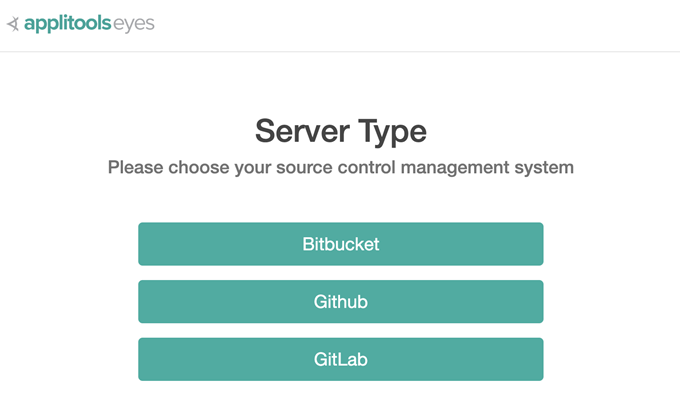
Select Bitbucket as the source control management system.
-
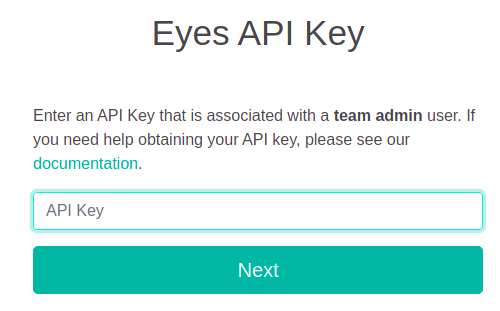
Enter an Eyes API key with Team Admin rights and full privileges.
-
Click Next
-
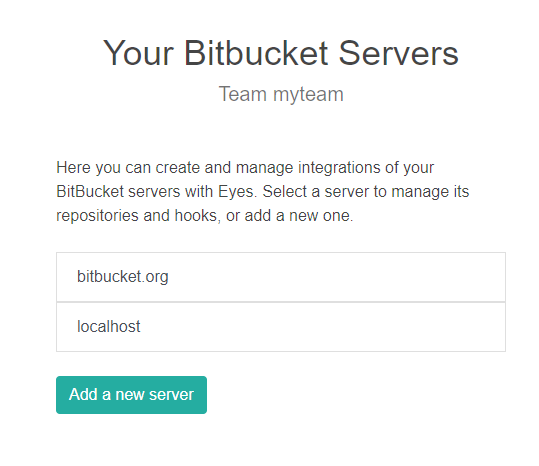
A list of any SCM servers that have already been configured is displayed. Select an existing server, or click Add a new server and enter the URL of the server.
-
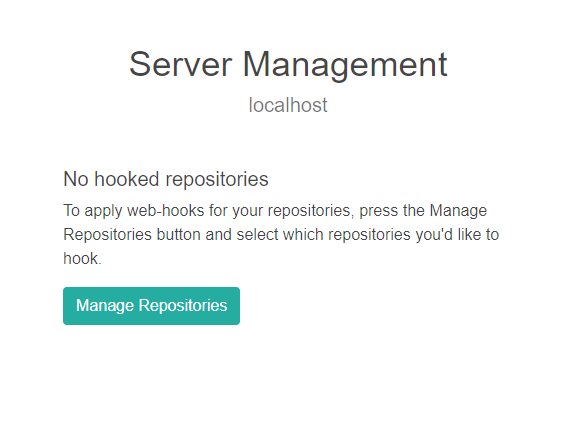
The first time you interact with the server, no repositories will have been enabled for Eyes access. Click Manage Repositories to select the repositories that you want to enable Eyes access to.
-
Click Next
-
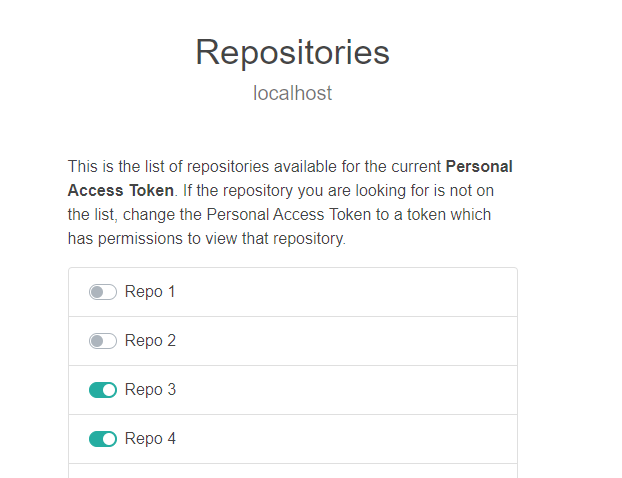
A list of repositories on the SCM server appears. The first time you configure the proxy service, all the repositories will be disabled. Click on the toggle next to the repository that you want Eyes to access, to provide a Personal access token (PAT) for repositories that are disabled, or to change the PAT for repositories that are already enabled.
-
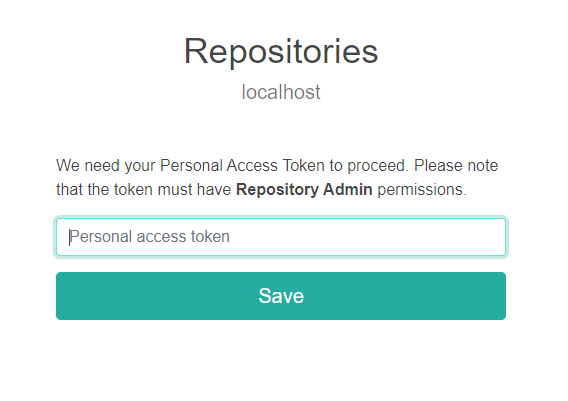
Click Next. and enter the PAT for the repository. You can obtain the PAT value from Bitbucket.
-
Click Save.
If the PAT is valid, the repository you selected will be in the enabled state. You can now enable any other repositories that you want to allow Eyes to access, and then exit from the browser.