Working With Jenkins
Configuring the Applitools CI/CD Integration
Navigate to the Jenkins project configuration, go to the Execute shell window and enter the following:
export APPLITOOLS_BATCH_ID=$(echo ${GIT_COMMIT})
export APPLITOOLS_API_KEY= "your api key"
Jenkins Plugin
Installing the Applitools eyes Jenkins plugin
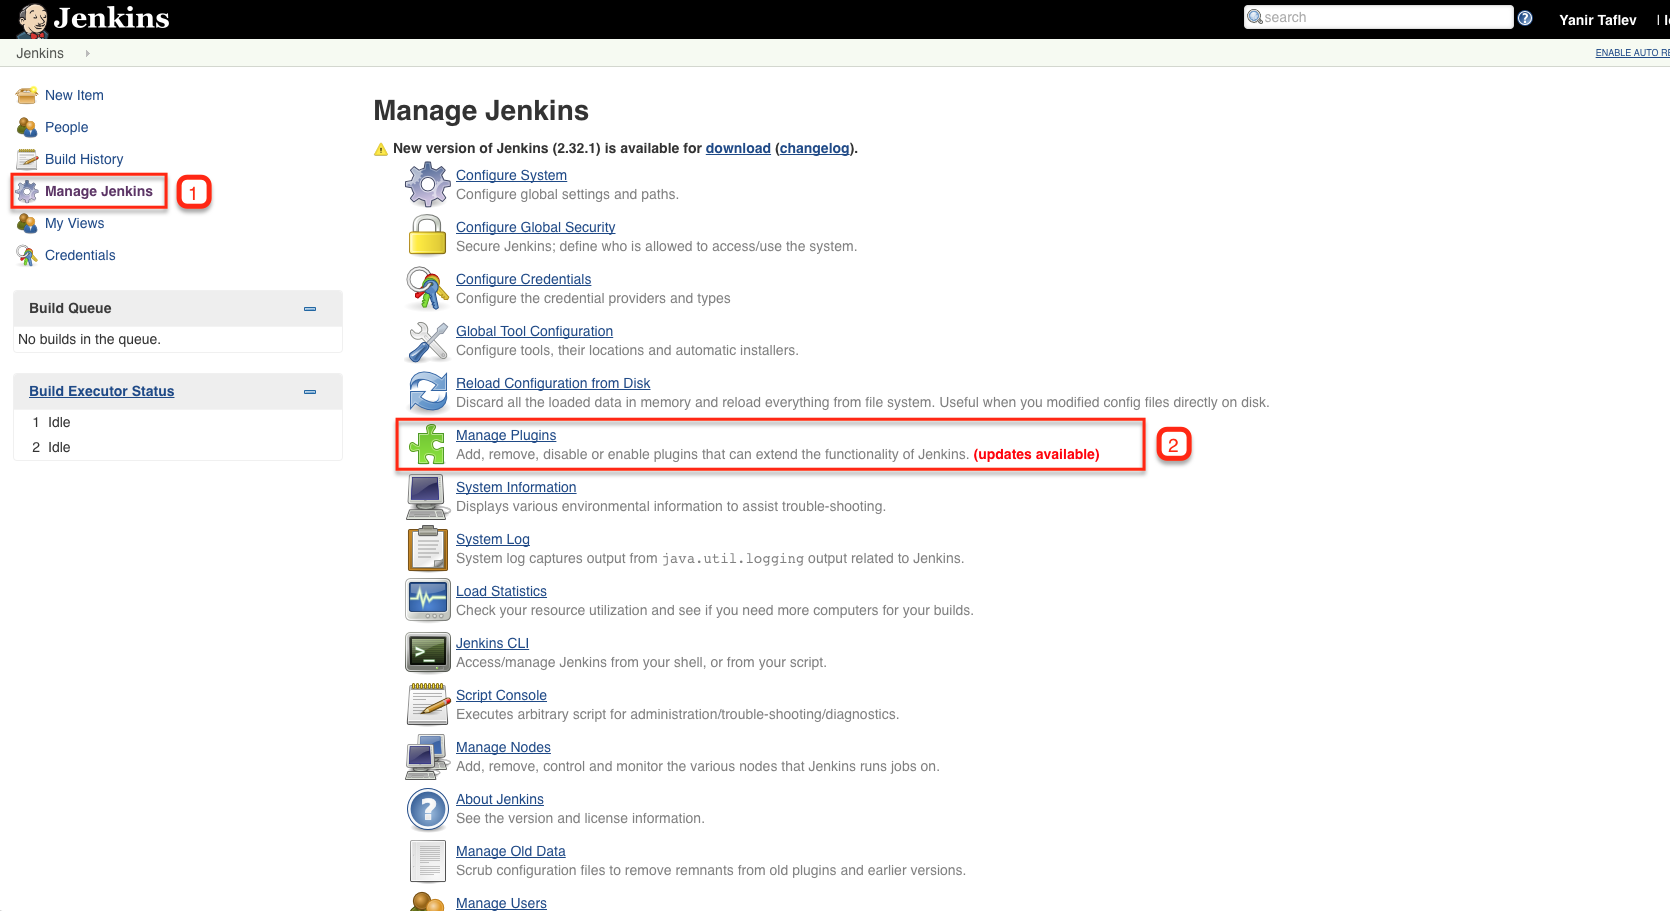
Go to the project in Jenkins that you want to integrate. Then click on "Manage Jenkins" (1) and then go to "Manage Plugins" (2).

Then go to the "Available" plugin list (3) and search for "Applitools" (4). After the search, install the "Applitools Eyes Plugin" (5) without restart (6).

Project configuration - Free style project
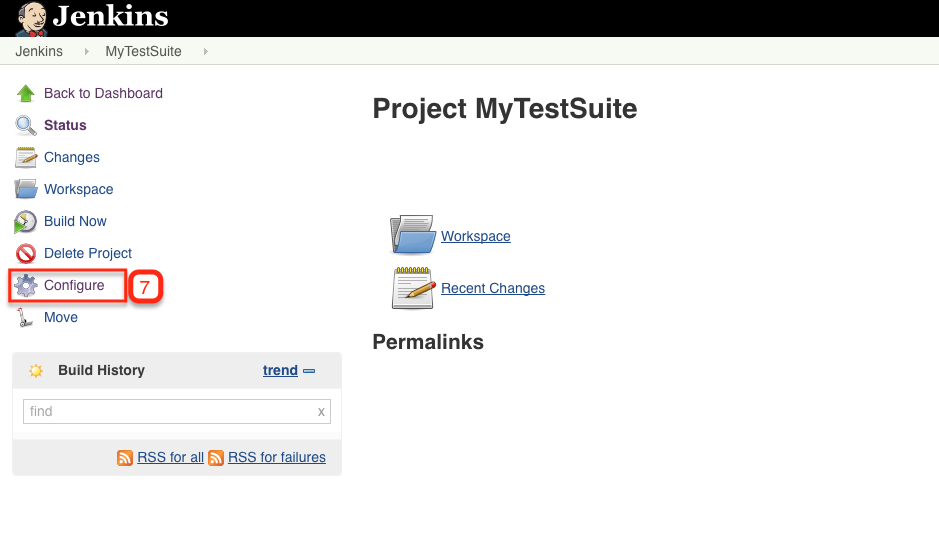
Go back to your Jenkins project, and click on "Configure" (7).

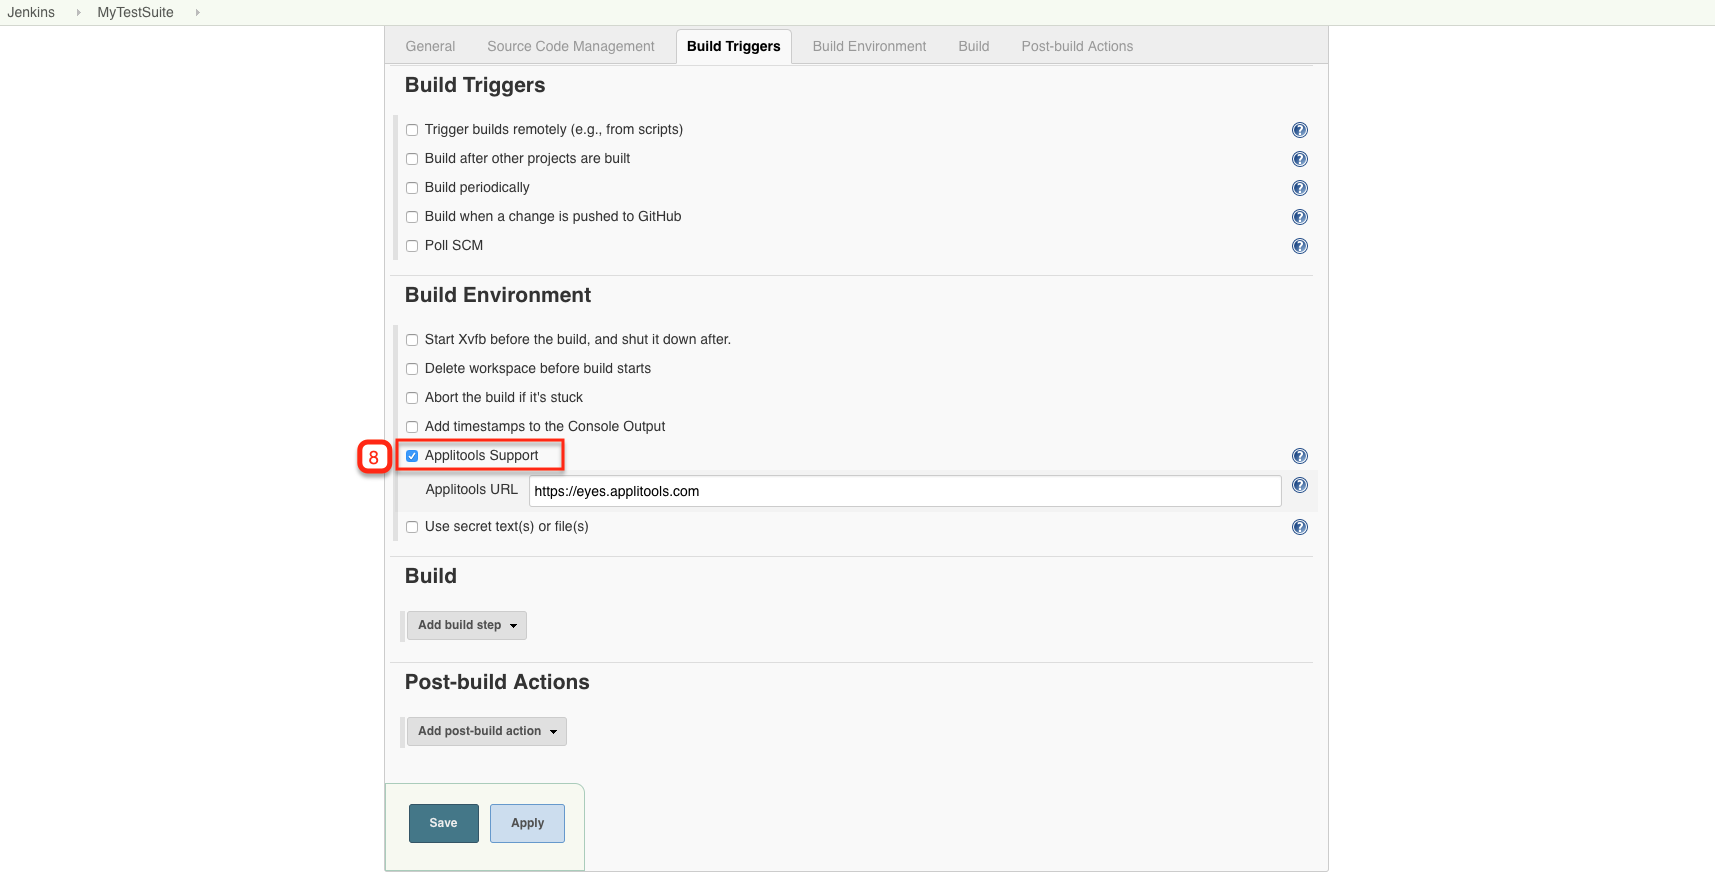
Now you can find under "Build Environment" an option titled "Applitools support" (8). If you're using the public cloud, leave the URL as it is, but if you're using a private cloud, change the URL according to your server's address and press "Save".

Project Configuration
To use the Applitools plugin in a pipeline project, you need to add the Applitools() directive and put your run code in a block. Following is a script example:
node {
	stage('Applitools build') {
		Applitools() {
			sh 'mvn clean test'
		}
	}
}
If you are using a dedicated Applitools Eyes server, you should update the Applitools URL accordingly inside the Applitools directive. For example:
node {
	stage('Applitools build') {
		Applitools('https://myprivateserver.com') {
			sh 'mvn clean test'
		}
	}
}
Linking the Applitools batch ID with the relevant Jenkins Job
The batch-ID parameter is passed through an environment variable called APPLITOOLS_BATCH_ID to the executed tests, and the build name is passed through an environment variable called APPLITOOLS_BATCH_NAME.
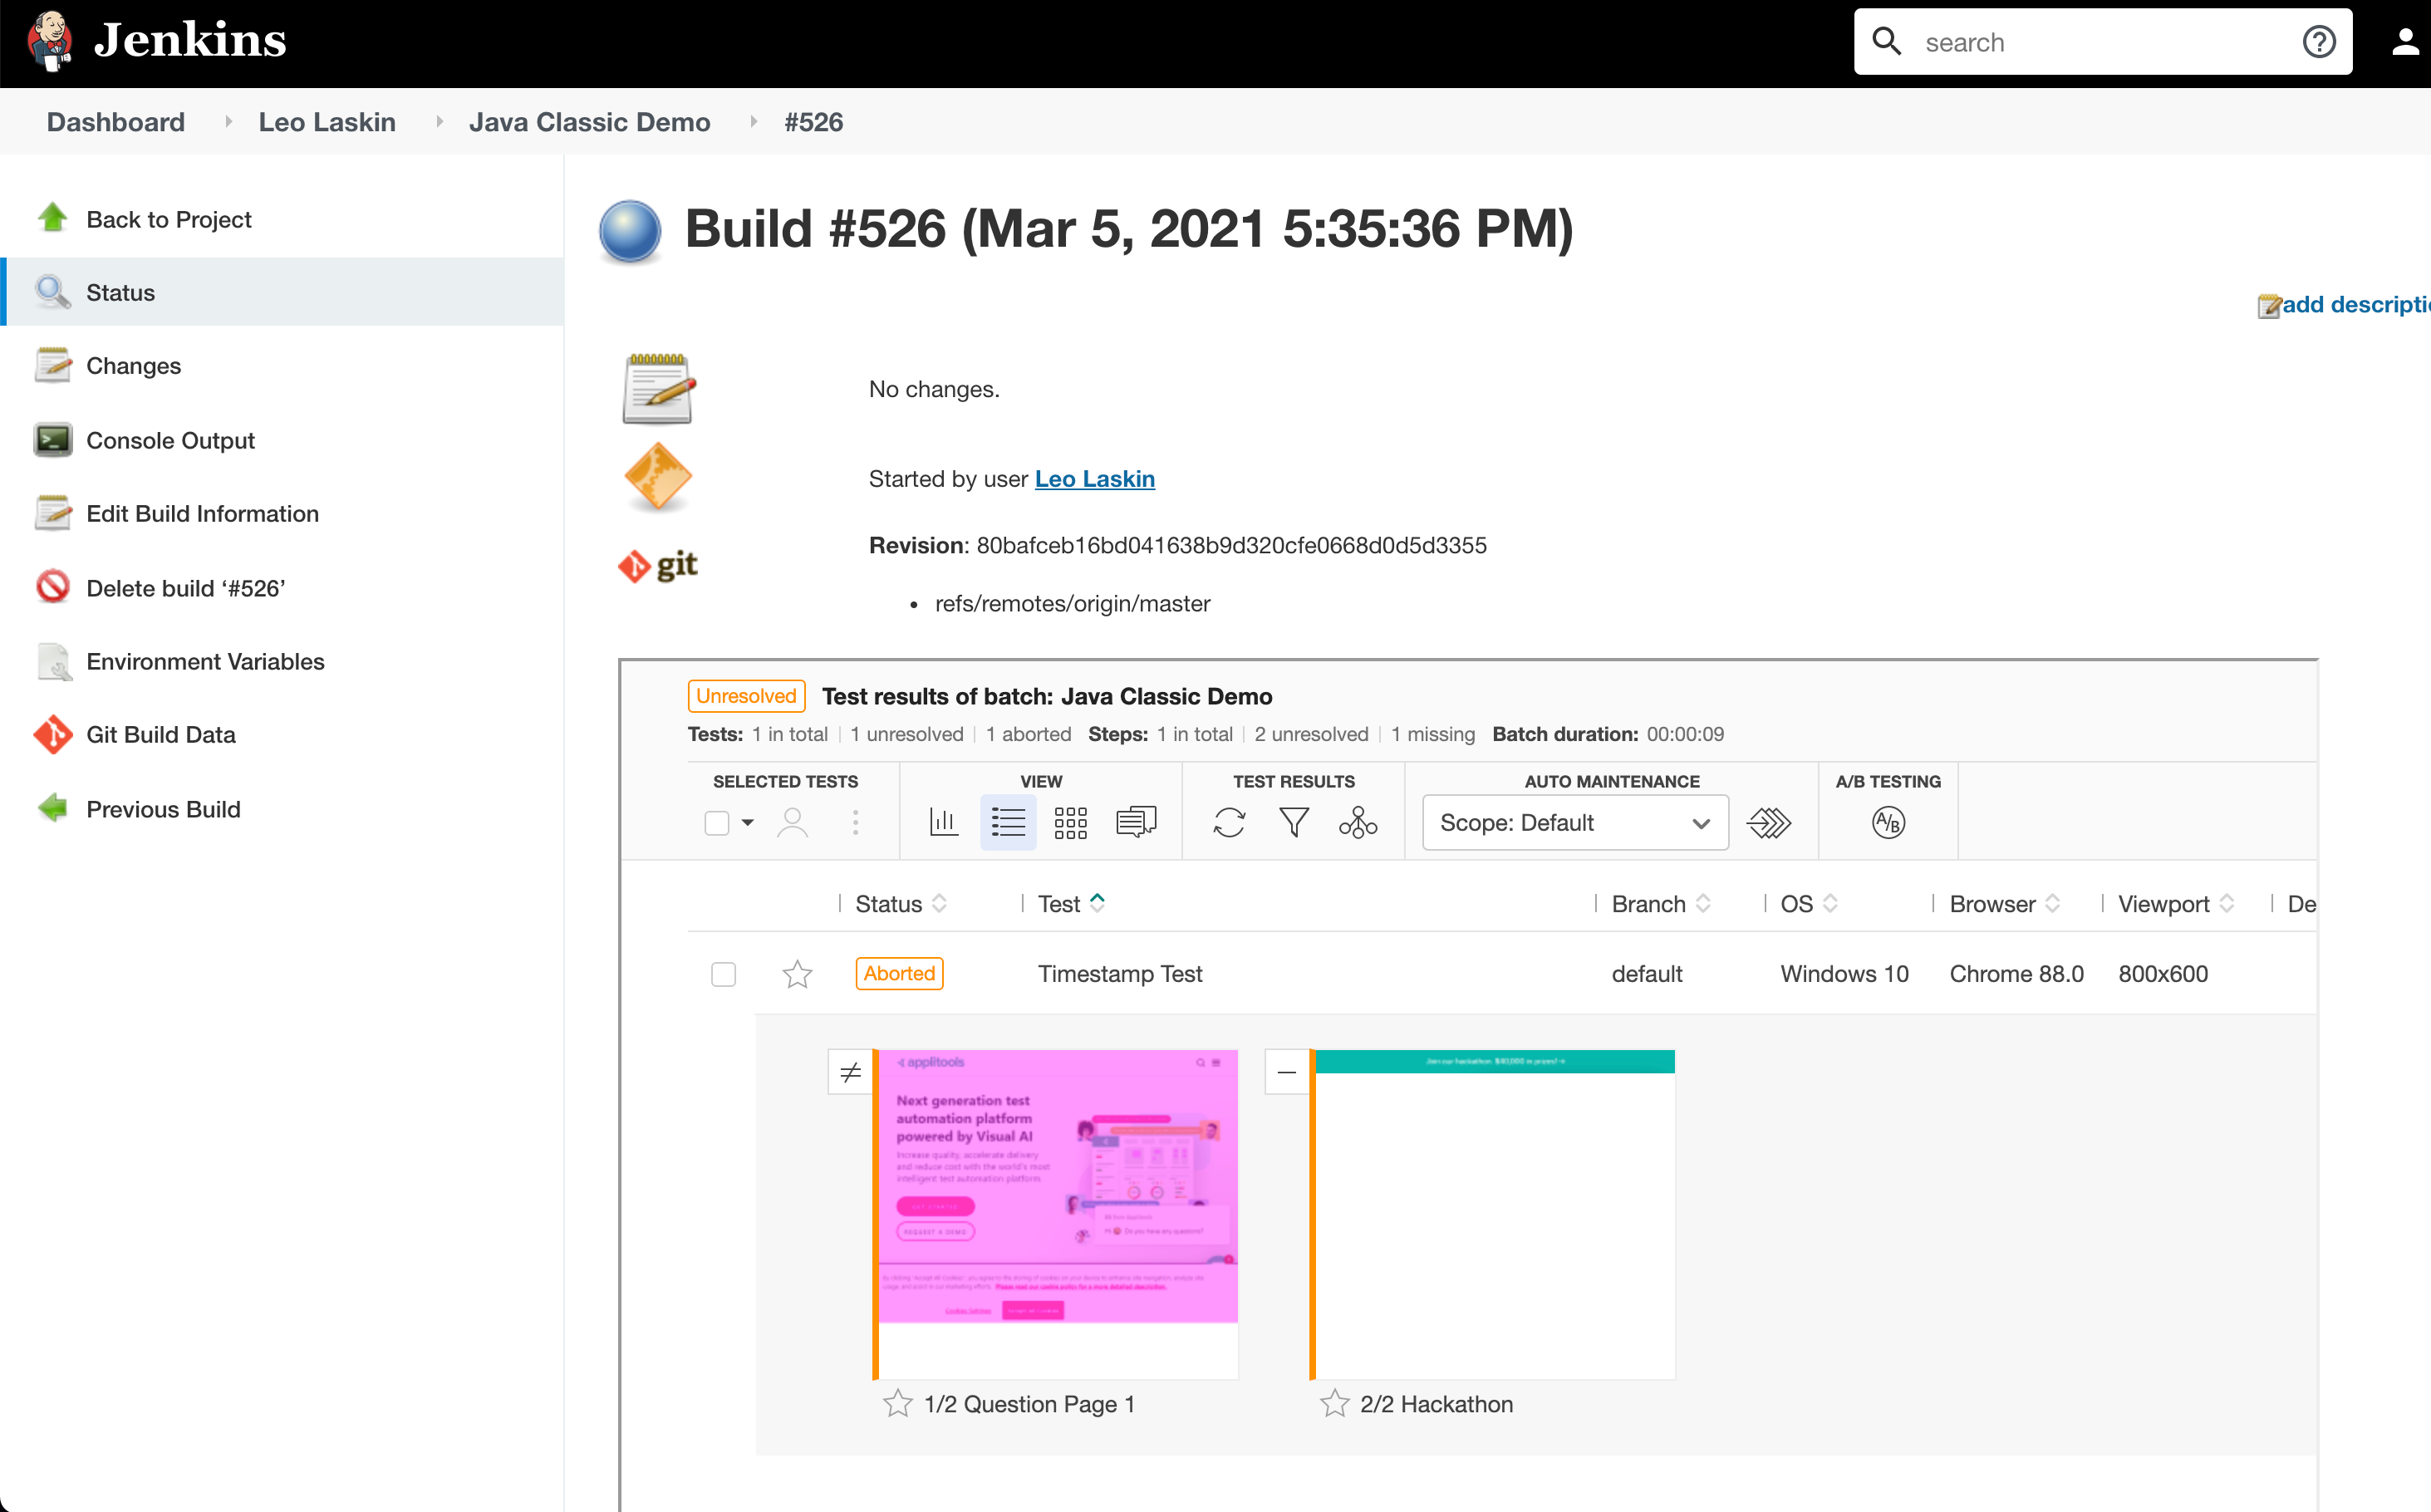
The next time you build a project with Jenkins, you will be able to get the Applitools test results integrated into your Jenkins Build Report, as can be seen below:
