Screens View
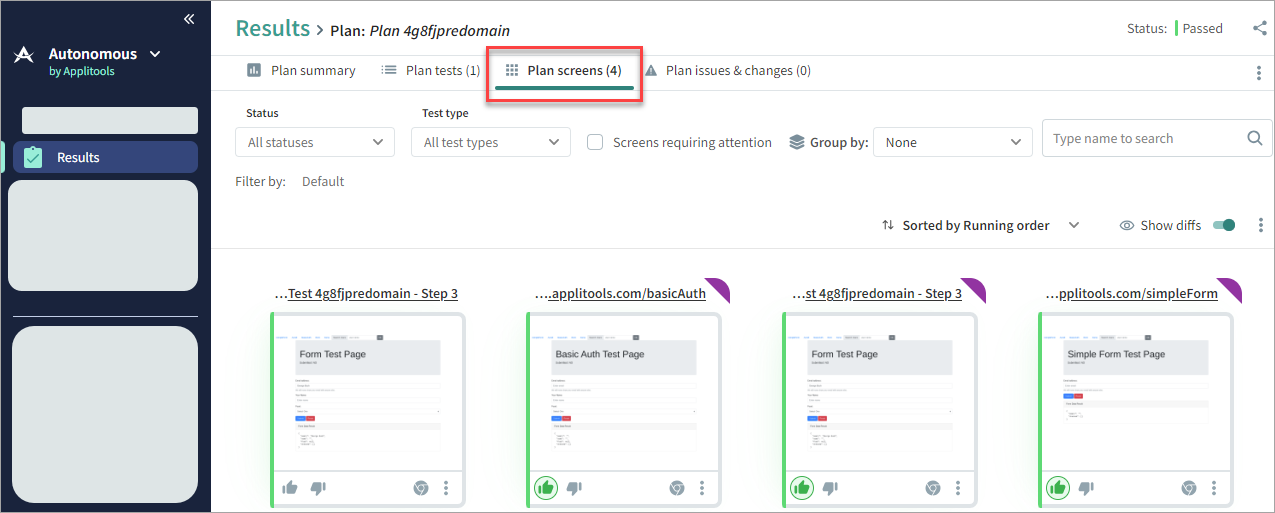
The Screens view in the Results page shows a thumbnail of all screens in all tests in a plan or a specific test. This is an easy way to get a visual overview of the entire plan without needing to open each screen individually. New screens have a purple icon in the top left corner.

Filtering Displayed Screens
At the top of the Screens view, you can filter the list of screens displayed.

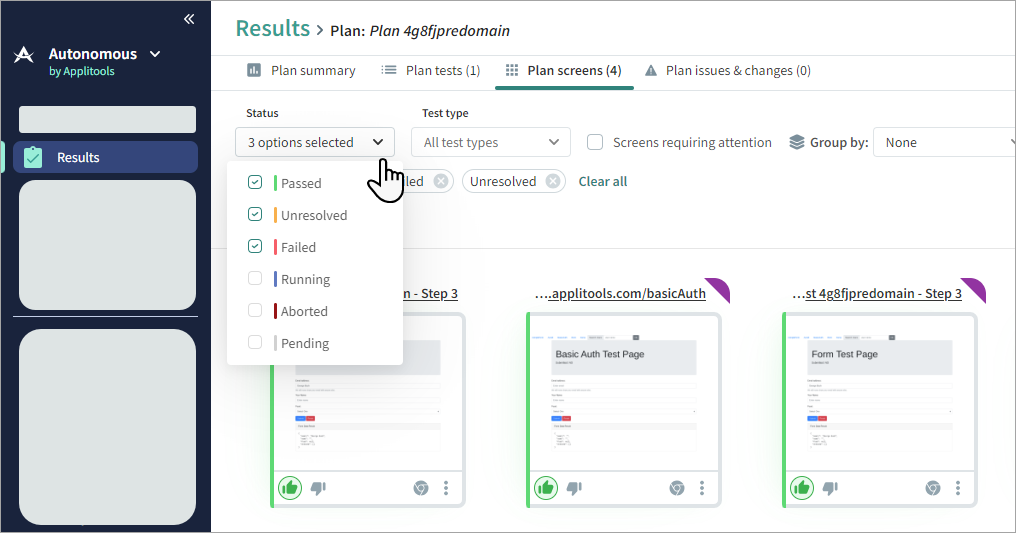
You can filter by the following attributes:
-
Status – Select one or more status. For example, you may want to look only at screens that are unresolved or aborted and require attention.
-
Test type – Select a test type (full website, custom flow, or URL list).
-
Screens Requiring Attention – Screens that do not have a status of passed and need to be reviewed
Grouping tests makes it easy to compare similar tests. For example, by grouping by viewport, you can see all screens in the same viewport side-by-side, making it easy to spot any screens that do not load correctly in a specific viewport. You can group the results by any of the following:
-
Browser
-
Viewport
-
OS
-
Device
-
Test name
-
Test type
-
Test & Environment
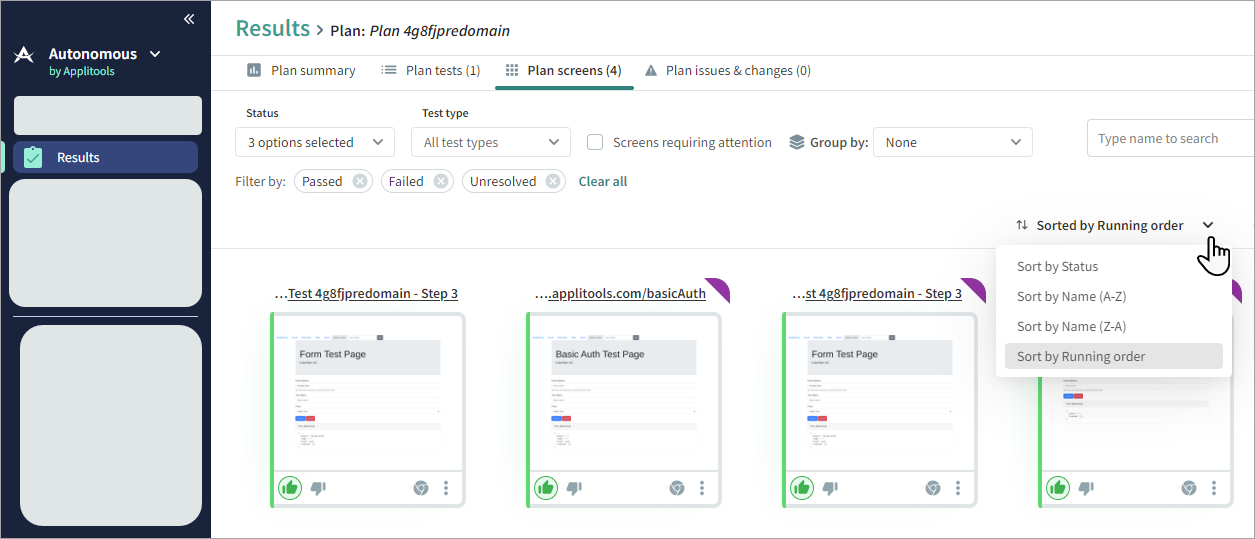
You can sort the order that screens are listed by the following:
-
Status
-
Name
-
Running Order
Listing by running order is useful for a custom flow test as it shows the progression through the test.

Accepting or Rejecting Changes
In many cases you can tell from a thumbnail whether a difference can be accepted or rejected without needing to open the screen in the Analyzer.
To Accept or Reject a Single Screen
At the bottom of each thumbnail you can accept or reject using the following icons:
-
– Reject – Changes the status of the screen to Failed. This means that the differences identified are the result of a bug which needs to be fixed.
-
– Accept – Changes the status of the screen to Accepted. This means that differences are expected or do not represent a bug and the changed screen will be used as the baseline the next time that the test runs.
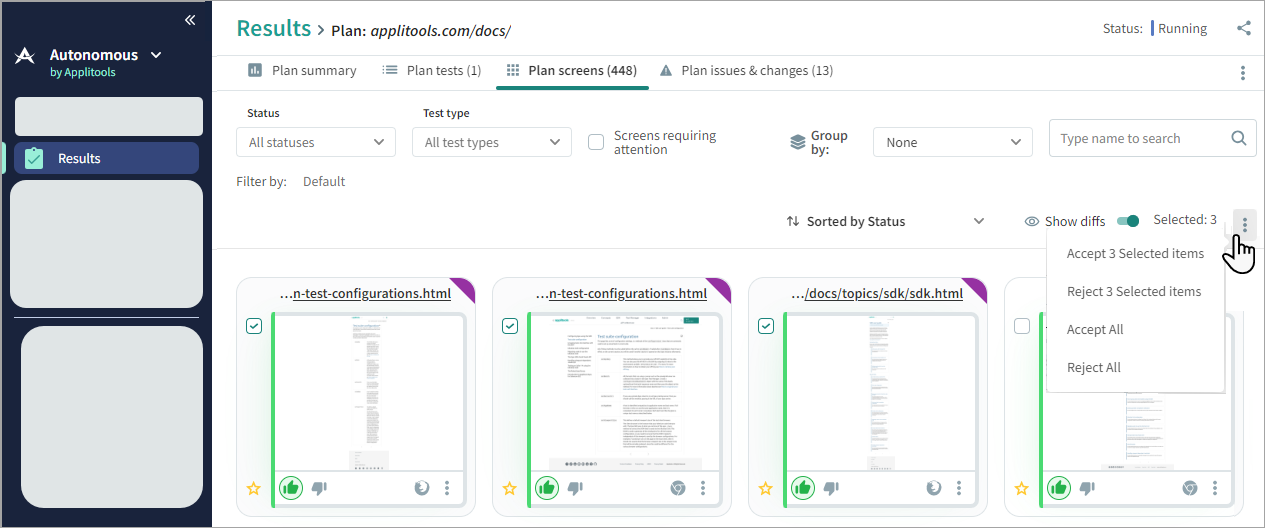
To Accept or Reject a Selected Screens
-
Select the checkbox next to the required thumbnails.
-
Click
> Accept Selected items or Reject Selected items.

To Accept or Reject a All Screens
-
Click
> Accept All or Reject All.
When you accept a change, Autonomous automatically accepts other screens in the plan with the same changes. For details, see Auto Maintenance.
Other screen actions
Click the icon below a thumbnail to perform any of the following actions:
-
Exclude URL from full website test (Available in Full Website Test only) – Adds the screen to the list of excluded URLs so that it will not be included in future tests. If you need to add the test again, see Excluding or Adding URLs.
-
Add a new test from here (Available in Full Website Test only) – Creates a new custom flow test and automatically enters the URL as the start URL. The test is associated with the same application and plan as the full website test. See Custom Flow Test.
-
Filter by same – Allows you to filter the thumbnails displayed by OS, Browser, or Viewport.
-
View screen details – Displays details of the screen, including a link to copy detailed information which you can send to Applitools Support if there is an issue that needs troubleshooting.
-
View in Test Analyzer – Opens the screen in the Test Analyzer where you can define parts of the screen, create comments or bugs, accept or reject changes, or perform other actions. You can also click on the thumbnail to open it in the Test Analyzer.
