Accepting and rejecting steps in the Test editor
You can use the Test editor to navigate through the steps in a Test result, investigate the differences in each step, and then resolve differences by accepting or rejecting steps.
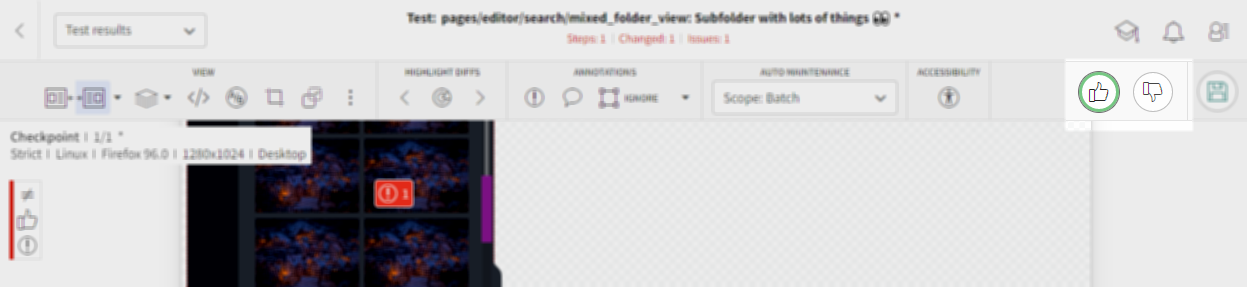
To accept or reject steps in the Test editor:
-
In the Test editor, click to open the Batch steps view.
-
Next to a thumbnail, click More options > open in test editor.
-
To accept differences click or press A on the keyboard.
To reject differences click or press R on the keyboard.
-
Click to save the changes.
The Accept or Reject icon is highlighted to indicate the status of the checkpoint.
Once a step has been accepted or rejected, the user name parameter of the user that performed the action is available on the tooltip on the thumbnail in the Test results page and in the Baseline history page.
If you accepted the step then once you save to the baseline, the checkpoint image will replace the current baseline image and will be used as the reference image on subsequent test runs.
For more information see Accepting and rejecting steps
