Advanced Test Settings
There are several optional advanced settings that control how Autonomous takes screenshots in a test. You can set advanced settings for all URLs in a test, and in a full website test or URL list test you can define settings for individual URLs within the test.
To Set Advanced Settings for All Screens in a Test
You can set advanced settings for an entire test. This determines how screenshots are taken for all URLs in the test, except for individual URLs that have different advanced settings applied.
-
In the , select Tests and select a test.
-
At the top of the Test Details page, click
 and enable the required advanced settings as defined below.
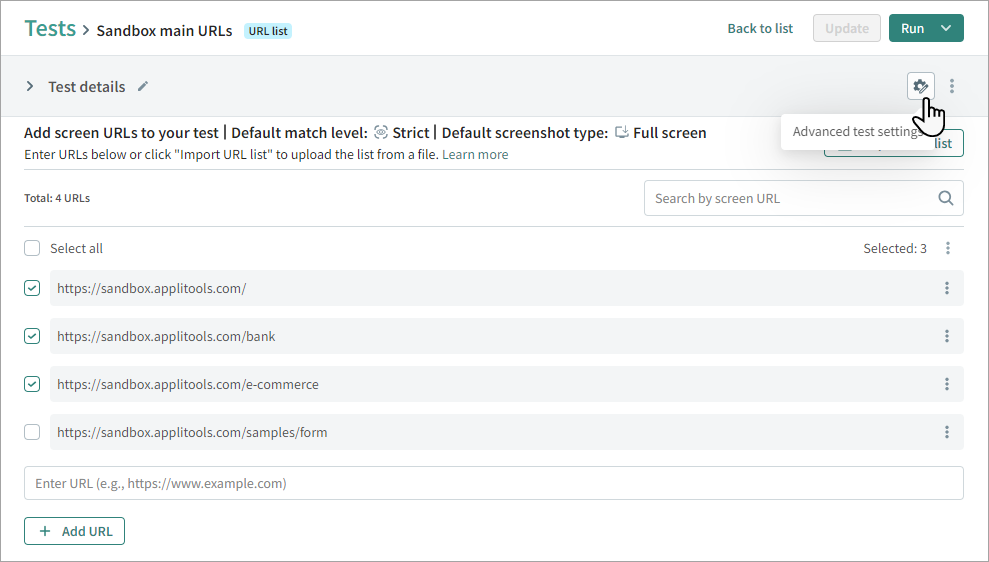
To Set Advanced Settings for a Single URL
In a full website test or URL list test you can set advanced settings for a single URL. For example, if there is a URL with lazy loading, you can enable lazy load for that URL without changing other URLs in the test.
-
In the , select Tests and select a test.
-
In the list of URLs, click on a URL and in the area on the right select
 > Advanced settings.
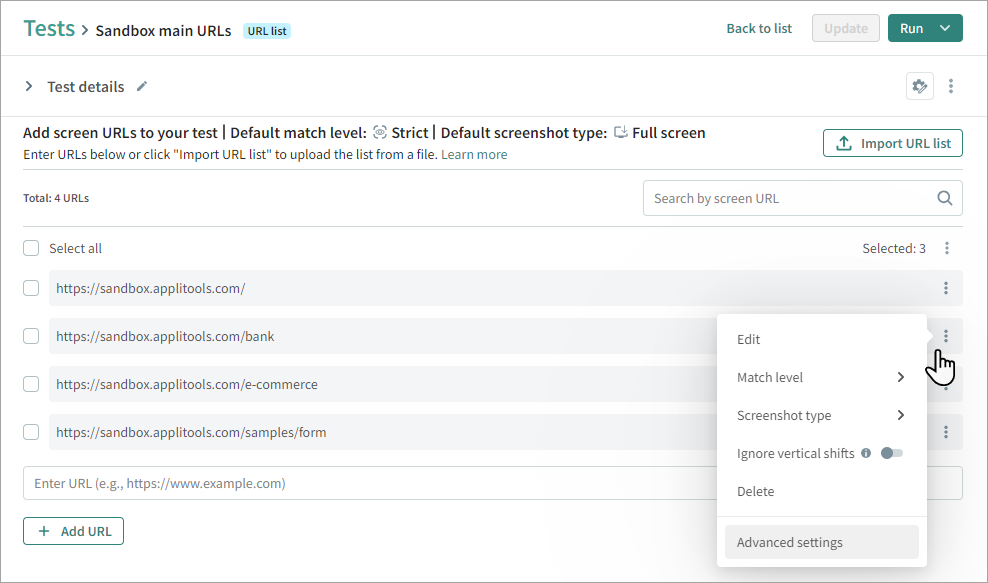
-
Enable the required advanced settings as defined below.
To Set Advanced Settings for Multiple URLs
You can set advanced settings for multiple URLs. If some of the URLs previously had other advanced settings enabled or disabled, this process replaces previous settings for those URLs.
-
In the , select Tests and select a test.
-
Click on a URL list test.
-
In the list of URLs, select the required URLs and click
> Advanced.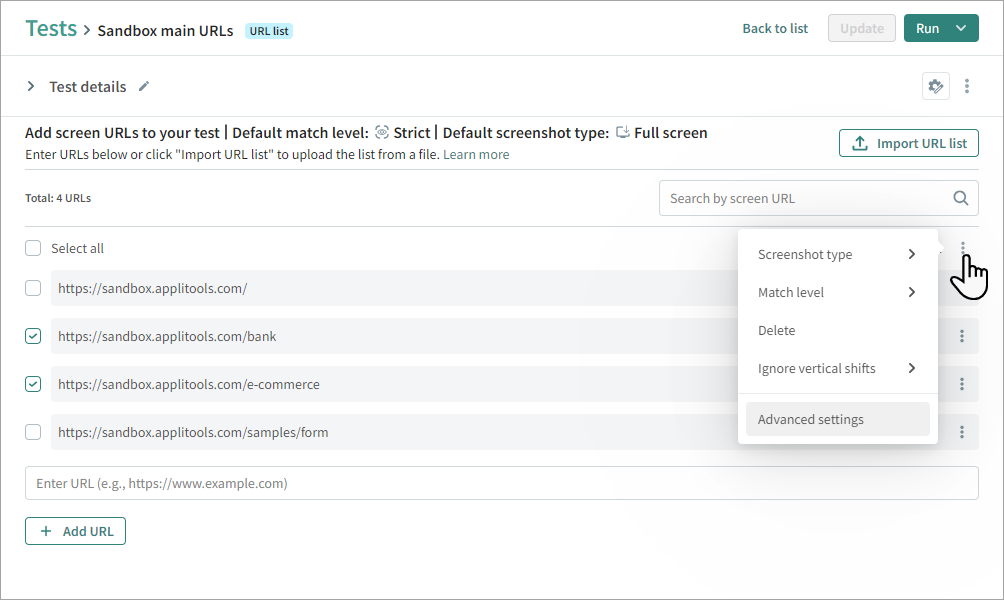
-
Enable the required advanced settings as defined below.
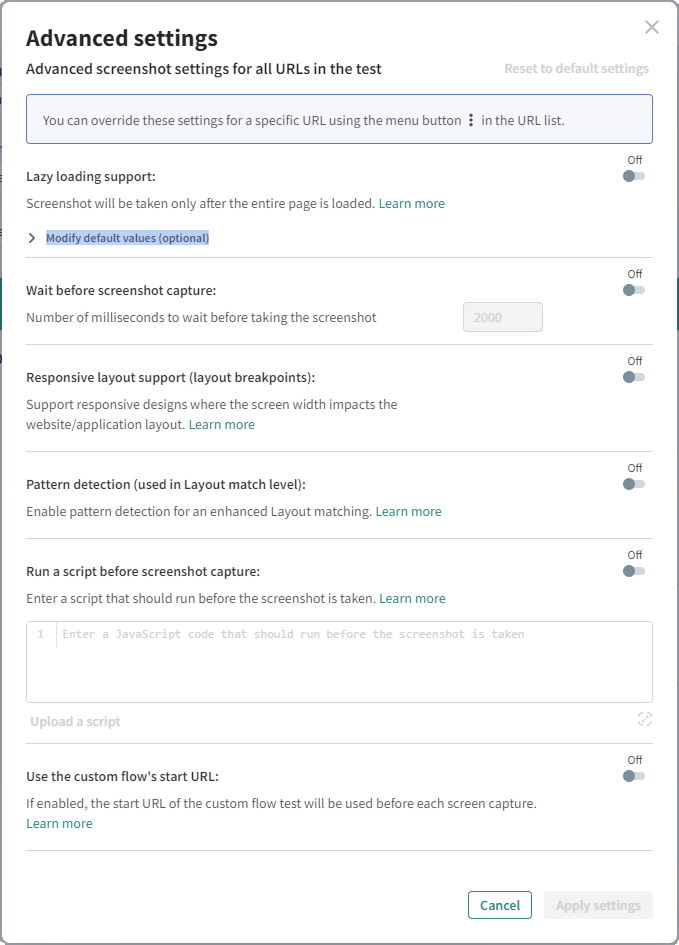
Lazy Load
Lazy loading (also known as asynchronous loading) is a technique in web design to defer initialization of an object until the point at which it is needed. This means that to get a screenshot of the entire screen, you need to slowly scroll to the bottom of the screen, allowing each section to load.
If the lazy load option is enabled, before taking the screenshot, Autonomous loads the screen in increments, pausing between each increment and then scrolling down. This allows the entire page to load before the screenshot is taken.
The default settings work for most lazy load URLs. If the results do not include the complete screen, click on Modify default values and modify the following values:
-
Number of pixels to scroll in each increment – If there are incomplete or blank sections in the middle of the screenshot, you may need to reduce the number of pixels scrolled in each increment. The default value is 300 pixels.
-
Total number of pixels to scroll on the page – This value corresponds to the size of the complete page once it has fully loaded. The default value is 15000 pixels.
-
Number of milliseconds to wait between each scroll – If there are incomplete or blank sections in the middle of the screenshot, you may need to increase the number of milliseconds to wait between each scroll. The default value is 2000 milliseconds.
Wait Before Screenshot Capture
You can set the system to wait a predefined number of milliseconds before taking the screenshot. This is useful for screens that may take time to fully load. The default value is 2000 milliseconds.
Responsive Layout Support
Select this option if your website has a responsive design logic that changes the website using JavaScript onresize/onLoad events depending on the viewport size.
Pattern Detection
Enables pattern recognition for efficient structure-matching and editing, used to improve the results in Layout match level.
Single Baseline per parameter value
This feature lets you use one shared visual baseline for each unique combination of test parameter values. Previously, every run with different parameters created its own baseline, which made maintenance repetitive and time-consuming.
Now, you can compare different inputs using the same baseline, so you don’t need to create and maintain separate baselines for every variation.
Use cases include:
- Cross-environment testing: Compare results from staging, production, or other environments using a single baseline.
- Localization testing: Validate multiple languages without creating a new baseline for each one.
How Single Baselines Work
Baseline per parameter value setting location
The toggle is available in Advanced Settings:
- At the test level: applies to all of the visual checks or URLs in the test
- At a step level: applies to each visual check (Custom flow test) and each URL (URL list test)
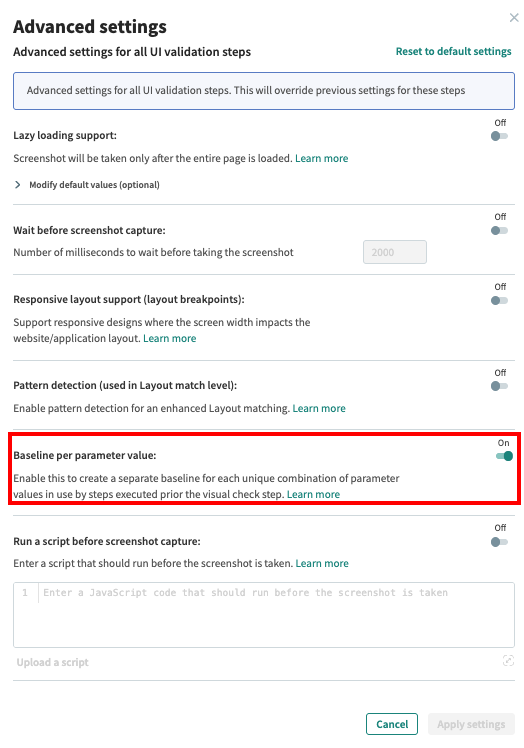
Using the Toggle
- Default: The toggle is off. This means a single shared baseline is created for each unique combination of parameter values used by steps executed before the visual check step
- Enabled (at the test level): When this toggle is turned on at the test level, a separate baseline is created for each unique combination of parameter values in use by steps executed before each visual check step.
- Enabled (at the step level): When this toggle is turned on at this level, a separate baseline is created for each unique combination of parameter values used by steps executed before that specific visual check step.
How to Use Single Baselines
- Initial Run: Run the test standalone with the first parameter value (e.g., env=integration) to define the baseline.
- Subsequent Runs: Run the test again with a different parameter value (e.g., env=staging), either standalone or through a test plan. Autonomous will reuse the existing baseline but capture a new checkpoint for comparison.
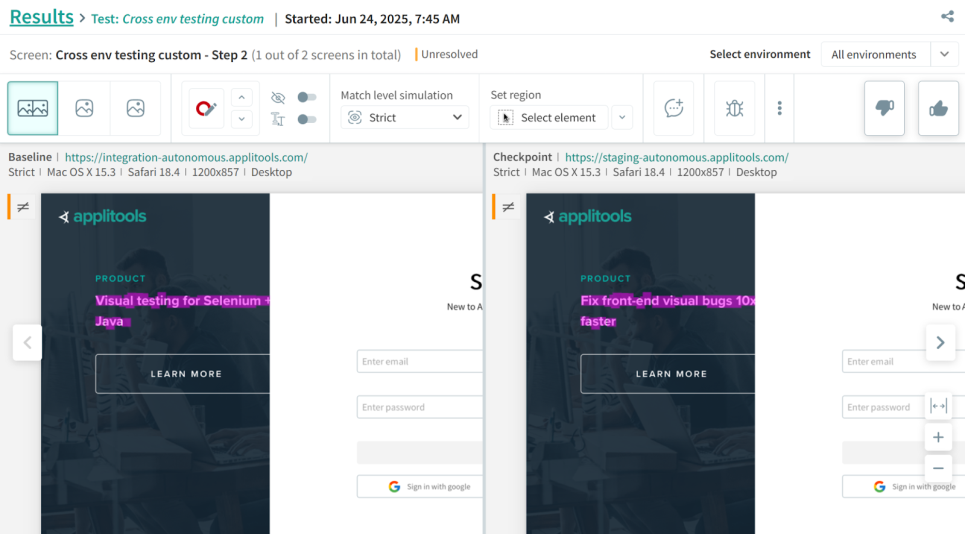
Example Flow
Use case: Compare staging and production UIs to ensure consistency across environments.
Test URL: https://{env}.app.com
- First run: env=integration → baseline is created for "https://integration.app.com"
- Second run: env=staging → checkpoint is taken on "https://staging.app.com" and compared with the same baseline (taken from "https://integration.app.com")
On the Results page, users will be able to distinguish between different environments by the URLs displayed above the baseline and checkpoint images in Test Analyzer.
Migration & Backward Compatibility
For tests that previously used separate baselines per parameter combination, the flag will be turned on automatically to preserve that behavior.
New tests will use a shared baseline for each unique combination of parameter values used in steps executed prior to each visual check.[a]
Run a Script Before Screenshot Capture
Enter a JavaScript to run after the page has loaded on the requested browsers and devices, before a screenshot is taken.
For example, the following script selects the HTML element of the page and resets the height of the element to the client height, to make sure that the full content of the page is rendered. This is useful if the content of the page changes dynamically based on the viewport size or other factors.
document.querySelector("html").style.height = document.querySelector("html").clientHeight + "px";
Run a Script Before Screenshot Capture
Enter a JavaScript to run after the page has loaded on the requested browsers and devices, before a screenshot is taken.
For example, the following script selects the HTML element of the page and resets the height of the element to the client height, to make sure that the full content of the page is rendered. This is useful if the content of the page changes dynamically based on the viewport size or other factors.
document.querySelector("html").style.height = document.querySelector("html").clientHeight + "px";Use Custom Flow's Start URL
If you have a custom flow set to run before each step in a full website test or URL list test test, for example, a test which closes a popup, by default the start URL of the custom flow test will be ignored. This means that it will start with the second step of the test.
Enable Use the custom flow's start URL if you do not want the system to ignore the default URL step in a customized pre-step.
This option is only available for full website tests or URL list tests that have a pre-step assigned. For more information, see Flow to Run Before Steps.