Setting Up Jira Integration
Autonomous allows you to annotate any step in the test with one or more issues (see Adding Comments or Issues). You can associate such an issue with a Jira issue, you can create a Jira issue within Autonomous, or link an existing Jira issue to an Autonomous issue.
To set up Jira integration, you need admin privileges in Autonomous and the following information:
- The URL of the Jira server
- The ID of your Jira project
- The ID of the Jira issue type you want Autonomous to report
If you do not have these values, obtain them from the Atlassian site. You might find this link helpful: How to Get Project ID from the Jira User Interface.
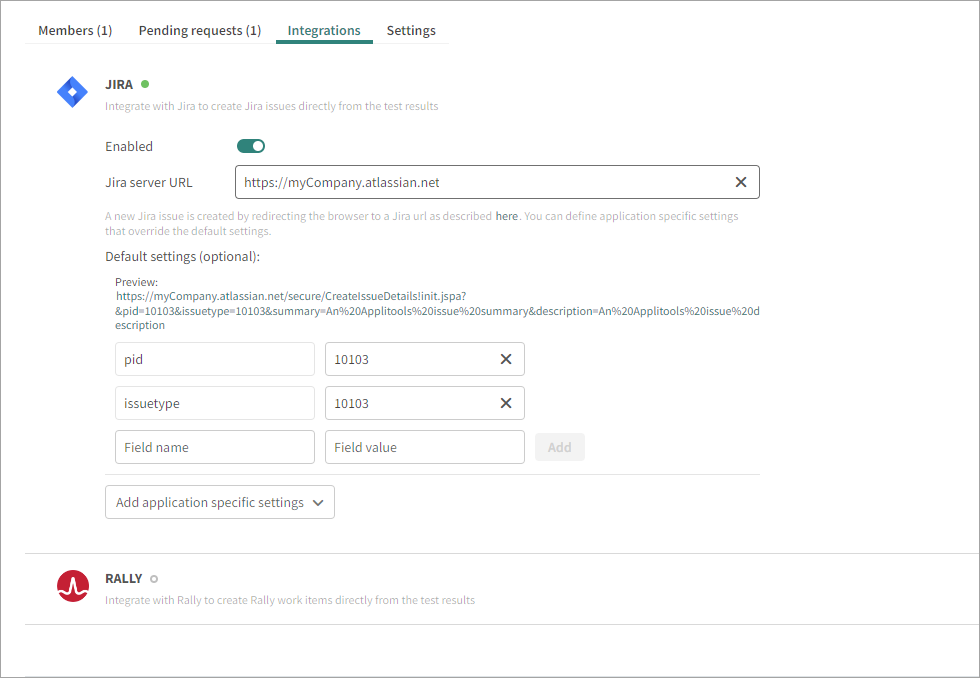
To Set Up Jira Integration with Autonomous
-
Select
 > Teams and select the required team.
 -
On the Integrations tab, click Jira.
-
Click Enabled and enter the Jira server URL, the pid (Project ID), and the issue type ID.
-
To include other Jira information when creating the Jira issue from Autonomous. Enter the required information in the Field name and Field value boxes, then click Add. A new Field Name attribute appears, allowing you to add additional attributes if needed.
-
To add project ID and issue type information on a per-application basis, click Add Application-Specific Settings and select an application from the list. A new set of fields opens for you to enter the project ID, issue type, and other Jira attributes for that application. Repeat this step for each application requiring specific Jira values.