In the previous blog posts in this Appium series, we discussed step-by-step instructions for creating your own Appium 2.0 Plugins as well as Appium 2.0 Drivers and Plugins usage and its installation. This article discusses the evolution of touch gestures and how you can simplify the way you perform automated tests for gestures using a new plugin in Appium 2.0.
What are Touch Gestures?
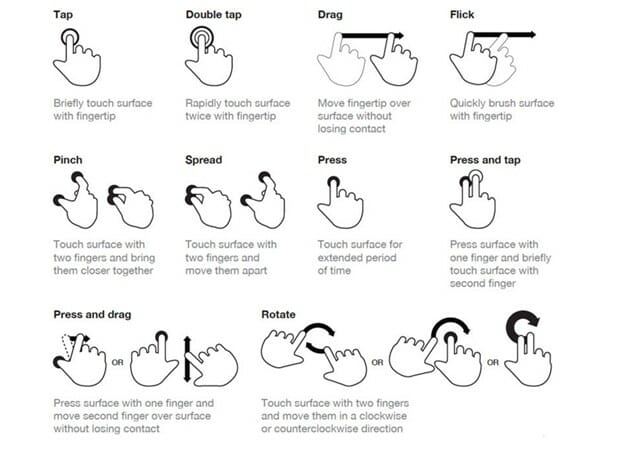
Gestures are the new clicks. Gesture-driven devices changed the way we think about interaction. The success of mobile applications depends on how well the gestures are implemented into the user experience. The definitive guide for gestures by Luke Wroblewski details a lot of different actions and how they actually work.
Animations, when paired with Gestures, make users believe in interacting with tangible objects. Appium handles these gestures using the Actions API defined in the W3C WebDriver Specification. It’s great that the API was designed thinking of all interfaces like touch, pen, mouse, etc., but it is hard to understand. Since Appium 1.8, Appium supports the W3C Actions API for building any kind of gesture in mobile devices.
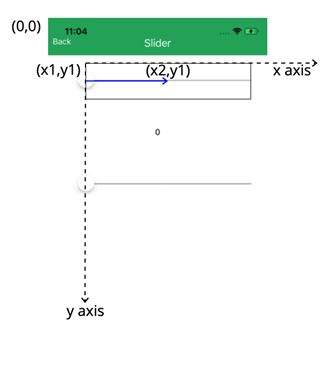
Let’s consider a situation where the application sets specific values based on the slider movements.
Let’s see using Actions API how this situation can be handled.
In the above code snippet, we have three actions to look at which are to get the element location using location API and create a sequence with actions which includes pointerMove, pointerDown, pause, pointerUp, and then perform the sequence. So in this case we need to add these actions in the right order to get the gesture to work. Let’s break down the above in detail to understand what happens under the hood.
- Identify the slider element using any locator strategy.
- Find the location of the slider element on the screen.
- Create a
PointerInputobject of typeTOUCHwith a unique id as a finger. - Create a Sequence object with a
PointerInputobject. - Add individual actions to the sequence.
- Pointer move to the slider element location.
- Pointer down on the slider element.
- Hold for a few milliseconds.
- Pointer move the slider to the destination location.
- Pointer up from the slider element.
- Perform the sequence by calling the Actions API.
Refer to the below image to understand how the element location can be calculated.
This way any complex gestures can be automated using Actions API.
How the Appium Gestures Plugin Helps
Let’s look at how the gestures plugin from Appium 2.0 simplifies this entire process:
Internally appium-gesture-plugin finds the given element location and does the target location calculation based on the given percentage. It also creates the sequence of actions to perform the gestures on both iOS and Android platforms.
Refer here for a working example of the above swipe gesture using the gestures plugin. Follow the instruction specified here to install the Appium gestures plugin.
For any simple gesture actions (swipe, drag and drop, long press, double-tap, etc.) we can use the gestures plugin. For more custom actions, like if your application has a feature on digital signature, we could still use the Actions API.
Apart from the Actions API, Appium also supports native gesture API which is exposed by Android and iOS platforms through non-standard endpoints like below:
For more such APIs, check out Android non-standard gesture APIs and iOS non-standard gesture APIs.